Read up

Gardening book sparks new ideas

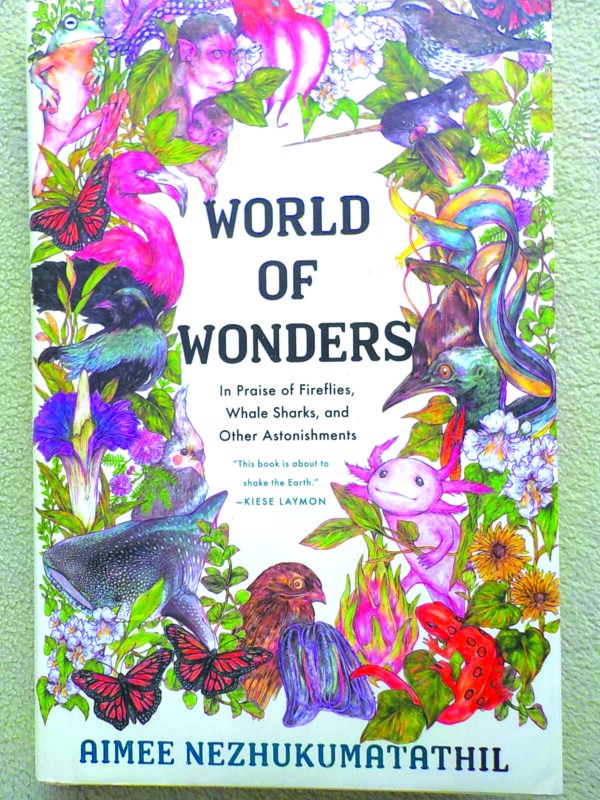
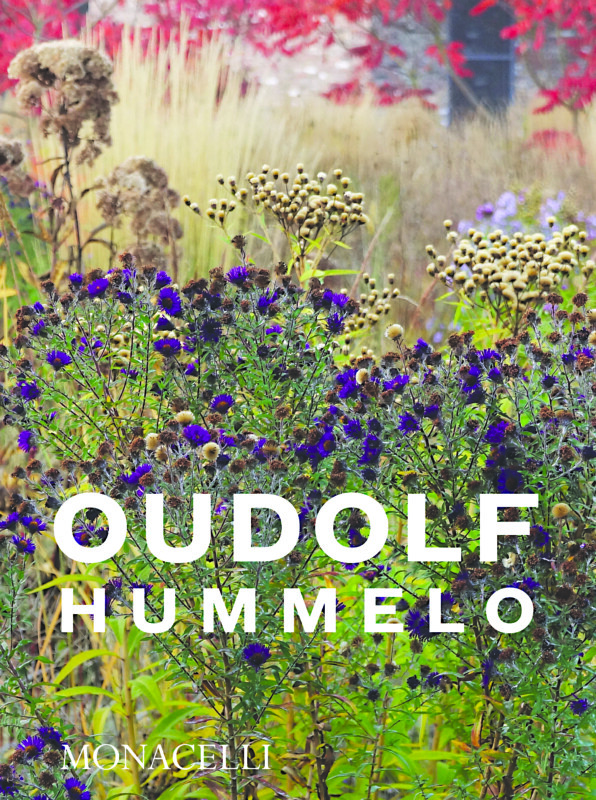
Here in New England winter is long, especially for gardeners. We want to be outside in the garden but most days we can’t really do much. I compensate by learning about gardening from books. I recently finished a good one, Hummelo: A Journey Through a Plantsman’s Life by Piet Oudolf and Noel Kingsbury.

At over 400 pages it might seem daunting, but I’d estimate that nearly half of those pages are color photos of the gardens Piet Oudlof designed, with plenty from his home in Hummelo, Holland. It is written by Noel Kingsbury, a well-known British garden writer, and by Oudlof himself.

High Line (NY, NY). Photo courtesy of Monacelli Press.

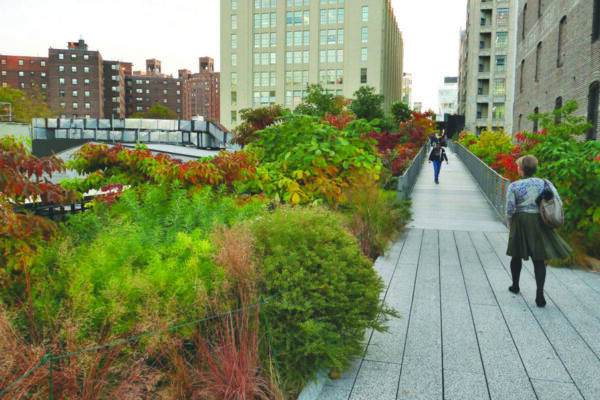
Piet (which is pronounced Pete) Oudolf was the primary designer of the High Line Gardens in New York City, a garden planted on a section of an abandoned elevated railway line in midtown Manhattan. This 1.45-mile planting is consistently rated in the Top 10 most visited places in New York City.

The book follows Oudolf’s life as a garden designer and plantsman. In addition to the High Line, he designed gardens in Chicago, Detroit and many in Europe. The book follows his professional life and illustrates the changes nicely. Many plants in the photos are not labeled, but more advanced gardeners will recognize them, and many are mentioned in the text. And although some common names are used, most are identified by the scientific names with the genus, species and cultivar, which I find helpful when studying the plants and finding out if the plants are hardy in my zone.

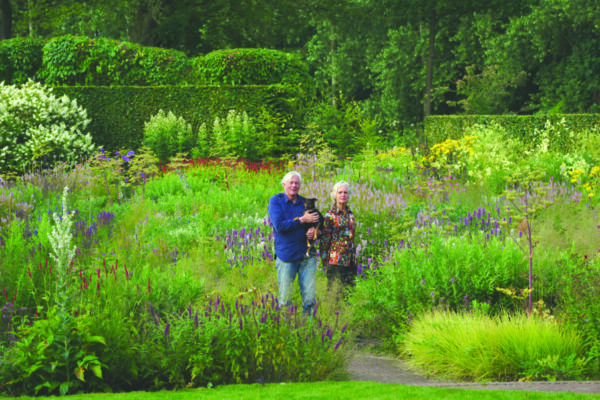
So what makes Piet Oudolf one of the most famous garden designers ever? First, he is a highly accomplished plantsman. When he specifies plants for a garden, he knows what they need to do well. He started out with his wife, Anja, growing most of the plants he used in his designs, often growing and selecting plants for years before using them.

He knows each plant including its root system and its capability to fill in spaces by seeding in or spreading by rhizomes. He grew and used plants that were largely disease-resistant. His gardens rarely need to be re-planted because the plants seldom fail. I should note that now he does not grow his own plants, he just specifies them and has others grow them for him, often from stock he perfected.

Piet Oudolf uses many tall grasses in his designs. He loves the way they provide structure and form to a design, and that they last well into winter. He is less interested in color than many designers. He loves the look of seed heads and stems after the (relatively short) bloom period is over. He is quoted in the book as saying, “A plant is only worth growing if it also looks good when it is dead.” Since he bred plants for toughness, I assume he means dormant, not dead.

Oudolf is a rule-breaker. He tried things that others had not. He is quoted as saying in the book, “I discover beauty in things that on first sight are not beautiful. It is a journey in life to find out what real beauty is — and to notice that it is everywhere.”

Piet and Anja at Hummelo. Photo courtesy of Monacelli Press.

Early on in his career, Piet Oudolf used large blocks of a single species of a plant. But as he refined his designs, he started intermingling a few large, tall plants inside a block. He planted them repeatedly, as repetition adds a sense of unity and coherence to a garden. Unlike many designers, he actually lays out his gardens himself instead of drawing a plan and handing it off to gardeners. Oudolf is first and foremost a gardener. He loves plants, and knows them like his ever-present dogs.

What did I learn from this book? Given a large space to design, like Oudolf, I would use largely native plants. They are tough and if properly sited will last well. I like his philosophy that plant diversity is good but that too much diversity can overwhelm our ability to appreciate the whole.

I am, by temperament, a plant collector — I want to try lots of plants. But seeing the photos of Oudolf gardens, I recognize that buying — or growing — several plants instead of just three (my usual purchase), I can create a more powerful display.

Reading this book I made notes of plants I want to try. Among these is Eryngium giganteum, a sea holly that gets to be 3 to 4 feet tall with spiny egg-shaped blossoms and white bracts. Miss Willmott’s Ghost is readily available online, though I have never seen it for sale in a nursery.

Another plant that looks great is Agastache nepetoides, yellow giant hyssop. It is deer-resistant and big: It grows to 6 feet tall with flower spikes up to 16 inches long. In fall and winter the dry seed heads are fabulous, particularly in counterpoint to dry grasses.

I feel blessed that I was able to meet Piet Oudolf and interview him at his home in Hummelo, Holland, in 2007. He was very generous with his time and his knowledge.

This wonderful book was produced by Monacelli Press and is available in paperback for $40. To me, or any serious gardener or designer, it is a treasure. You might like to thumb through it before you decide if it is for you, especially if you are a beginning gardener. If you have big spaces to fill, you will get many ideas.

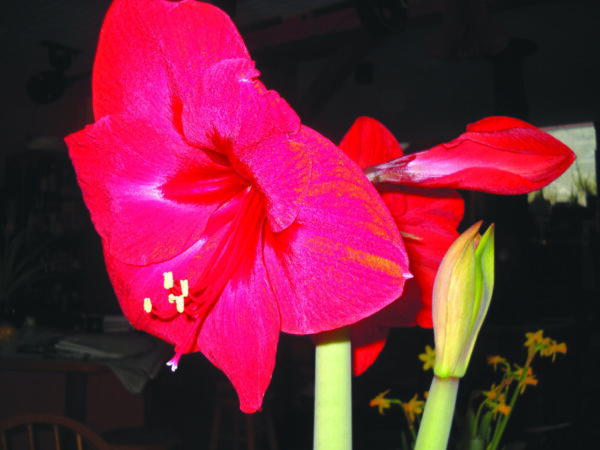
Featured photo: Courtesy photo.

Winter veggies

Plan what you’ll plant

I am probably not the only person who is determined to lose a little weight after all those delicious but fattening meals and desserts served up over the holidays. One way to feel satisfied and lose weight is to eat more salads and enjoy more vegetables. That’s my plan, anyway, and I recently took stock of what is lingering on in my storage fridge. I still have some nice veggies from summer that still taste good and are satisfying my hunger.

Digging around the vegetable drawer I noticed several kohlrabi I grew last summer, but that had not been touched in months. I was prepared not to like them because they had been stored so long. I peeled one, chopped it into half-inch cubes, and added to my nightly salad. It was delicious! It’s even tasty as low-calorie snack food just by itself.

Gardens aren’t just for food. They can be for fun, too

Kohlrabi is in the cabbage family, but not well-known or much grown. It looks like a space alien in the garden: It is an above-ground root vegetable of sorts. Round or oblong, it can be green or purple, with leaves poking out of the beet-like “tuber” on bare stems. It is crunchy, and tastes a bit like broccoli, which is in the same family. It can be used to make coleslaw when grated with carrots.

Buy a packet of kohlrabi seeds and plant them in early June or late May. They are fast-growing plants and only need a bit of space to grow well. If you want kohlrabi all winter for adding to stir-fries, plant a green one called ‘Kossak,’ which gets large — up to 8 or 10 inches in diameter — and stores for up to four months in a cool, high-humidity place like the vegetable drawer of your fridge. I get seeds from Johnny’s Selected Seeds in Maine, but it is also available from High Mowing, Gurney’s and Park Seeds, among others.

I also found half a purple cabbage that had been lurking in my vegetable drawer since September. I expected it to be stale, but it was fine. Cabbage is easy enough to grow, but I often don’t bother because I don’t use it much — it is cheap and readily available. I grated some and added it to a green salad, adding color and bulk.

I had a great onion crop last summer. I buy onion plants from Johnny’s Seeds most years instead of babying seed-started plants indoors. When I start from seed, I start them under lights around March 1. When I start my own, even with intense light close to the seedlings, they are always a bit flimsy. Some of the plants I get from Johnny’s are nearly as thick around as a pencil, and take off and start growing immediately. The kind I grow are yellow onions, one called Patterson. They keep for months in a cool location, but will sprout and soften if left in the warm kitchen in a bowl.

The plants come in bundles of 50 to 60, according to their catalog, but last year I got closer to 100 plants per bundle. Onions don’t like competition, so weed early and often. Space your onions about 3 inches apart in the row, with rows at least 8 inches apart. They like fluffy, rich soil so be sure to add lots of compost and stir it in well. You can also start onions from “sets,” which are like little bulbs but less vigorous than plants.

What else am I eating from the garden now? Garlic. It is easy to grow, but if you didn’t plant any last October, you’re probably out of luck. It sets its roots in the fall, goes dormant, and pops up early in the spring. It is rarely available to purchase in the spring. I was out in California one spring and bought some soft-necked garlic in the spring, and it did fairly well here. You could try planting some of last year’s garlic, come spring, if you have any left over but it’s not recommended.

Fresh potatoes from one plant

Potatoes are also a mainstay of my winter menu. I know, they are not usually recommended for dieters. But that is partly because of how they are served. They are a healthy starch, but many of us tend to load up potatoes with sour cream or butter. Add them to a stew or stir-fry, and they are still tasty but much less calorific.

I went 20 years once without buying a potato. I grew plenty, and saved out some for planting each spring. By only eating my own, I went a few months without any while waiting for my new crop to be ready. But it was a matter of principle to only eat my own. Commercial potatoes, if not raised organically or following IPM guidelines, can carry heavy pesticide loads.

The trick to getting lots of potatoes is to grow them in full sun. You can get potatoes where there is only six hours of sun per day, but the more sun, the more potatoes. And don’t let the potato beetles defoliate your plants. Check leaves, including the underneath side, for orange egg masses or larvae often when they are starting to grow. They can multiply exponentially if you let early beetles multiply.

Having a vegetable garden is, of course, a certain amount of work. But not only does it provide me with good, healthy, organic veggies; it also saves me lots of money and keeps me active in the garden. As we get older, the more exercise we get, the better. So start reading the catalogs or websites of seed companies, and plan what you will plant, come spring. Me? I can’t wait!

Featured photo: Try growing Kohlrabi this summer. They’re tasty and keep well. Courtesy photo.

Winter wreaths

Make the most of last year’s garden

Winter is upon us and it may seem there is little for a gardener to do. No weeding, nothing to plant, no flowers to pick. But last year’s garden may still have some remnants that, with a little imagination, can create something pleasing to the eye. I went out to my garden in early winter to see what dry flowers were still standing after my garden clean-up and saw plenty to work with. I picked a lot and set it all aside for making winter wreaths and arrangements.

I like wreaths, and in the past I have made them to decorate an outdoor space such as a blank wall or door. Instead of using a wire wreath form, as many people do with evergreen wreaths, I used grapevines to make the basic form for my wreath. You can, too.

Wreath form made with grape vines. Courtesy photo.

Go to a wooded area and look for vines climbing a tree. Grape vines are common in hardwood forests, but often strangle trees, so removing some grapevine is actually a good thing to do. Cut a 15-foot length of grapevine that is about as thick around as your ring finger. It is important to use living, not dead, vines; they are a greenish white inside and flexible. Dead vines are brittle, brown, and not suitable.

Begin by forming a vine circle 14 to 16 inches in diameter by overlapping (or twisting) one half of the vine over the other half — the same way you would start to tie your shoelaces. Then grasp one of the loose ends and weave it around the vine circle in loops, over and under, pulling it tight as you go. Then take the other end of the vine and weave it around the circle.

The great thing about this grapevine wreath is that you can just slide stems of dry flowers in between the vines and natural tension will hold them in place. In fact, I had to use a screwdriver to lift the vines at times in order to slide the stems in place. But I also use thin florist wire to tie together more delicate things like grasses and add them to the wreath.

Here are some of the plants I used in my winter wreath. Sedum “Autumn Joy” is a deep brown and stands up well in the winter garden. Fountain grass “Morning Light” provides a light brown, fluffy material, as the seed heads are still present. Mine got knocked over by ice earlier in the winter, and then after the ice melted, it stood back up again!

Dry plants cut for use in wreath. Courtesy photo.

What else? Various hydrangeas have flower panicles that are dry and delicate but still attached at this time of year. I used some flowers from one called “Quick Fire.” I like it for wreaths because the panicles are not huge, the way many of the PeeGee hydrangeas are, or Annabelle. If your panicles are too big, you can prune parts off to make them more suitable for a wreath.

I wanted some greenery in the wreath and could have pruned off some twigs from either white pine or hemlock but had some Christmas fern right near the house and used that instead. I’m not sure how long it will hold up in a wreath, but it looks good now. Hemlocks tend to drop needles fairly quickly, but anything used as a Christmas tree would be fine — Balsam fir or blue spruce, or example. Or snip some stems off your Christmas tree when you take it down.

For color I went to my brook and gathered some winterberry growing alongside it. This shrub has bright red berries in winter, and although it prefers a moist location, it will grow in ordinary garden soil, too. In summer it is pretty ordinary looking, but is fabulous when covered with red berries in winter. You need both male and female plants to get berries. One male is fine for five females.

The last addition to my winter wreath were some stems of teasel, a biennial weed hated by Midwestern corn farmers. It gets in their machinery and gums up the works — and it grows 6 feet tall. The flowers and seed heads are 2-inch cylinders that are very prickly. The stems have thorns, but these can be rubbed off while wearing gloves, making them easier to work with.

Because teasel is a biennial, it is easy to control: I pull most of the first-year plants when they are small. I leave just a few to grow and produce flowers. Six plants or so are nice. They stand up all winter and contrast well with the snow.

If you are not interested in making a wreath, or don’t have the time, pick some stems of anything interesting still standing in the garden, and put them in a dry vase. I leave some flowers with seed heads for the goldfinches and juncos to munch. Things like black-eyed susans and purple coneflower are nice for them. I always leave some snakeroot, too, as it is a tall plant that stands above the snow.

Lastly, if you are looking for dried flowers to decorate with, don’t forget the weeds. Walk through an un-mowed field and you will see plenty of dry flowers standing proud in the snow. Or take a walk along a country road and look for shrubby things with interesting branches or seed pods. With a little imagination, they can be used to create beauty.

Featured photo: Winter wreath with a dusting of snow. Courtesy photo.

World of wonders

Fostering a curiosity for nature

One recent morning I decided it was time to finish reading a small book of essays I had started long before and savored but had (inexplicably) put off finishing. World of Wonders: In Praise of Fireflies, Whale Sharks and Other Astonishments is a delight, from start to finish. Its author has a name that could wrap around my own more than once: Aimee Nezhukumatathil.

I think of the author as Aimee, and I know she would not mind. She is young, full of life, with a “joie de vivre” that lights up every room she enters, I should think. But what encouraged me to share her book with you was the last essay, “Firefly (Redux): Photinus pyralis.”

In her essay about fireflies she recounts her experience teaching a poetry class at an elementary school in a suburban town where fireflies are common. When she mentioned fireflies, most of her students thought she was making them up. Of 22 students in her class, 17 had never seen a firefly. Instead of spending early summer evenings outdoors catching fireflies and putting them in jars to bring indoors, they were texting friends or playing video games.

That same morning I read a review in the New York Times of a biography of E.O. Wilson, a hero of mine and a biologist who is now 92 — but still active and observant [editor’s note: Wilson died Dec. 26, 2021]. He began his scientific life studying small creatures ignored by most of us: ants. At age of 13 he found a species of red fire ant from Argentina that had never been reported in the United States. He went on to study at Harvard and write more than 30 books and 500 scientific articles.

So what do these two wonderful people have to do with you or me? They have great curiosity about the natural world. And we do, too. We are gardeners and as such spend time pondering why any given plant bloomed magnificently last year but meagerly this year. We offer our palette of plants more water, or less. We add fertilizer, or we don’t. Would an early June “haircut” delay blossoming and encourage a less lanky plant? Good gardeners pay attention to the details of life.

I believe that we all have a responsibility to share our passion with our children and our grandchildren. Or the boy across the street who stops, while walking his dog, and asks us questions about our garden. Most scientists and citizen scientists had someone in their early life who encouraged them to ask questions and showed them something special that amazed them.

When I was in the third or fourth grade my family took a week’s vacation together in Maine. We stayed at Goose Cove Lodge on Deer Isle, a delightful rustic place run by a retired biology professor, Dr. Ralph Waldron. Dr. Waldron offered guided walks along tidal pools and in meadows of wildflowers off the beaten track. My parents, my sister Ruth Anne and I always went on these walks. Dr. Waldron not only let me see new things; he encouraged me to take samples and bring them back to the lodge to study.

And so I began my career as a citizen scientist. He taught me how to preserve flowers and leaves by pressing them in a simple press to make herbarium mounts. He taught me not only the common names of plants but their Latin names. He encouraged me to see similarities and differences in plants. He let me preserve small sea creatures in glass jars with formaldehyde as a preservative so that I could take them home, along with my flowers. I began to appreciate the vast diversity of the natural world, and its beauty.

My grampy, John Lenat, was an early proponent of organic gardening and taught me much. Courtesy photo.

We returned to Goose Cove Lodge every summer for a few years, and I deepened my interest for the natural world each time we went. In college I majored in biology, in part because of Dr. Waldron’s influence.

Sometimes it seems that the news about the natural world is always depressing: global warming, I read this morning, is causing rising temperatures in ponds, causing more poisonous blue green algae to flourish. Elsewhere today I read that a living species somewhere becomes extinct every day. And so on. What can you and I do about it?

We can garden. And we can introduce the life outdoors to a young person. An 8-year old, perhaps. If we take joy in what we do and share our excitement with a young person, they too may become an E.O. Wilson, or an Aimee Nezhukumatathil.

We don’t need to be scientists to encourage young people to love and respect our natural world. My gardening grandfather, John Lenat (1888-1967), probably never finished high school. He came to the United States as a young man from Germany. He loved to garden, invited me to spend time with him each summer, and I absorbed a lot from his way of doing things. He let me putter in the garden and do things to help, but only as much as I wanted. He never asked me to weed, and let me take worms from his compost pile to catch fish.

As a New Year’s resolution this year, I hope you will think about connecting a young person with the outdoors. With our gardens, or the bugs and toads that live there. Maybe together we can all make a difference. Just maybe, if we each make an effort to live sustainably, we can save the world.

Featured photo: World of Wonders is a delight to read. Courtesy photo.

Mulching and composting

Little snow means more work in the garden

Although we had a little snow on the ground for much of November and December, snow has been scarce as we move toward the new year. If this continues, does this have any consequences for our gardens? Yes, it can.

If we have bare ground and a very cold winter, roots will see colder temperatures than they might prefer. Like that pink fluffy fiberglass in the walls of our homes, snow is a great insulator. Snow holds tiny pockets of air, holding in warmth from the soil and preventing icy north winds from stealing warmth from the soil.

Lacking snow, what can one do? Fall leaves are great. If you have a leaf pile somewhere, think about moving some to spread around your most tender plants, especially things planted this year. Perennials and woody plants are most vulnerable to the cold their first winter.

I have a tree peony that I planted this year, quite a pricey plant. Unlike the common perennial peony, the stems of the plant are woody and do not die back to the ground each winter. And the blossoms are much more dramatic, up to a foot across.

I have done two things for it: I mulched around the base with chopped leaves, and I wrapped some burlap around it to protect the stem itself and the flower buds that are already in place for next summer. This will help to keep January’s cold winds from affecting it. We have done the same for tender heirloom roses, with good success. Shrub jackets made of synthetic breathable material are also available instead of making your own from burlap.

I worry about voles chewing through the burlap, nesting inside, and then eating the tender bark of my young tree peony. I had some Bobex brand deer repellent and decided to spray the burlap. It is made with rotten eggs and other nasty stuff and might deter voles.

My wife, Cindy, and I recently used burlap to prevent hungry deer from eating the leaves and branches of a pair of large yews. First I drove four 1-inch-diameter hardwood stakes into the ground around each 6-foot-tall shrub. I stood on a step ladder and used a 3-pound short-handled sledge hammer to drive the stakes in about a foot. Then we draped the burlap over the top of the stakes and stapled the burlap to hold it in place on windy days. We used a heavy-duty carpenter’s stapler, as a desk stapler would not work. We have done this before, and the deer cannot get to one of their favorite winter meals. The wrapping we did was open to the top as deer can’t reach that high, but smaller plants should be completely wrapped.

Another hazard for plants is heavy snow and ice that fall off roofs or are pushed up by snow plows. Last winter I made three A-frame plywood protectors for small shrubs to protect them. Each used four stakes and two pieces of plywood. At the top of each stake I drilled a hole and slid through both a piece of wire that connected the two stakes. This is a cheapskate’s way of avoiding the cost of hinges. And it works just fine! If the ground is not frozen, push the stakes into the soil, but if it is frozen, it should stand up fine anyway.

Later, after the holidays, recycle your evergreen tree in the garden. After I take off decorations, I use my pruners to cut off all the branches. This helps me find every last little ornament, and then I have a nice stack of evergreen branches to use around or over tender plants. The branches are good windbreaks for small shrubs, and hold snow through winter thaws as they sit over tender perennials. If you use a fake tree, watch for discarded trees waiting curbside, and snag one (or more) for use in the garden.

Composting in winter is a chore that some gardeners don’t bother doing. But you should, as it is a waste to put your moldy broccoli in the landfill. For many gardeners the compost pile is a considerable distance from the house, requiring warm coats, gloves — and perhaps snowshoes. But there is an easy solution.

Invest in an extra garbage can, a large one that will hold 30 gallons or more. Place it inconspicuously but conveniently near the house. Ideally, you have a kitchen door behind the house, and can bring food scraps to it without bundling up for the cold.

Your winter compost will freeze, and will not break down during the cold months. So chop any big things to smaller pieces to allow it to pack down well. Then, come spring, you will have to shovel the material into a wheelbarrow and bring it down to your regular compost pile after it has thawed.

Of course, commercial compost bins are available to buy instead of the Mr. Thrifty 30-gallon plastic can. But since compost does not break down outside in winter, a plastic bin may not hold all the material you produce. If you fill the first garbage can, an extra can is a smaller investment than a bin made just for compost. And those rotating bins? I’ve rarely met anyone who keeps turning them every week anyhow.

So get creative and protect your plants however you can. And if you have a great idea, write me so I can share it with others.

Featured photo: This tree peony had 10-inch-wide blossoms. Photo by Henry Homeyer.

Winter plantings

Enjoy paperwhites and amaryllis indoors

As winter drags along, I long for warm sun and green plants surrounding me outdoors. It’s much too early to start spring seeds (even indoors), but I can plant some flower bulbs. I love paperwhites and amaryllis, and both are readily available for planting now — and they will bloom indoors while it snows outside.

Paperwhites are a type of daffodil specifically for forcing indoors now. Most grocery stores sell them, as do garden centers and feed-and-grain stores. They usually cost about a buck a bulb, and will produce flowers in four to six weeks. They are not hardy in New England, so don’t bother saving the bulbs to plant outdoors. Just enjoy them, and accept that they are a one-shot deal.

Amaryllis blossoms come in red, white, pink and striped. Courtesy photo.

I should warn you that paperwhites have strong scents, and not everyone is enthralled with their smell. But I like the scent, which I can smell once I walk into a room with freshly blooming paperwhites. If you don’t like strong-smelling musky scents, there is one variety that is barely fragrant: Grand Soleil d’Or. Instead of the traditional white blossoms these bulbs produce gold or yellow blossoms.

If you are in a hurry for blossoms and can select your bulbs from a bin, select those that already have started to grow. They are just aching to grow. Select a nice bowl or pot that will hold water, and get some small stones — three quarters of an inch to an inch is a good size. Garden centers sell white marble chips for this, but you can pick up stones from your driveway or garden, too. Just rinse off any stones before using them.

Arrange the three to five bulbs on a layer of stones, then fill in around the bulbs with more stones. The stems and flowers will get up to 18 inches tall, so they may tip over if not firmly seated and surrounded with stones.

Next, add water until it just kisses the bottom of the bulbs. You do not want the bulbs to sit in water. Those dry roots will quickly wake up and extend into the pool of water around the stones. Top up the water as needed, but try not to let it go dry.

Some people wait until the bulbs have grown an inch or two, drain off the water, and replace it with a 7-to-1 dilution of gin or vodka. This will, I am told, produce shorter, sturdier stems that will not flop. Or use rubbing alcohol and dilute a bit more, 11 to 1.

An amaryllis bulb does not need much soil and needs to be planted like this. Courtesy photo.

A more expensive but more dramatic flower for forcing is amaryllis. This is a tropical flower originally from South Africa — and many are still imported from there each year. Properly cared for, your investment in an amaryllis bulb will produce a plant that will last for up to 75 years, blooming every year

Amaryllis bulbs are big: They are anywhere from 2 to 4 inches across. They are often sold with a kit that includes an appropriate-sized plastic pot, the bulb, and enough potting soil to plant it in.

Smaller amaryllis bulbs are younger and less expensive, but you get what you pay for: A $5 amaryllis at a Big Box Store will probably produce one stem with three or four large blossoms. A $12 bulb will be bigger and should produce two stems with eight or more blossoms. In time, your small bulb will get bigger if you care for it properly.

Planting an amaryllis is easy. You should plant it in a good potting soil, not soil from the garden, which may stay too wet and get compacted. It is important that the bulb not be buried in soil. It may rot if you do that. The shoulders of the bulb should stick up above the soil line, up to one third of the bulb. The potting soil should be lightly moist, not dry or soggy when you plant it.

Place your amaryllis in a sunny window and wait. Sometimes when you buy an amaryllis it will have already started to grow in the box. I like that, as it means that my amaryllis will start growing for me right away.

Other times an amaryllis will sulk for weeks, doing nothing. There is nothing I know of to encourage it to grow, though maybe whispering encouragement to it will help. Only do that, however, when you are the only person in the room!

Amaryllis stems tend to lean toward the light, so rotating the pot every few days will help to keep it growing straight up (and give you something to do). You may need to insert one or more thin bamboo sticks and tie with yarn to help keep the heavy blossoms — up to 4 inches across — from pulling the stem over.

After the first stem has bloomed you may get a second stem. You can cut off the first stem after it is finished blooming. Sometimes the first and second stems grow at the same time, which leads to a little pushing and shoving in the pot, much like teenagers. Once a stem is finished blooming, you can cut it off.

After blooming, keep it in the pot, and put it outside in a sunny location all summer, but bring it inside by Oct. 1. Remove from the pot and let it dry out. Cut off the leaves and place it in a paper bag and keep in a cool, dark place for five or six weeks. Then pot it up, and it will bloom again.

So if you miss gardening, get an amaryllis or some paperwhites. And spring will be along in no time!

Featured photo: 5 paperwhite bulbs fit into this soupbowl with gravel. Courtesy photo.

Stay in the loop!

Get FREE weekly briefs on local food, music,

arts, and more across southern New Hampshire!