Healthy-ish cauliflower cakes

Hello, 2022! As one often does at the start of a new year, I am eating a little more mindfully after all of the frivolity of the holiday season. However, the fact that I’m being mindful doesn’t mean I am limiting myself to boring foods.

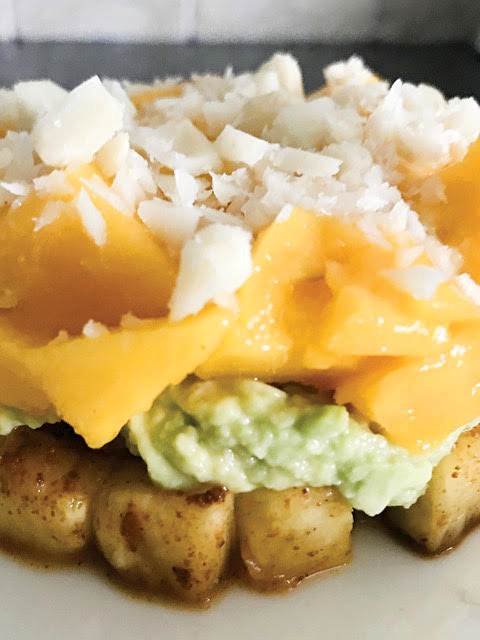
These cauliflower cakes are a great example of how you can eat a healthier snack or side dish that is still fun and flavorful. The majority of the ingredients in this dish are on the “good” list. Steamed cauliflower and egg whites are about as mindful as you can be when eating. What makes them only healthy-ish, subjectively speaking, is the topping of shredded cheese. If you’re feeling that you need to make these 100-percent healthy, just eliminate the cheese.

There are a few tips to go with this recipe. First, you need to use fresh cauliflower. Frozen cauliflower contains too much moisture. Second, be sure to mince the garlic so that you don’t end up with a large chunk in one of the cakes. Third, you can replace cheddar cheese with any other cheese that melts well.

Here’s to a healthy-ish start to 2022!

Healthy-ish cauliflower cakes
Makes 12

1 pound cauliflower florets (approximately half of a medium-sized head of cauliflower)
1 egg white
1 teaspoon dried basil
1 clove garlic, minced
salt & pepper
1 cup shredded cheddar cheese

Place florets in a steaming basket over boiling water, and cook for 4 to 5 minutes or until fork tender.
Divide cooked cauliflower florets in half.
Place half in a food processor with egg white, basil, garlic, salt and pepper.
Chop the other half into small pieces (about the size of a peanut).
Combine the pureed and chopped cauliflower in a mixing bowl.
Preheat the oven to 400 degrees, and heat a nonstick frying pan over medium heat.
Coat the baking sheet and frying pan with nonstick cooking spray.
Scoop 1/4 cup of cauliflower mixture, and place in preheated frying pan, pressing gently to flatten.
Repeat, leaving an inch between cakes.
Cook for 1 to 2 minutes (or until golden brown); flip and repeat on second side.
When both sides are golden brown, transfer to the prepared baking sheet.
After all of the cauliflower patties are on the baking sheet, top with shredded cheddar cheese.
Bake for 8 to 10 minutes or until cheese is melted.

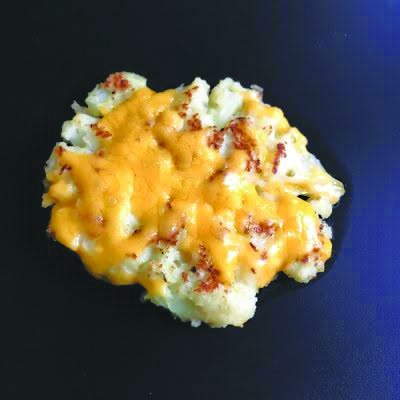
Photo: Healthy-ish cauliflower cakes. Photo by Michele Pesula Kuegler

Chocolate peanut butter crunchies

We are nearing the very end of the holiday season. After New Year’s Eve, there may be thoughts (and actions) of healthier eating to compensate for the seasonal indulgence. However, before we tiptoe into the land of less sugar, fat, carbs, etc., I want to share one simple and delicious treat: chocolate peanut butter crunchies.

I don’t know if there is a recipe that is more aptly named. These crunchies are made of three ingredients, two of which are announced in its name. As simple as they are, they also provide a great amount of flavor, texture and balance. They are creamy yet crunchy, as well as sweet with a hint of saltiness.

When you look at the recipe, you might note that it only makes 12 crunchies, which may seem small when you compare it to a cookie recipe. However, these crunchies are fairly dense. You won’t be eating three or four of them. Of course, you also could easily double this recipe, especially since chocolate chips usually are sold in two-cup packages.

There are two key notes for this recipe. First, on the ingredient front, you want to use regular creamy peanut butter, not the all-natural, need-to-stir-it variety. You could use crunchy peanut butter, but you may need an extra tablespoon or two to get the correct consistency. Second, these are messy treats. Be sure to keep a napkin handy while enjoying them.

Whether you use this recipe now for a New Year’s gathering or store it in a file for some time in 2022, it is the perfect last-minute dessert recipe. From gathering the ingredients to popping one into your mouth, this recipe can be ready in 20 or so minutes.

Chocolate peanut butter crunchies
Makes 12

1 cup milk chocolate chips
½ cup creamy peanut butter
2½ cups corn flakes

Line a rimmed baking tray with parchment paper.
Combine chocolate chips and peanut butter in a large microwave-safe bowl.
Heat in 30-second increments, stirring after each. (It should take 2 or 3 rounds to melt completely.)
Add corn flakes to chocolate mixture; stir well.
Using a serving spoon, scoop approximately 1/4-cup portions of the mixture onto the prepared tray.
Repeat until all mixture has been scooped into individual portions.
Refrigerate for 10 to 15 minutes or until firm.
Store in a sealed container.

Michele Pesula Kuegler has been thinking about food her entire life. Since 2007, the New Hampshire native has been sharing these food thoughts and recipes at her blog, Think Tasty. Visit thinktasty.com to find more of her recipes.

Photo: Chocolate peanut butter crunchies. Photo by Michele Pesula Kuegler

Chocolate & caramel oatmeal bars

It’s almost Christmas, so you probably are already surrounded by many treats. You may wonder why you need one more dessert recipe right now. The answer is simple: These bars are delicious and make a fabulous dessert that doesn’t require a lot of time.

During this holiday season, cookies usually take center stage, which is fine. The problem with cookies is that you need to make batches of them. Plus, you need to find a cute serving tray on which to serve them. That’s where this bar recipe can assist you. You can bake and serve in the same pan!

When you make these (not if but when), there are three important ingredient notes. (1) You need to use old-fashioned or rolled oats to provide the correct texture. (2) The soft caramels are the ones that come individually wrapped but don’t have that white/creamy center. (3) Although it’s only a few tablespoons, whole milk really is the best choice to keep the caramel sauce creamy.

Now you have a dessert that is bound to receive many oohs and ahhs. Make sure you save one for yourself!

Chocolate & caramel oatmeal bars
Makes 20

1½ cups flour
1½ cups old-fashioned oats
1 cup light brown sugar
¾ cup unsalted butter, softened
1 teaspoon baking soda
¼ teaspoon salt
7 ounces soft caramels
4 Tablespoons whole milk
12 ounces semisweet chocolate chips

Preheat oven to 350 degrees.
Using a stand mixer with the paddle attachment, mix flour, oats, sugar, butter, baking soda and salt on medium speed until butter is the size of rice.
Line a 13×9 pan with parchment paper, and then grease the parchment paper with butter or nonstick cooking spray.
Place 3/4 of the cookie dough in the pan; spread evenly and pat firmly.
Bake the bottom crust for 12 minutes.
While the crust bakes, combine the caramels and milk in a microwave-safe bowl.
Heat the caramel mixture in the microwave in 30-second increments, stirring after each.
Remove crust from oven; spread melted caramel over it.
Sprinkle chocolate chips on top of caramel.
Scoop remaining cookie dough into tablespoons, and distribute evenly over the chocolate chips.
Bake for 15 to 20 minutes or until the crust is golden brown.
Cool for at least 30 minutes before serving.

Michele Pesula Kuegler has been thinking about food her entire life. Since 2007, the New Hampshire native has been sharing these food thoughts and recipes at her blog, Think Tasty. Visit thinktasty.com to find more of her recipes.

Photo: Chocolate and caramel oatmeal bars. Courtesy photo.

Baked falafel burgers

Falafel is one of those dishes that seems like it’s healthy, but that isn’t always the case. Although falafel is mainly composed of garbanzo beans, quite often they are deep fried and topped with heavy sauces. Now, there is nothing wrong with a little decadence, but at this time of year there is so much indulgent eating, a healthier alternative is greatly appreciated.

Thus, today I have a recipe for baked falafel burgers. This simple-to-make dish is about as healthy as can be. There is no oil added to the burger, and they are baked instead of fried. However, all of this healthiness does not equal a boring dish. These burgers are bursting with flavor from the addition of two different fresh herbs as well as a dried spice.

Serve these “burgers” in a piece of pita bread and add lots of veggies, and you have an incredibly healthy meal. To keep it even healthier, skip mayonnaise and opt for something lighter, such as Buffalo sauce. You can even make your own two-ingredient condiment: 1/4 cup plain Greek yogurt mixed with hot sauce (you choose the amount). This recipe should be enough to top all four falafel burgers.

Serve these falafel burgers with some baked green bean fries or a fruit salad, and you have a delicious, health-conscious meal for four!

Baked falafel burgers
Serves 4

15-ounce can garbanzo beans, rinsed & drained
½ cup fresh parsley
1 cup fresh cilantro
3 cloves garlic, minced
2 teaspoons cumin
¼ cup walnuts
3 Tablespoons lemon juice
Salt & pepper
Optional:
Hamburger buns or pita bread
Lettuce, tomato and condiments

Combine garbanzo beans, parsley, cilantro, minced garlic, cumin and walnuts in the bowl of a food processor.
Add 2 tablespoons of lemon juice, and pulse.
Add remaining lemon juice, 1 teaspoon at a time, blending until smooth.
Divide mixture into 4 equal portions, and form into patties.
Place on a small greased baking sheet.
Refrigerate for at least 30 minutes.
Preheat the oven to 375 degrees.
Remove falafel burgers from the refrigerator, and bake for 30 minutes.
Serve in a pita or on a bun with desired toppings and condiments.

Michele Pesula Kuegler has been thinking about food her entire life. Since 2007, the New Hampshire native has been sharing these food thoughts and recipes at her blog, Think Tasty. Visit thinktasty.com to find more of her recipes.

Photo: Baked falafel burger. Courtesy photo.

Tropical Fruit Stack

Try this at home

The weather finally is turning to the warmth of summer. Although we, as New Hampshirites, are excited for the increased temperature, we also will be complaining about how hot and humid it is in the very near future. With that in mind, I have created a dish that welcomes the arrival of summer while keeping one cool.

Allow me to introduce to you the tropical fruit stack. While its name may make you think that it’s a sweet dish, it actually has a nice balance between sweet, savory, salty and even a little bit of spice. Yes, it’s all of the taste categories in one dish. Additionally, it has a nice balance between tender and crunchy, so what’s not to like?

This is a simple dish to make, but because of its simplicity you also need to be mindful when purchasing your ingredients. All of the produce needs to be fully ripened, as it won’t spend any time cooking or macerating to highlight its flavors. If you can only find under-ripe produce, that’s fine. The mango and avocado can be ripened by placing them in a paper bag on the counter for a day or two. The same is supposed to work with pineapples, although I’ve never tried that.

You may hesitate to try this recipe because you need a ring mold. However, there are many substitutes for a ring mold. You can make one out of aluminum foil. If you buy your pineapple whole but with the skin removed, that container can work, if you cut off the bottom. You also could cut the bottom off a large disposable plastic cup and use it with the widest part as the bottom of your mold.

With fresh ingredients and your tool acquired, you’re ready to make a dish that’s sure to wow. It’s pretty easy to make, elegant to view and refreshing to eat. Summer dining doesn’t get much better than that.

Tropical fruit stack. Photo by Michele Pesula Kuegler.

Tropical Fruit Stack
Serves 2

1 1/3 cup diced pineapple
1/2 teaspoon chili powder
1/4 teaspoon salt
1 avocado
1 teaspoon lime juice
1 cup diced mango
2 tablespoons finely chopped salted macadamia nuts

In a small bowl combine pineapple, chili powder, and salt.
Stir until pineapple is fully coated.
Remove skin and pit from avocado.
Place avocado and lime juice in a small bowl.
Using a fork, mash until avocado is creamy.
Place a 4-inch ring mold on a small plate.
Spoon half of the pineapple mixture evenly as the bottom layer.
Spread half of the mashed avocado on top of the pineapple.
Spoon half of the diced mango over the avocado.
Sprinkle 1 tablespoon of macadamia nuts over the mango.
Carefully remove mold, and repeat for second serving.
Serve immediately.

Caramelized peaches with bacon & blue cheese

There is nothing quite like a perfectly ripe peach as an afternoon snack. When a peach is tender and so juicy that you need to have a napkin nearby, it should be enjoyed on its own. There is nothing else this peach needs to evoke all of its flavors.

Sometimes, though, you have peaches that aren’t perfectly ripe. Then it is time to transform those peaches into an entirely different snack. Allow me to introduce you to a ridiculously simple recipe that turns ho-hum peaches into something much more spectacular.

You need only four ingredients and less than 30 minutes to create a dish that could be an appetizer or a side dish. It could even be your lunch if you wanted. Even better, slightly underripe peaches work well in this dish because the roasting time brings forth tenderness and sweetness. Topped with salty bacon and savory blue cheese, this makes an amazing mix of flavors and textures. Oh yes, this simple recipe produces a show-stopping dish.

A few notes on this recipe:

1. You don’t want to use thick-cut bacon, as you want the bacon to be really crispy after cooking so that it will crumble nicely.

2. I found it easier to cut through the pit, as opposed to trying to pull the peach flesh off the pit. Pulling resulted in squishing the fruit.

3. Be very watchful when broiling the final product. It takes mere seconds and will go from caramelized to burnt in the blink of an eye.

Although peaches are lovely on their own, after making this recipe you may be hard pressed to think about peaches without also considering blue cheese and bacon.

Caramelized Peaches with Bacon & Blue Cheese
Serves 2-4

3 slices regular-cut bacon
2 peaches
3 tablespoons blue cheese
1 tablespoon brown sugar

Preheat oven to 400 degrees.
Heat large frying pan over medium heat.
Add bacon and cook until crisp.
Transfer fully cooked bacon to a paper towel-lined plate.
Cut peaches in half (using the crease as a guide) and remove pit.
Place peaches, cut side down, on a greased, rimmed baking dish.
Roast for 8-10 minutes or until tender.
While peaches bake, place blue cheese in a small bowl.
Crumble bacon into small pieces, adding it to the cheese.
Use a fork to combine the cheese and bacon.
Remove peaches from oven, and flip so that they are cut side up.
Change oven from bake to broil.
Move a rack to the highest shelf in the oven.
Fill peach centers with blue cheese and bacon.
Sprinkle sugar over peaches.
Place under broiler for 15-30 seconds.*

*Instead of broiling the peaches, you can caramelize them with a kitchen torch.

Stay in the loop!

Get FREE weekly briefs on local food, music,

arts, and more across southern New Hampshire!