Creamy Cucumber and Pea Salad

We have reached the end of July, which is one of my favorite times of summer because of the local produce. If it has been a good farming season, we have tomatoes, cucumbers, lettuces and more available at nearby farm stands. This year’s rain has definitely wreaked havoc on local farms, but we can hope that the fields and produce will be salvaged.

Although widely available, cucumber is quite often an overlooked piece of produce in my world. It doesn’t have a lot of flavor, so it isn’t a go-to snack for me. However, because of its low flavor profile, it is excellent at retaining other flavors. This creamy cucumber and pea salad requires few ingredients but delivers a lot of texture and taste.

The ingredients in this recipe are straightforward. Ideally, the cucumber will be freshly picked, but a grocery store cuke will work also. For simplicity, stick with frozen peas, but fresh peas aren’t that much more work. Shell and add them to boiling water for a minute or two, and they’re ready for the salad. I prefer Greek yogurt, as it is extra creamy, but plain yogurt can work as well. One note: The cucumber needs to sit for an hour and the entire salad should rest for a couple hours, so make this in the morning, if you want it with dinner that night.

On a personal note this is my last recipe for Try This at Home. It’s been fun writing these articles, but it’s time for me to focus on other endeavors. Thank you for reading, trying my recipes, and occasionally reaching out. It’s been a fun few years!

Creamy Cucumber and Pea Salad
Serves 4

1 medium-sized cucumber
salt
½ cup peas, fresh or frozen
2 Tablespoons minced red onion
½ cup plain Greek yogurt
1½ Tablespoons cider vinegar
1 teaspoon sugar
ground black pepper

Peel cucumber.
Slice in half lengthwise twice, so that you have 4 spears.
Cut each spear into ½-inch-thick wedges.
Place cucumber wedges in a bowl, and sprinkle with 1 to 2 teaspoons of salt.
Allow to sit for at least an hour.
While the cucumber sits, blanch fresh peas or defrost frozen peas.
After an hour, drain cucumber, and transfer to a paper towel; blot to remove excess salt.
Combine cucumber, peas and onion in a medium-sized bowl.
Whisk yogurt, vinegar and sugar together in a small bowl.
Add yogurt mixture to veggies, and stir to combine.
Season with salt and pepper to taste, stirring well.
Chill for at least 2 hours before serving.

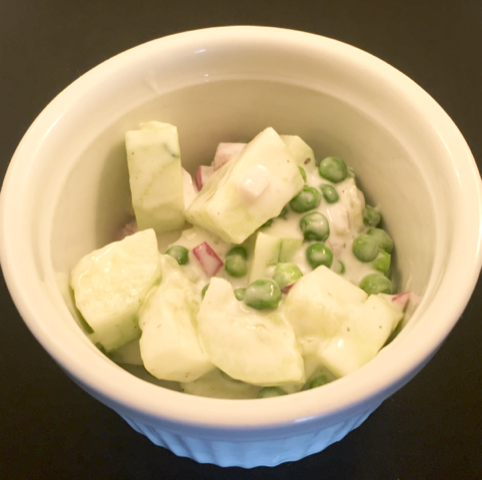
Featured photo: Creamy cucumber and pea salad. Photo by Michele Pesula Kuegler.

Quick Pickled Watermelon Rind with Baking Spice

Summer is the season of watermelon. Most of the time we simply throw out the rinds. Why not find a use for some of this leftover produce?

This recipe is really simple and creates a slightly tart, slightly sweet snack. Pickled watermelon rind makes a fine addition to a charcuterie tray, a nice topping to a salad, or a different side to serve with burgers.

When making this recipe, the most difficult step is removing the layer of green rind. You can try using a vegetable peeler; however, I found it to be a slow process. I recommend using a paring knife to remove the green rind. Just take your time, as you are working with a slippery ingredient.
Once your rind is ready for brining, the rest of the process is simple. The only tricky part is waiting 24 hours to enjoy the final product. It’s well worth it. In that amount of time the rind absorbs a nice amount of flavor. As these are quick pickles, they do need to be stored in your refrigerator and will last about one month. (That is if they aren’t all eaten by then!)

Quick Pickled Watermelon Rind with Baking Spice
Makes 1 pint

2 cups watermelon rind
1 cup apple cider vinegar
1 cup water
1/2 cup sugar
1 teaspoon kosher salt
1 Tablespoon black peppercorns
1 cinnamon stick
1 teaspoon whole cloves

To get 2 cups of watermelon rind, you need 1/4 of a small watermelon.
Cut out the watermelon flesh, and save for another use.
Using a knife, remove all of the green skin from the watermelon rind.
Cut the rind into small, bite-sized pieces, about 1/2-inch cubes.
In a small saucepan, combine the vinegar, water, sugar, salt, peppercorns, cinnamon stick and cloves.
Bring to a boil over high heat.
Once it begins boiling, stir occasionally until the sugar and salt are dissolved.
Add watermelon rind, and lower to a simmer.
Cook, stirring occasionally, until watermelon cubes are fork tender, about 8 minutes.
Transfer rind to either 1 pint jar or 2 half-pint jars.
Top with brining liquid.
Allow to cool for an hour before sealing with lids.
Refrigerate for at least 24 hours before serving.

Featured photo: Quick Pickled Watermelon Rind with Baking Spice. Photo by Michele Pesula Kuegler.

Mushrooms filled with cheese, spinach and garlic

Stuffed mushrooms are a popular appetizer. They are easy to make at home and can be filled with so many different ingredients. For today’s recipe, I wanted to make an appetizer that leaned toward healthy. Goat cheese is the optimal choice for this. It’s lower in calories than many cheeses and also provides a creamy note.

This recipe has two rounds of baking. The initial round completes two important tasks. First, it helps to soften the mushrooms without drying out the filling. Second, it allows the mushrooms to release some of their liquids, so that you don’t have a watery mess for your final product. Don’t skip this first bake!

The ingredients in this recipe are straightforward: white mushrooms, frozen spinach, garlic cloves and goat cheese. Could you make them fancier and use porcini or cremini mushrooms? Sure, although baking times might vary. Depending on your garlic preferences, you could reduce the amount to one clove, and you definitely could increase it to three.

Once you have decided on your formula for these stuffed mushrooms (and bought the ingredients), you are only about 25 minutes away from a healthy, delicious snack!

Mushrooms filled with cheese, spinach and garlic
Makes 16

12 ounces white mushrooms
1 Tablespoon olive oil
1½ cups frozen spinach, thawed and drained
2 cloves garlic, minced
2 ounces goat cheese, softened
Pinch of kosher salt
Freshly ground black pepper

Preheat oven to 400 degrees.
Remove stems from mushrooms, and set aside for use in a bit.
Line a rimmed baking sheet with foil, and spray with nonstick cooking spray.
Place mushroom caps on tray, stem side down.
Brush tops of mushrooms with olive oil.
Bake for 8 minutes.
While mushrooms roast, finely chop mushroom stems.
In a nonstick pan over medium heat, add 1/2 tablespoon of olive oil.
When heated, add chopped stems, and sauté for 3 minutes, stirring occasionally.
Add garlic and sauté for one more minute, stirring frequently
Remove mushrooms from the oven.
Reduce oven to 375 degrees.
Combine spinach, chopped mushrooms, garlic, goat cheese, salt and pepper in a small bowl, and stir well.
Throw away foil, and line tray with a new sheet of foil.
Coat with nonstick spray.
Fill mushroom caps with spinach mixture.
Place filled caps on the prepared sheet, and bake for 8 minutes.
Serve.

Featured photo: Mushrooms filled with cheese, spinach and garlic. Photo by Michele Pesula Kuegler.

Extra-crunchy okra the healthy way

Okra isn’t an item you find all that often on menus in New Hampshire. That is why I’m advocating for you to cook it at home. This recipe will show you just how amazing it can be as a side dish or appetizer.

There are two key components to extra crunchy okra: an air fryer and panko bread crumbs. The air fryer almost goes without saying. It’s hard to get extra-crunchy veggies that are healthy without an air fryer. Panko is also essential to the consistency of the okra. Regular bread crumbs don’t add enough texture.

When you are cooking the okra it is important not to crowd the slices. My air fryer has shelves, so I divide the okra slices among two racks. I also rotate the racks halfway through cooking to give exposure to both top and bottom. If you are cooking in an air fryer that has a basket, it may take two rounds of cooking.

For serving, I highly recommend you make the dipping sauce. Ketchup is a fine alternative, but the barbecue dipping sauce just adds that little something extra. Either way, keep an eye out for okra when you shop; it could be the veggie you didn’t know you love!

Extra-crunchy okra the healthy way
Serves 4

12 ounces okra
1 egg white
1/2 teaspoon garlic powder 1 cup panko
1 teaspoon garlic powder
1/2 teaspoon kosher salt
Dipping sauce
1/4 cup plain Greek yogurt
2½ Tablespoons barbecue sauce

Clean okra, and remove stem and tip ends; set on paper towels to dry slightly.
In a shallow bowl, whisk egg white and ½ teaspoon garlic powder.
In a second shallow bowl, combine panko, 1 teaspoon garlic powder, and salt.
Cut okra into 1-inch segments.
Place ¼ of okra into egg white mix.
Use a fork to toss and fully coat okra pieces.
Remove okra from egg white, using the fork, shaking to remove excess egg.
Transfer to panko mixture.
Toss until all pieces of okra are well-coated.
Spray air fryer racks with nonstick cooking spray.
Place coated okra pieces on rack.
Repeat with remaining okra.
Do not crowd the okra on the rack; use multiple racks as needed.
Heat air fryer to 375 degrees.
Place rack(s) in oven and air fry for 6 minutes.
If using more than one rack, rotate positions, and air fry for 6 more minutes.
While okra cooks, combine yogurt and barbecue sauce in a small bowl, stirring well.
Remove okra from air fryer and serve immediately with dipping sauce.

Featured photo: Extra crunchy okra. Photo by Michele Pesula Kuegler.

Love me some lemon whoopie pies

If you are a regular reader, you may remember that I shared a lemon whoopie pie recipe a few years ago. Since then, I have made this recipe and found that it needed a bit of tweaking. Rather than keeping that information to myself, I thought I should share it with you. This recipe makes a cake that is a bit denser, which makes for a better whoopie pie.

I have added a decorative touch to this version. The sides of the frosting can be coated in flaked coconut or sprinkles. While this is completely optional, these toppings do add a nice bit of crunchy texture to a dessert that is mainly tender.

As for ingredients, I have only one note. For this recipe, you should use fresh lemon juice. You need one lemon for zesting. If you buy a second, you should have enough juice for this recipe. The brightness and flavor from freshly juiced lemons will make these whoopie pies much more vibrant. It definitely is worth the expense and effort.

Love me some lemon whoopie pies
Makes 10 pies

CAKES
½ cup unsalted butter, melted and cooled
1 cup granulated sugar
1 large egg
1 teaspoon lemon extract
½ teaspoon vanilla
1 teaspoon baking powder
1 teaspoon baking soda
½ teaspoon table salt
2½ cups all-purpose flour
¼ cup fresh lemon juice (1 to 2 lemons)
Zest of 1 lemon
3 Tablespoons milk
yellow food coloring, optional

FILLING
½ cup unsalted butter, softened
2¼ cups powdered sugar
2 Tablespoons lemon juice
1 teaspoon lemon extract
Flaked coconut or sprinkles, optional

Preheat oven to 350 degrees.
Line a baking sheet with parchment paper.
Place melted butter and sugar in the bowl of a stand mixer, and beat with paddle attachment on speed 2 until smooth.
Add eggs mixing until each is fully incorporated on speed 2.
Add extracts, baking powder, baking soda and salt, mixing well on speed 2.
Use a spatula to scrape down the sides, and add 1½ cups of flour.
Mix on low; scrape sides with spatula, add lemon juice, and mix until fully blended.
Add remaining cup of flour, and mix.
Add milk and food coloring, and mix until fully combined.
Scoop approximately 1½ tablespoons batter, and place spaced evenly, onto parchment paper-lined baking sheet. (Will take two batches to bake all of the batter.)
Bake for about 12 to 15 minutes, or until cakes spring back when touched.
Allow to cool for 2 minutes on baking sheet.
Transfer to baking rack to cool completely.

TO ASSEMBLE
In a stand mixer combine butter, powdered sugar, lemon juice and lemon extract; mix on low speed until combined.
Spread the flat side of 10 cakes with the frosting.
Top each with another cake.
Place coconut flakes or sprinkles in a small bowl.
Holding the cake on its side, roll in desired topping to coat frosting edges.
Serve or store in a sealed container.

Featured photo: Lemon whoopie pies. Photo by Michele Pesula Kuegler.

Strawberry whoopie pies with a secret ingredient

It’s almost strawberry season in New Hampshire. While we await their arrival, let’s make something full of strawberry flavor that doesn’t need fresh produce!

The key to the flavor in these whoopie pies is the freeze-dried strawberries and strawberry Jell-o powder. Freeze-dried berries are a go-to ingredient for me, but Jell-o is something I almost never use (a.k.a. my secret ingredient). However, as I tested (and retested) this recipe, I found that the Jell-o was the key to this strawberry-centric treat.

There are two ingredient notes for this recipe. First, be sure to use regular Jell-o. I did not test this recipe with the sugar-free version, so I’m not sure how it would impact the final product. Second, you can use any milk you have on hand. Whether you use almond, soy, full-fat, low-fat, etc., the recipe will be just fine.
Now enjoy a batch of these as we await the arrival of strawberries and the start of summer!

Strawberry whoopie pies with a secret ingredient
Makes 10 pies

CAKES
½ cup unsalted butter, melted and cooled
1 cup granulated sugar
2 large eggs
1 teaspoon vanilla
4 Tablespoons strawberry Jell-o powder
1¼ cup freeze-dried strawberries, ½ cup ground
1 teaspoon baking powder
1 teaspoon baking soda
¼ teaspoon table salt
2½ cups all-purpose flour
½ cup milk
red food coloring, optional

FILLING
½ cup unsalted butter, softened
2 cups powdered sugar
1¼ cup freeze-dried strawberries, ½ cup ground
2 Tablespoons milk
½ teaspoon vanilla

Preheat oven to 350 degrees.
Line a baking sheet with parchment paper.
Place melted butter and sugar in the bowl of a stand mixer, and beat with paddle attachment on speed 2 until smooth.
Add eggs, one at a time, mixing until each is fully incorporated on speed 2.
Add extract, Jell-o powder, strawberries, baking powder, baking soda and salt, mixing well on speed 2.
Use a spatula to scrape down the sides, and add 1½ cups of flour.
Mix on low; scrape sides with spatula, add milk, and mix until fully blended.
Add remaining cup of flour, and mix.
Add food coloring, and mix until fully combined.
Scoop approximately 1½ tablespoons batter, and place spaced evenly, onto parchment paper-lined baking sheet. (Will take two batches to bake all of the batter.)
Bake for about 15 to 20 minutes, or until cakes spring back when touched.
Allow to cool for 2 minutes on baking sheet.
Transfer to baking rack to cool completely.
TO ASSEMBLE
In a stand mixer combine butter, powdered sugar, strawberries, milk and vanilla extract; mix on low speed until combined.
Spread the flat side of 10 cakes with the frosting.
Top each with another cake.
Serve or store in a sealed container.

Featured photo: Strawberry whoopie pie. Photo by Michele Pesula Kuegler.

Stay in the loop!

Get FREE weekly briefs on local food, music,

arts, and more across southern New Hampshire!