Fall color is everywhere
New England is known worldwide for its fall color. People swarm here from all over, largely to see the color of our sugar maples. As a senior citizen I am legally entitled to drive around at 25 miles per hour, holding up traffic and enjoying every brilliant red tree I see. But I rarely do — I’m too busy in the garden, most of the time. But there is a lot more to see than maple trees.
For color I really enjoy the leaves of oaks and American beech. They hold on to their leaves much longer than the maples, often long into winter. Why is that? Probably because they have only migrated north after the last ice age, and where they came from — the American South — they did not have to drop leaves in the fall. That’s one theory I have read, anyway.
On sunny fall days the yellow leaves of beeches just glow. I enjoy them in the woods or alongside the road, but do not plant beeches or recommend them to others. There is a disease caused by the Neonectria fungus that is spread by scale insects. It mars their smooth gray bark and eventually kills the trees. So I advise enjoying them where you see them in the woods. Yes, there are systemic poisons you could apply to kill the scale insects and perhaps hold off the decline of an existing tree, but I don’t want poisons in my landscape.
Oaks vary considerably in their fall color. Deep reds, purples and browns are often mixed with reds depending on the locale, soil and species. Yellows and greens are often displayed on leaves, too.
One of the great features of oaks is their stamina: The “George Washington Oak” was only recently declared dead — at the age of 600 years. It grew in Bernards, N.J., and grew to have a trunk circumference of 18 feet and reach 100 feet tall. Oaks routinely live to be 300 years old if not abused by soil compaction and urban smog. Yet they are relatively fast growing when young: The pin oak can grow 12 to 15 feet in five to seven years.
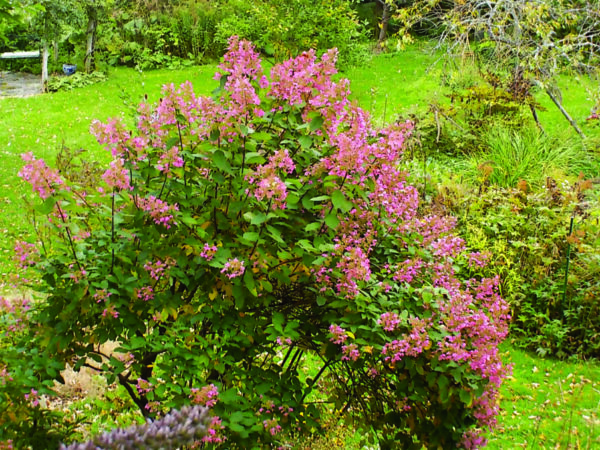
Although I am tremendously keen on promoting native trees and shrubs, I do believe we can have a few imports, and one of my favorites for fall color is a large shrub called disanthus. It is listed as a Zone 5 plant, but I have had one in my Zone 4 garden for at least 10 years. Mine is now nearly 8 feet tall and wide. In the fall the leaves turn a brilliant purplish red, as good as or better than that dreaded invasive, burning bush, that was so popular before it was listed as an invasive. In October some years (but not every year) my disanthus bush has tiny pink-purple blossoms that you will only notice if looking for them. They come right out of the bark, without stems.
Witch hazel is one of the few native trees that flower in the fall. It is an understory tree that will grow in shade, partial shade or full sun. It has yellow fall foliage that pretty much obscures the yellow blossoms until leaf drop in October or November. Then the blossoms become prominent. The blossoms have four strap-like curly petals that are less than an inch across. Witch hazel usually has many, many blossoms.
Scientists have only recently discovered what pollinates witch hazel. Bees and other pollinators are no longer buzzing around when they bloom. But witch hazel produces nectar and brightly colored flowers to attract insects. No one knew what pollinated them until naturalist Bernd Heinrich discovered that it is the night-flying owlet moth. Apparently that moth can raise its temperature by 50 degrees by shivering. If only that would work for me!
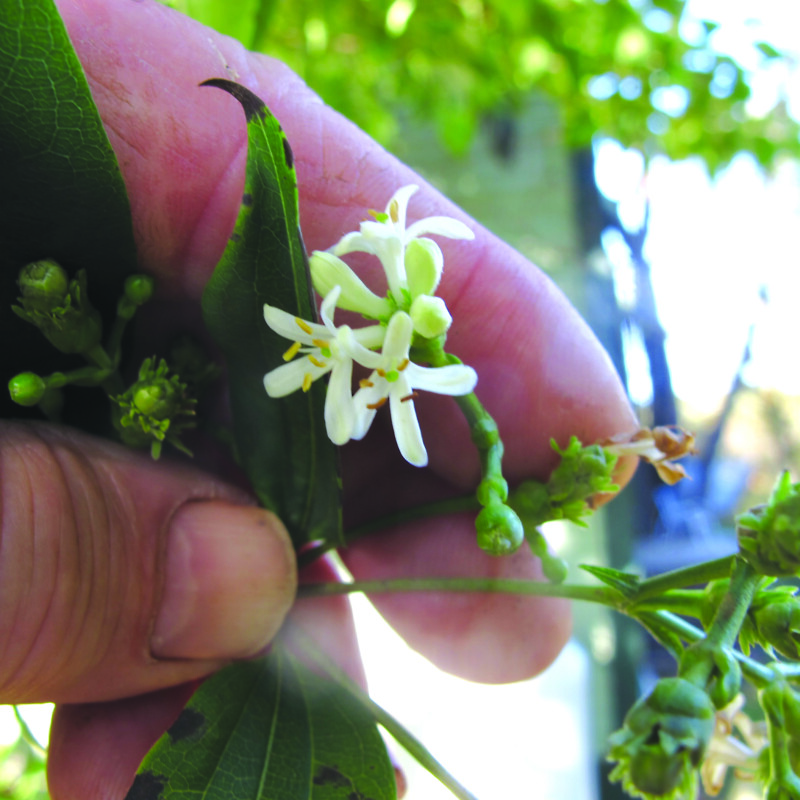
The seven-son flower tree is another fall bloomer. It was imported from China in 1907, but sales never took off. It was reintroduced in 1980 and immediately became popular for its fast growth (I have seen stems grow 6 feet in a year) and fabulous shaggy bark in winter. Its mature height is said to be 25 feet, but I keep mine to 15 feet with pruning. It will grow in full sun or partial shade.
This year mine was still blooming in late October. The blossoms are small, white, lightly fragrant and appear in clusters of seven at the ends of branches. Later, if there is no frost, the sepals turn pink.
There is one other tree I grow that blooms in the fall each year, usually in September, and then only a few blossoms at a time. It is a magnolia, a hybrid called Jane, one of the Little Girl series. It blooms first in late spring, and then re-blooms once a month or so with a few fabulous deep pink 4-inch blossoms, with a light pink interior.
Jane grows in six hours of sun or more in moist, rich soils. The leaves are deep green and glossy, good enough to put in a vase. It is listed as a Zone 5 plant but does well in Zone 4 for me. Because it blooms in late spring, frosts in April do not affect it. It is a small tree, perhaps 15 feet tall, with a nice rounded shape.
Spring and summer will always be the best seasons for flowering trees, but I like to extend the seasons with trees that flower and look good well into winter.
Featured photo: Heptacodium blossoms are small, but lovely. Courtesy photo. Courtesy photo.