Say no to pesticides

Why growing — and eating — organic is important

I’ve been growing vegetables organically all my life. I use no chemical fertilizers or pesticides. I don’t often think about the reasons I do so, any more than I think about breathing — it’s just something I do.

I recently picked up a book written by Maria Rodale called The Organic Manifesto: How Organic Farming Can Heal Our Planet, Feed the World, and Keep Us Safe (Rodale Press, 2010) and it reminded me why I do so. I’d like to share some of the important points with you here.

In the introduction Eric Schlosser (author of the fabulous book Fast Food Nation) presented some stark facts: American farmers use 1.2 billion pounds of pesticides each year — four pounds for every man, woman and child. Some of these pesticides — the organophosphates — were first developed in Germany in WWII as chemical weapons. The federal government does not require reporting of usage, and testing is done by manufacturers, not the EPA or USDA. Most food has some pesticide residue — except for organic foods, which shouldn’t have any.

One of Maria Rodale’s reasons for eating only organic food might surprise you: It has to do with climate change. Soils treated with chemicals, including fertilizers, do not have robust populations of microorganisms. Organic soils do. Key among these living beings are the mycorrhizal fungi that coat the roots of plants in organically tended soils. These fungi sequester huge amounts of carbon, taking greenhouse gases out of the atmosphere and holding it in the soil. But they are virtually non-existent in soils treated with chemicals. Grow organically? Eat organically? You are helping the environment.

Secondly, irrigation water for commercial agriculture, particularly in the West, uses large quantities of water, depleting aquifers and polluting ground water. When I traveled through the Midwest in the early 2000’s I was amazed that supermarkets designated entire aisles to jugs of water — no one wanted to drink from their own wells. And there is a dead zone in the Gulf of Mexico that is bigger than New Jersey caused by agricultural runoff of chemicals from conventional fields.

Children are particularly vulnerable to chemicals used in commercial farming. Rates of childhood cancers, asthma, diabetes, autism and other debilitating conditions continue to increase. Ms. Rodale attributes (with copious footnotes to scientific studies) many of these changes to the chemicals children consume. As she says, “Cheap food equals high health care costs.”

The “organic” label on food also means that no genetically modified organisms were used in producing your food. Back in 2010 when Rodale wrote the book, 91 percent of all soybeans and 95 percent of all corn produced in America was genetically modified to be tolerant of a weed killer called glyphosate, sold under the trade name Roundup.

There has been much controversy about Roundup, and whether it is harmful to humans. Ms. Rodale points out that Roundup cannot be washed off food: It has a surfactant that allows the chemical to penetrate the cell wall. And since corn and soy are used to manufacture many foods, from ice cream to baby food and ketchup, it is everywhere. The federal government does not consider Roundup a problem, though many scientists do.

Ms. Rodale never once, in this book, criticized conventional chemical farmers. Organic or conventional, she recognized their hard work and a desire to work their land and support their families. She recognizes that transitioning to organic farming takes time, money and education.

So what can you do? You may not be able to afford to buy nothing but organic food. But you probably can buy your meats from local farmers that do not use the feedlots of the Midwest that feed their cows and pigs antibiotics. And you can get eggs, as I do, from a local teenager who treats his hens well. (Thank you, Ian’s Eggs.)

For vegetables, you can probably grow some of what you require for vegetables in summer, or buy from a local farm stand. Many farmers are happy to tell you about how they grow their vegetables. The supplier of the local farm stand near me uses an approach called IPA or Integrated Pest Management. This method encourages farmers to use natural controls and to use pesticides only when a crop is threatened. They cultivate crops to root out weeds instead of spraying herbicides like Roundup.

But the bottom line is this: The more you grow organically, the better your soil will be. If you use only organic methods, you can avoid many chemicals in your food that might be present in grocery store foods.

I recognize that I cannot change the world with what I do. But I have learned to grow plenty of vegetables and to keep them for eating out-of-season. So think about a bigger vegetable garden this summer, and I will tell you about how to put food up for next winter when the time comes.

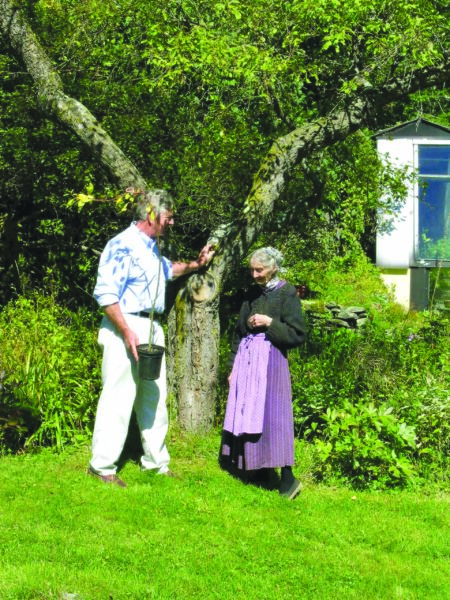
Featured Photo: Image courtesy of Henry Homeyer.

Winter survival

Help your plants make it through winter

If you are like me, you buy new perennials, trees and shrubs every year. Most plants sold locally are hardy, but not all. It’s good to know the “zone hardiness” of plants before you buy them, and how the zone maps work. In a nutshell, the colder the climatic zone, the lower the number.

The U.S. Department of Agriculture has created maps showing the climatic zones of all states and regions. They are based on many years of temperature records, and rate each zone according to the coldest average temperatures in each zone. Summer temperatures are not considered in creating the hardiness zones.

Each zone covers a 10-degree range of temperatures. The coldest zone in New England is Zone 3, which includes places where temperatures each winter range between minus 40 and minus 30 degrees Fahrenheit. Some maps include an “a” and “b” designation to further describe the zones. An “a” is 5 degrees colder than a “b.” So Zone 4a is minus 25 to minus 30, and 4b is minus 20 to minus 25.

Trees and perennial plants that survive in Zone 4, which includes much of Maine, Vermont and New Hampshire, should be hardy to minus 30 degrees, though we often only see minus 20 degrees. Zone 5 is minus 20 to minus 10, Zone 6 covers areas where temperatures range between minus 10 and zero, and Zone 7, which includes much of Rhode Island, temperatures only drop down to zero or 10 degrees above.

All that said, you can grow perennials, trees and shrubs that are not rated to be hardy in your zone. The key is to get them well-established before winter arrives and to provide them with growing conditions that are optimal: sun, soil and moisture levels that correspond to their needs. You probably cannot grow perennials and woodies that are rated for two zones warmer than yours, but one zone is generally possible.

Some trees and shrubs will survive in a colder zone but might not bloom every year. Or ever, for that matter. Here in Zone 4, old-fashioned wisteria vines that do well in Connecticut or Rhode Island will survive but their flower buds (which are set the summer before) are spoiled by our cold, so they do not bloom.

Harvey Buchite of Rice Creek Gardens in Blaine, Minnesota, wanted a wisteria that would bloom in his Zone 4 gardens. He was given a seedling on his wedding day 34 years ago, one started from a seed of a fairly tough hybrid. His turned out to be a wonder vine, and he named it the Blue Moon Wisteria and sold it for many years. It blooms reliably after winter temperatures of 30 below. The reason for its success? Blue Moon, unlike most other wisteria, blooms on shoots grown in the current season — on new wood.

I called Harvey Buchite in 2006 and he reported that even after hard winters it will bloom, and often three times each summer. I’ve had one since 2004 and get a very nice set of blooms each year around the Fourth of July. It usually re-blooms a little in the fall. Others have been developed since then that will bloom in Zone 4, including “Amethyst Falls,” which I grow and like even better.

Survival rates in a cold winter can be improved by mulching the roots of your delicate or borderline-hardy plants. I bought a Japanese andromeda this year, even though it is only hardy to Zone 5. In the fall I spread a thick layer of leaves around the base to keep the roots warm as winter approached. I could have used bark chips instead, which is also a good mulch.

Trees and shrubs extend their roots in the fall up until the ground freezes, and I wanted my little shrub to grow as big a root system as possible. And later, when temperatures drop to minus 20 and below, I wanted to keep the roots protected.

That andromeda was loaded with flower buds when I bought it. I may wrap it with burlap or landscape fabric to protect those blossoms from harsh winter winds, though I haven’t yet. In the long run it will have to survive on its own — I have too many plants to fuss over them all every year. The first year is always the most important — once established, plants are tougher.

Sometimes freezing and thawing of the ground will push a plant up and part way out of the soil. This allows roots to be exposed to the air, freezing and dehydrating. That is almost always lethal. But this usually only happens the first winter after planting. Check new plants after a thaw, and if a plant has popped up, push it back down and mulch it well.

Wrapping shrubs or small trees with burlap or a synthetic, breathable cloth will help to protect flower buds from desiccation and dieback. I find roses in my climate often are badly burned by winter winds, but I rarely do anything to protect them. I just cut back the roses to green wood in April or May, and they bloom nicely. I cut back a nice double red “Knockout” rose to the ground this past spring, and it rewarded me with dozens of blossoms all summer, starting in June.

I do lose some plants to winter conditions most years, but don’t feel bad about that. As I see it, I learn something each time one dies, and losing one plant means I can try a new one! Or, if a particularly loved plant does not survive in one location, I may buy another and plant in a different spot.

Henry’s book, Organic Gardening (not just) in the Northeast: A Hands-On, Month-by-Month Guide has been re-printed and will be shipped to people who ordered it soon.

Featured Photo: Blue Moon wisteria blooms on new wood, so is not bothered by cold winters. Photo by Henry Homeyer.

Know your trees

Winter is a good time to get outside and explore

This is a good time to be outdoors exploring the fields and woods. There is so much to see that will be buried in snow later on. But, you may ask, what is there to see? Trees, winter weeds, animal footprints, signs of insects, shelf fungi on trees, evergreen woodland plants and more. If I had to choose one person to show me the outdoors in winter, it would be Donald W. Stokes, who wrote A Guide to Nature in Winter, which covers all these topics and more.

I find that learning the names and characteristics of plants and animals makes them more interesting. Many people look at all evergreen conifers and call them “pine trees.” But if you know the difference between a white pine and a Canadian hemlock or a balsam fir, you can decide whether you want to grow one or the other on your property.

Donald Stokes’ book explains that if you learn to identify the six most common deciduous trees and the six most common trees with needles or cones, you will know 80 percent of the trees in most northern forests. And you can do this in winter. Bud location, size and shape are good indicators for identifying trees.

1. Maples. As on ash trees, the buds, branches and, later, leaves are arranged opposite each other, while most other trees alternate the location of them on stems. Maples have oval buds that are between ¼ and ½ inch long.

2. Ash. Buds on ash trees are larger than maple buds and are dark and dome shaped. The twigs on ash trees are generally thicker than on maples.

3. Oak. These have clusters of buds at the end of each branch, and the younger trees often hold onto their brown leaves through the winter. Buds and branches appear in an alternating pattern.

4. Beech. The buds on beech are long and pointy. But the most distinguishing characteristic is its smooth, gray bark. There is a beech fungal disease that can mar the bark, making it look like a bad case of acne.

5. White Birch. Most people can recognize white birch by its bright white and peeling bark, but other birch species can have golden or greyish bark. The bark also has long horizontal lines marking it, and they often have catkins hanging from the tips of upper branches.

6. Poplar, also called aspen. These trees tend to grow in clumps in places with poor soil. The upper bark has a greenish tinge, and their buds are variable in color but always have sharp, pointy ends.

Then there are the evergreens:

1. Pines. They have clumps of needles in groups of two, three or five. White pine, the most common, has groups of five long, soft needles.

2. Hemlock. These trees have short (1/2-inch) soft needles with two white lines on the underneath side. There is a short stem between needle and twig.

3. Balsam fir. One-inch needles, also with two white lines underneath but no stem between needle and twig.

4. Cedar. Small, scale-like needles arranged along the twigs.

5. Spruce. Four-sided needles that are uncomfortably sharp to the touch.

6. Larch. No needles in winter, but cones may be present. Stubby twigs on branches.

After that basic list of characteristics, the Stokes book provides interesting details about the various species of trees, and differences within a genus. So, for example, he explains that most wooden sports equipment and the handles of our garden tools are made from ash because it is strong, relatively light, and flexible. And he notes that sycamores, known for beautiful variegated bark, are often hollow when large, and home to nesting mammals like raccoons and skunks.

I was fascinated to read that willow seeds, if washed away and deposited on a muddy bank (in spring), can germinate in two days and grow seven feet during the first year.

Poplars or aspen are often the first trees to grow after land has been burned or damaged by construction of roads. They often appear in clusters, as new trees pop up from the roots. They are not long-lived like maples or oaks, which can live hundreds of years: poplars, Stokes noted, generally last no more than 80 years, and frequently less.

Did you know that the sounding boards of many musical instruments are made of spruce? Stokes points out that it is especially clear of knots and imperfections, and resonates better than other woods.

If you pay attention to your trees, you will learn to identify them by shape and bark. Sugar maples, for instance, have nice rounded tops and older ones have craggy bark. I can identify a white pine from a fast-moving vehicle: branches on the lower part of the tree droop downward, upper branches reach for the sky.

So head outdoors and study the trees along a woodland path. And bring along A Guide to Nature in Winter. Almost anyone will learn something from it in no time.

Featured Photo: Birches have horizontal lines on their bark. Photo by Henry Homeyer.

2020 gardens

What worked last year and what didn’t

This past year was a tough one for many of us: isolation due to Covid-19, political turmoil, employment interruptions and more. But in the garden? For me, it was pretty good, overall. It was a very dry summer, but that meant that there were fewer fungal diseases on my tomatoes and phlox. Since a small stream passes through my property the water table is high, and my established plantings did fine with little supplemental watering.

Let’s start in the vegetable garden. What tomatoes did best for me? For sheer production, it was one called “Big Mama.” She is shaped like a plum tomato, but three times the size or more. Flavor-wise it was not spectacular for fresh eating, but it was great for making sauce. I got seeds from Burpee.

My best-flavored tomato? One I bought as a seedling called Hungarian Heart. It is a big, juicy tomato that makes any sandwich memorable. I ate them for breakfast, lunch and dinner when I had them. Seeds for this heirloom tomato are available from The Seed Savers Exchange or Burpee seeds. And since it is an heirloom, you can save seeds from this year’s harvest to use next year.

Equally tasty is a perennial favorite of mine, the Sun Gold cherry tomato — early, relatively disease-free, highly productive. It’s a modern hybrid, so you’ll need to buy seeds or plants every year. But buy them early: They sell out fast. They’re great for snacking or in salads. I also dehydrate them by the hundred and use in soups, stews and salads all winter.

Best-looking early tomato? Blue Beauty. It starts out blue but ripens to be a red tomato with black shoulders. Very productive with six- to eight-ounce tomatoes and a nice flavor. Hybrid. Seeds available from Pine Tree Garden Seeds.

Best annual flowers? My wife Cindy ordered 18 dahlia tubers last winter, and we started them indoors last March in 12-inch pots. We grew them under lights until mid-June, when the soil was warm enough to please this heat-loving flower. They grew purple, pink and white six-inch blossoms on six-foot-tall plants. We had more dahlia plants than any normal people would want, and even after we gave away a few we had a forest of them.

These big plants had to be staked, and the only thing strong enough to support them were one-inch-square hardwood grade stakes, five- or six-footers. We dedicated one eight-foot by three-foot flower bed to them and scattered a few plants elsewhere.

For years I have been trying to find the perfect spot for a nice flowering shrub called Carolina allspice or sweetshrub. I moved it this year for the third time, and finally found a good spot. About 10 years ago I planted it in full sun with moist soil, and the leaves burned. Then I put it in shade, and it didn’t flower much. This year I moved it to a drier location in dappled shade under a pear tree. It grew well and appears to have settled in *well.

Sweetshrub produces nice burgundy flowers in late June. Some varieties are very fragrant. Mine is not. (Note to self: Buy flowering plants when in flower if they are supposed to be fragrant.)

We had a fierce windstorm in 2020 and it partially tipped over a 15-foot catalpa tree that we’d had for three years. I was able to push it back up to vertical position but worried that it was unstable. I tied it to three stakes for a while. Then I had the idea to place a large stone over the root ball on the side that had lifted up. That really stabilized it, and I removed the ropes, which had begun to dig into the bark. So far, so good, despite strong winds this fall.

For years I have been frustrated by weeds that infested a walkway through a terraced area for flowers. Goutweed and creeping grasses were seemingly impossible to eradicate, especially since the roots could hide under the large flat stones I had used as stepping stones. This year my wife, Cindy, decided to make it better.

First we removed all stepping stones and she dug out the weed roots. She hired three teenagers to wheelbarrow away the soil and help with the digging as she excavated the path. They dug out a pathway about eight inches deep, two to three feet wide and 80 feet long. They then put down six inches of one-inch crushed stone and covered it with landscape fabric. Then they edged it with bricks standing on edge and filled it with rounded pea stones about half an inch across.

The project was a huge success: For the first time ever, we had no weeds in the walkway. Not one, all summer. Stone, with no soil mixed in, will not grow weeds and the bricks kept soil in the beds from getting into the pathway. We will be on the lookout for scraps of goutweed that might pop up at the edges of the walkway next year, but the landscape fabric will keep any scraps of root from sending up shoots.

Each year is different. Each year certain flowers or vegetables are supremely happy, and others sulk. That’s part of the fun of gardening: remembering the good, learning from the bad, and looking forward to the next year. My best wishes to you all for 2021.

Featured Photo: Calycanthus or sweetshrub is a shade-loving shrub I love. Photo courtesy of Henry Homeyer.
Pops of color

How to make cut flowers last

Snow is finally here in Cornish Flat. The cardinals and blue jays are providing a little color to an otherwise unremarkable world. The sun is lurking behind gray clouds, and on a good day we get nine hours of light. I do miss the colors of summer. I still keep fresh cut flowers on our table — just not flowers from my garden.

Cut flowers are among modern America’s true bargains. For the price of a bottle of wine — or a few cups of fancy coffee — you can buy flowers that will grace your table for up to three weeks. But there are some things you should know about getting good table-life for your investment.

Where you buy your flowers may affect how well they last. A floral shop or a good Food Coop has trained personnel who trim each stem in the store every other day. And someone who regularly changes the water to keep it fresh. Chain grocery stores probably count on you buying their flowers before the flowers need to be trimmed or their water changed.

In either case, you should cut off half to three quarters of an inch from each stem before you put them in a vase, and change the water regularly. Never let leaves sit in the water. Leaves will rot, promoting growth of bacteria, which will impede water take-up. Ask for the little packets of powder that florists provide, and add that to the water to prolong the life of your flowers. A couple of drops of chlorine bleach may work, too.

Keep your arrangement cool if you can. Putting it near a radiator or woodstove will shorten its life. If you’ve invested in roses or tulips, you may wish to move the vase to the entryway or mudroom at bedtime to keep the flowers extra cool during the night.

Some flowers are better picks than others if you’re on a budget and can’t afford to buy new flowers every week. Here are my recommendations for good cut flowers:

Alstroemeria: Each long stem has clusters of two-inch lily-like blossoms in pinks and reds, with yellow throats. Very long-lived. Great value. Most grocery stores sell them inexpensively.

Chrysanthemums: These come in a variety of sizes and colors, from the huge spider mums to little guys. I love the scent of the flowers — it’s not overpowering, but it’s there if you sniff them.

Lisianthus: These look like silk flowers to me: perfect white, pink or lavender-colored bell-shaped flowers on long stems. Tough to grow in the garden, they are perfect in a vase — I’ve kept them for up to 3 weeks.

Miniature carnations: Each stem has two to four blossoms. They come in a variety of colors. Mix dark red “minis” with red roses to make a bouquet of roses look fuller. And even after the roses go to Valhalla, the carnations will still be good!

Baby’s breath. Tiny white pompoms are great on their own or mixed with colorful flowers. I have kept them in a dry vase for months.

Statice: I grow these for use as dry flowers, which tells you that they really do last forever, even out of water. They come in blue, purple, pink and white. You can put them in a dry vase and they will last all winter.

Spray roses: Instead of a single blossom per stem, these have two to five blossoms, giving you more bang for your buck. Will last about a week with proper care.

Orchids: While not cheap, orchids can last up to a month. I love dendrobiums, though they are not common, even in floral shops. Cymbidiums have bigger blossoms but also last extremely well. And of course you can buy potted ones, which bloom even longer and can be coaxed to rebloom next year if you put in the effort to keep them happy.

Kangaroo paws: These Australian natives are fuzzy and cute. They come in pinks, reds and browns, and last very well. Not every florist will have them. I grew them in a pot on the deck one year and love them — like teddy bears on a stem!

It’s possible to change the colors of cut chrysanthemums. Here is what has worked for me: leave a few stems of a white mum out of water for 12 hours, then cut off two to three inches and put it in water with food coloring. Try it with a few stems, to see if you like the results. Put eight drops of food coloring in a glass with just an inch of water.

When I tried it with blue food coloring, my white mums had turned color — but not the true blue I wanted, more of a ghastly greenish blue. Still, if you want to have some fun with your kids, this is an easy way to show how water and dye move up a flower’s stem.

Everyone loves to receive the gift of cut flowers, even guys. So treat your loved one — or yourself — to fresh flowers this winter. They’re cheerful, and can make winter less oppressive for gardeners.

Featured Photo: I grew Kangaroo Paws in a pot last year, and they are fabulous. Courtesy photo..

Winter chores

Still a few things left to do in the garden

Our gardens are put to bed for the winter: Veggie stalks are pulled and composted, perennials are cut back, weeds pulled, leaves raked. But I’m not done quite yet — and you might have a few chores left to do, too.
Young trees, especially young fruit trees, are often targeted by voles in winter. If they chew all the way around a tree, removing bark and the cambium layer beneath it, the tree will die. This is called girdling and happens most often in winters with deep snow because rodents live beneath the snow and are less likely to be caught by owls or other predators.
To prevent girdling, you need only surround young trees with a protective shield of “hardware cloth” made with quarter-inch wire mesh. It is sold at hardware stores and comes in rolls of various widths. I use 24-inch-wide hardware cloth and cut it with tin snips. It is too tough to cut with scissors. I cut pieces that will go around the trunk and overlap a little, and tie it with wire or string. I squeeze the top after encircling the trunk so that no ambitious mice can drop down from the opening.
Another rodent-related task is to protect my riding lawn mower from mice that want to spend the winter inside the air filter. They have done that in the past, causing problems. Now? I just put a few moth balls in a sock, lift the hood, and lay it inside. It keeps away the mice.
I have already winterized my mower. This means I added something to prevent the gas from going flat during the months of non-use. I use a product called Sta-Bil. Add it to the gas, then run the engine for five minutes. Come spring, my mower starts right up.
If your garden isn’t covered in two feet of snow, it might be useful to go outside with a clipboard and pencil to draw this year’s vegetable garden. Right now I still know where everything was. Come spring I might not remember exactly where the leeks or beans were.
I use wide raised beds for my veggies and leave them in place from year to year. It is good to pick a new spot each year to plant the regulars — tomatoes, potatoes, squash, etc. I like to rotate plantings so that insects and diseases are less likely to find their favorites. Rotation doesn’t stop diseases or pests, but it makes sense to minimize them by moving crops from year to year. In small gardens this is almost a futile effort and even in large gardens you will have tomato diseases each year no matter what you do.
I don’t believe in pampering my plants. They have to make it on their own, without too much fussing from me. So I have never been one to build shelters over shrubs to shelter them from cold winds or ice falling off the roof. I don’t plant shrubs beneath the drip line of the house.
This year I got a small cutleaf Japanese red maple and planted it about 10 feet from the dripline of my house. It was a perfect planting spot except for one thing: When the relatively flat roof of the house is shoveled after a foot or more of snow, the ice and snow could land on it — after a 30-foot drop. Yikes. I decided to build a simple shelter for it, as I had spent $125 on the tree and don’t want it broken.
Here is what I did: I got four five-foot-long wooden grade stakes and a piece of half-inch plywood. I had a scrap of plywood 60 inches by 40 inches, and cut it in half to create two pieces 30 by 40 inches. I painted the plywood to keep it from delaminating, and then screwed the plywood to the stakes. I left two inches of each stake clear at the top before attaching the plywood, and drilled holes sideways through them.
To set up the shelter, I pushed the bottom of the stakes into the soil at an angle, meeting in the middle over the small tree. Then I tied them together with a strand of copper wire going through the holes I had drilled in the stakes. It seems sturdy and strong enough to deflect any snow pushed off the roof.
I have a number of hand tools with wooden handles that are 50 to 75 years old, tools that my parents and grandfather used and that were passed on to me. I treasure them. To keep them in good condition, I clean and oil those wooden handles and recommend you do yours, too. First, I wipe off any soil from handles and blades. Blades get brushed with a wire brush if needed. Handles get a quick touch-up with fine steel wool or sandpaper if there are rough spots. Then everything gets wiped down with a rag moistened with boiled linseed oil. That oil is available at hardware stores. The oil on metal parts will minimize rusting. Motor oil would work, but I don’t want it going in the soil next spring.
An old saying goes, “A woman’s work is never done.” That’s true for gardeners regardless of gender. I’m sure I will find something else to do that is not on my list. Meanwhile, I can dream of finding time to read good books by the woodstove.
Email [email protected].

Featured Photo: Wire the 2 sides of the A-frame together. Courtesy photo.

Stay in the loop!

Get FREE weekly briefs on local food, music,

arts, and more across southern New Hampshire!