
Help yours survive and thrive
I’ll have to admit that I see many fewer volcanoes of mulch snuggling up to trees in public places. I think the word is out, at least with municipal workers, that trees can be damaged or killed by over-exuberant mulching. Among homeowners? I’m not so sure. Let’s take a look at the problem.
Tree bark is wonderful stuff: No matter the weather, bark protects its tree from rain, snow, cold or drought. But it is only rated for above-ground use. Bury tree bark, or cover it with mulch, and microorganisms will break it down and attack the green layer of cambium beneath the bark.
So what is this cambium layer? It is an active, growing layer of cells that produce the phloem and xylem tissue that provide for the transportation of necessary liquids and that provide mechanical strength. If the cambium layer is destroyed, the tree will die — but not right away. Most experts say that if the cambium layer is compromised, it can take six to 10 years for a tree to decline and die. First signs of the problem include tip dieback — top branches losing leaves — and earlier fall color than previously seen.
When you mulch around a tree, you should leave space between the tree trunk and mulch. Some say, leave a doughnut hole around the tree. How much? Four to six inches is good, depending on the size of the tree. Bigger tree, bigger space. And even if you have started with a mulch-free space around the tree, don’t assume there is still a space. Go look. Gravity works 24/7, and rain and wind can move mulch a little.
Don’t get me wrong: I am not against mulching around trees. It serves two important functions. It keeps down weeds, and it keeps away exuberant guys (usually) with weed whackers. No mulch? That guy with ear protection and a raging string trimmer can girdle your tree in a heartbeat. And that would be as bad as letting mulch slowly rot the bark.
By pulling away the bark mulch, you can save the tree. I have removed mulch and seen damaged bark. But if the cambium is still functioning, the tree can recover, and I’ve seen that, too.
There is another way that the cambium layer can be compromised: covering the trunk flare with soil at planting time. Burying the portion of the tree that should be above ground will lead to a slow death.
Growing trees is an industry. Americans buy hundreds of thousands every year. They are sold at local family-run nurseries and big box stores, but they’re often started in nurseries in the warmer regions of the United States. Trees are often grown in fields, like corn, and then lifted and potted up to be sold to your local nursery.
If you ask how deep to plant your little tree, the most likely answer (from my informal survey of homeowners) is “Plant it just like it is in the pot.” But that is generally bad advice. The process of taking a field-grown tree and getting it into a plastic pot is not precise. Time is money, so trees are often plunked in containers with little regard for the depth they were growing in the field. The trunk flare (that part that should be above ground) is often buried.
To recognize the trunk flare of a tree, go outside and look at a tree planted by Mother Nature. You will see at the base of a tree that there are above-ground roots heading away from the tree, and that the base of the tree widens just above ground level. That wider portion is the trunk flare and must be above ground.
Before planting a tree, take your fingers and pull away the soil from the tree trunk at the surface until you can see the trunk flare. If the tree has been in the pot for a few years (often the case for larger trees) and the flare has been covered, little roots have started to grow out of the trunk flare and should be cut off.
Larger trees for sale at nurseries have often been moved from their original pots or bags to larger ones. At that juncture, soil is added, and it often covers the trunk flare. I have planted trees that came from the nursery with four to six inches of soil over the trunk flare. By removing that, I saved the trees.
What should you do if you planted a tree without regard to trunk flare? Take a look at it carefully. If your tree trunk is as straight as a telephone pole at the soil surface, you need to do some digging. You need to expose the trunk flare.
I like to use a single-tine hand tool called the CobraHead weeder (CobraHead.cm) to expose the trunk flare. I gently and slowly loosen soil and pull it back with my hands. In fact, I use my fingers as much as possible, as I don’t want to damage the bark on the trunk flare. Once you see the flare, re-grade the soil around the tree trunk. It is not as scary a proposition as it sounds.
Trees are our friends. You have to be sure they are properly planted and tended, so go look at yours. You may have to do some work on the next warm day.
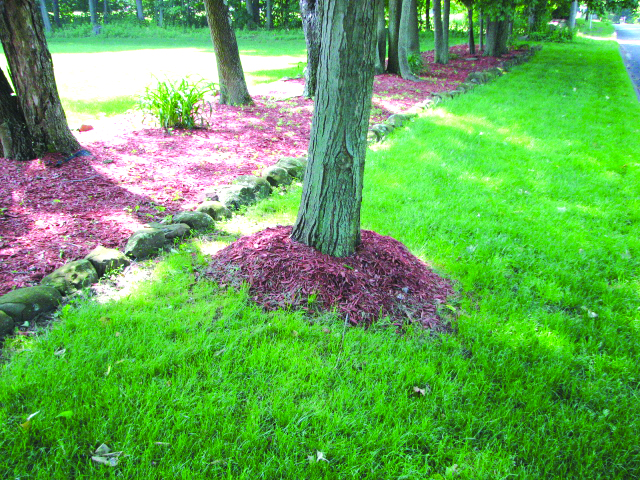
Featured Photo: Don’t create mulch volcanoes like this. Courtesy photo.