Summertime, but the livin’ isn’t easy
As the song goes, it’s “summertime, and the livin’ is easy!” Well, not really. Yes, I’ve planted my 53 tomato plants, 200 onions and more, but there is still plenty to do. Let’s look at a few chores you might want to do this weekend.
Your tomatoes need support. If they lie on the ground or even on a nice bed of straw they are more prone to diseases. They need air and sunshine to stay healthy and to ripen up sooner.
I like wire tomato cages as supports. I recommend getting the biggest cages possible: 54 inches tall with four support legs instead of three. They are expensive but last for many years. Right now your tomatoes are short and standing up on their own. But if you wait too long they will be much more difficult to install. Do it now!
If you grow a lot of tomatoes and don’t have the budget to buy nice cages, you can tie them to wood stakes. Get one-inch hardwood “grade stakes.” Five-footers are best because you need to push at least a foot into the ground. Tie the plants to the stakes with something soft: strips of old sheets work well, or pantyhose. If you use string it may bite through the stems when they are loaded with fruit. You will need to add more ties as the plants get taller.
As your tomatoes get mature, you may notice that lower leaves are turning brown. This is probably early blight, a common soil-borne disease. It is not fatal but reduces your fruit production. You can minimize by doing two things: cut off affected leaves, and mulch the soil to minimize splash-up. Grass clippings, leaves or hay will help. They also keep the roots more moist in dry times.
If you are growing carrots or beets, this is a good time to thin them. You really should thin them by the Fourth of July. It is tedious work, which is why many seed companies are selling “pelleted’ carrot seeds. These are seeds that are coated with a clay covering to make them larger and easier to plant an inch or so apart. Beet seeds are actually seed clusters: several seeds are in each “seed.” So even if you spaced them carefully, they need to be thinned.
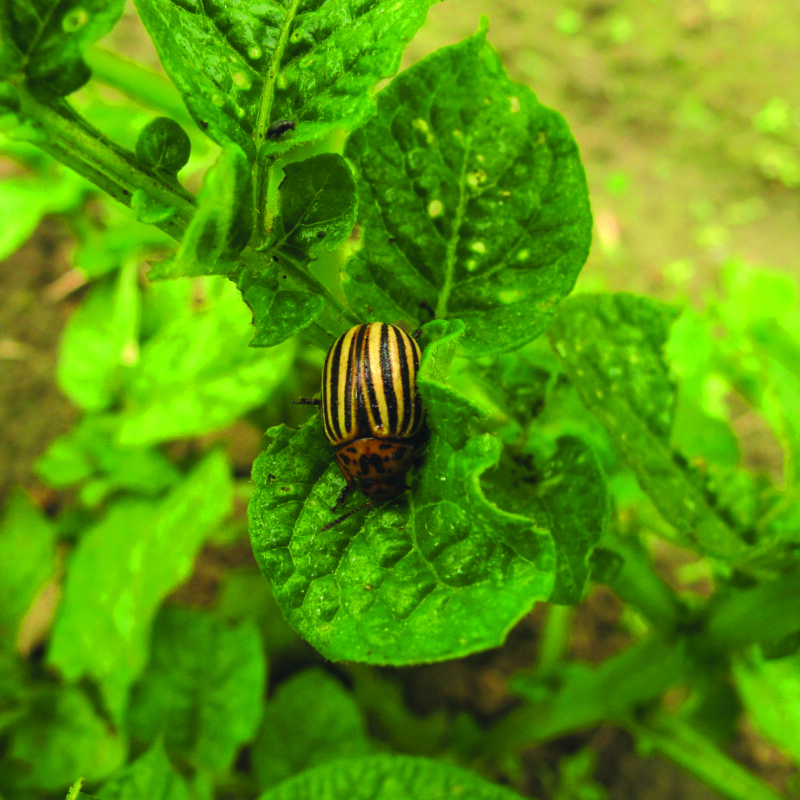
If you planted potatoes, now is the time to look for potato beetles, or their eggs on the underneath side of the leaves. The egg masses are bright orange and easy to spot. Scrape off the eggs into a jar of soapy water. If you see the beetles or their larvae eating the leaves, get them into the water, too. By reducing their population now you will reduce their exponential increase in numbers.
This is a good time to plant parsnip seeds because they need warm soil to germinate. Keep in mind that the seeds do not keep well, so do not plant last year’s seeds. Most garden centers probably still have parsnip seeds because they are not a terribly popular crop. But they store well over the winter — just leave them in the soil. I love them as an early spring treat: just boil them up, then serve them with butter and maple syrup. Yum! And don’t get discouraged if they take 2 full weeks to germinate; they are very slow.
I am eating lettuce from my garden that I planted early in the spring. That means it is time to plant some more seeds. Lettuce bolts when the summer gets too hot, which means that it elongates (reaching for the sky) and turns bitter before flowering and producing seed.
But there are summer varieties that are heat-resistant. Of the butterhead lettuces, try Skyphos or Buttercrunch bibb. Oakleaf lettuces such as Magenta do well, and a romaine called Jericho does well in heat. Read the packages well or study a catalog.
Plant mid-summer lettuces where they get morning sun and afternoon shade if you can. You can also use shade cloth to protect against strong afternoon rays. Perhaps you can plant seeds in six-packs to get them going, then transplant them in your tomato patch where the big plants provide some shade.
Pesto season is coming up in August, so plant some more basil by seed if you don’t already have enough planted. I like planting seeds in small pots to get them well established before planting them in the garden. But if you want a lot for pesto, dedicate a 6-foot row and plant plenty of seeds. They will do fine, even if a bit crowded.
Look around your garden now to see what you forgot to plant. For me this year, it was dill. No matter. I shall plant some by seed, and it will grow vigorously in the heat of summer.
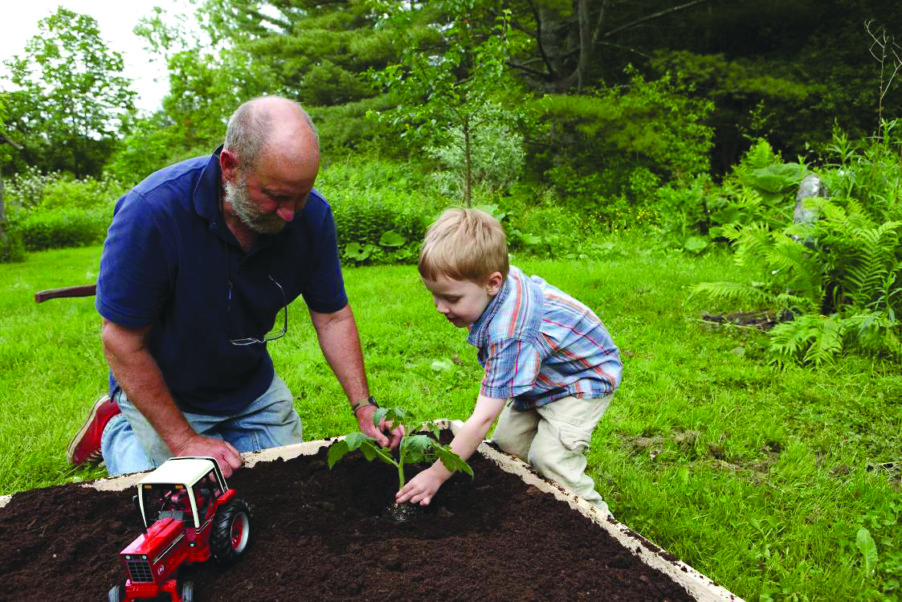
If you have run out of space in the garden, think about creating a raised bed for those last-minute plantings. Most garden centers sell metal corners to help you build your own raised beds, even if you aren’t a carpenter. Not only that, your local lumber yard will cut the boards to your specifications at no extra charge. All you need is a cordless drill and some outdoor screws to put a bed together in no time.
Don’t forget a few annual flowers in your vegetable garden to attract bees and butterflies. Most garden centers still have plenty of flowers that are in bloom and ready to plant. Just remember to tease the roots apart before planting now, as the little cells are often root-bound. So get outside, and get busy. It’s summer!
Featured photo: Hand pick Potato beetles and look for orange egg masses on underneath side of leaves. Photo courtesy of Henry Homeyer.