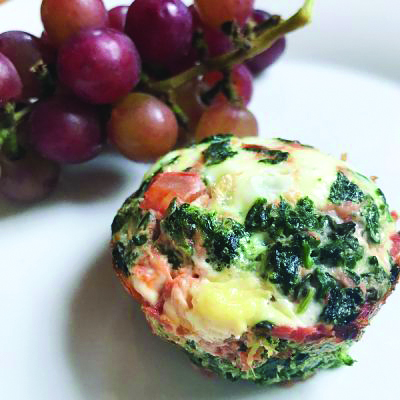
Spinach and salsa egg white muffins

After five weeks of baked goods, it seems like a good time to switch to a healthier dish.

This week I have an utterly healthy recipe that can be used as a breakfast or brunch dish, as well as an afternoon snack. You also can make a batch of these egg white muffins in advance and store them in the refrigerator to be eaten later. They are perfectly fine when served cold but also can be quickly warmed in the microwave.

There are only three ingredients to this recipe. In fact, there is a good chance you already have all of them at home. Frozen spinach is key for keeping it simple; if you prefer to use fresh spinach, you should cook it before starting this recipe. For the egg whites, I prefer to use whole eggs and save the yolks for another recipe. If you want to use a container of egg whites, you need about two tablespoons per muffin cup. Finally, the salsa can be whatever degree of heat you prefer, but try not to use one that is too watery, as it will interfere with baking.

While it’s not included in this recipe, you absolutely could add a tablespoon or two of shredded cheese to each cup. However, these muffins are so tasty as is, the cheese really seems unnecessary.

As you will soon discover, healthy eating can be quite tasty!

Spinach and salsa egg white muffins
Makes 8

1 10-ounce package frozen spinach
8 large egg whites
1/2 cup salsa, divided
Salt & pepper

Preheat the oven to 350 degrees.
Defrost spinach and squeeze out excess liquid.
Coat a muffin pan thoroughly with nonstick spray.
Divide spinach among 8 muffin cups.
Place one egg white in each cup.
Top with 1 tablespoon of salsa.
Season with salt and pepper.
Using a fork, mix spinach, egg white and salsa in each cup.
*If you are using a 12-cup muffin pan, place 1/4 cup water in each empty cup to ensure even baking.
Bake for 25 minutes or until the egg whites are fully set.

Featured Photo: Spinach and salsa egg white muffins. Courtesy photo.

Cheddar and chive scones

It is yet another week of baking, but this week has a different spin. These are savory scones. For the first 10 to 15 years that I made scones they were always sweet. Then my sweet tooth diminished, and I began to consider alternate fillings.

Even though they are savory, these scones still make a fabulous breakfast dish. Serve them alongside or even underneath the eggs that you are making for a weekend breakfast. Or you could serve them at dinner as a side with a bowl of soup or stew.

This recipe is pretty straightforward, especially if you got through last week’s sweet scone recipe. The ingredients shouldn’t need modification, except for the buttermilk, so I’ve left the same note at the foot of the recipe.

Here’s to a delicious, savory baked good that works at almost any time of day!

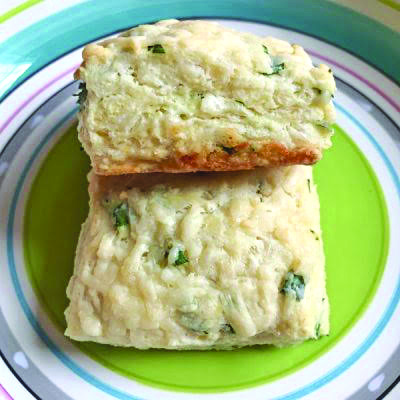
Cheddar and chive scones
Makes 8

2 cups all-purpose flour
1 Tablespoon granulated sugar
1 teaspoon baking powder
1/2 teaspoon baking soda
1/2 teaspoon salt
5 Tablespoons chilled, unsalted butter, diced
3/4 cup buttermilk*
1 large egg yolk
1/3 cup minced chives
1 3/4 + 1/2 cup shredded cheddar cheese
1 Tablespoon milk
Flaked sea salt

Preheat oven to 400 degrees.
Mix flour, sugar, baking powder, baking soda and salt in a large bowl.
Add butter.
Combine butter and dry ingredients using a pastry blender (or two forks) until butter is reduced to the size of grains of rice.
Whisk buttermilk and egg in a 2-cup liquid measuring cup or small bowl.
Add liquids to dry ingredients; mix until dough forms a ball.
Stir in chives and 1 3/4 cups cheese.
Place dough on a lightly floured surface and press into an 8-inch square.
Brush the top of the square with milk and sprinkle with remaining 1/2 cup cheese and a pinch of sea salt.
Cut into 16 squares.
Transfer squares to a parchment paper-lined, rimmed baking sheet.
Bake for 15 to 20 minutes or until the scones are crusty on top and a tester inserted into the center comes out clean.
Serve warm with butter for an extra treat.

*In lieu of buttermilk, you can combine 1 tablespoon lemon juice and enough milk (I’ve used both cow and almond milks with success) to equal 3/4 cup. Allow to sit for 5 minutes before using in the recipe.

Featured Photo: Cheddar and chive scones. Courtesy photo.

Blueberry and white chocolate scones

Last week might have been the end of my three-part biscotti series, but it was not the end of my baking theme. As we head toward spring, we know there is still some winter weather in our plans. Why not ward off the chilly feel with a homemade baked good to start a weekend morning? That is where these blueberry and white chocolate scones come into play.

What makes these treats a wonderful start to the day is the small amount of time and effort required. From gathering ingredients to taking your first bite is about 45 minutes. Better than driving to your local bakery, you can make these in your pjs and enjoy the amazing aromas as they bake!

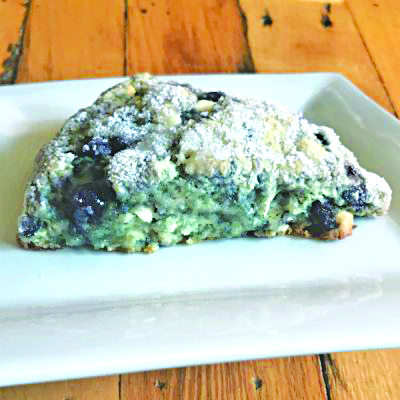
A few cooking tips for this recipe: If you use frozen blueberries, expect your dough to have a blue hue. It’s just aesthetic, not a big deal. You don’t have to buy buttermilk to make these scones. It can be hard to find a container that small. Check the bottom of the recipe for my shortcut. Finally, if you have salted butter, it will work. Just reduce the salt from 1/2 to 1/4 teaspoon.

Let the baking continue!

Blueberry and white chocolate scones
Makes 8

2 cups all-purpose flour
1/3 cup plus 2 Tablespoons granulated sugar
1 teaspoon baking powder
1/2 teaspoon baking soda
1/2 teaspoon salt
5 Tablespoons chilled, unsalted butter, diced
3/4 cup white chocolate chips
3/4 cup blueberries fresh or frozen
3/4 cup buttermilk*
1 large egg yolk
1 teaspoon vanilla

Preheat the oven to 375 degrees.
Mix flour, 1/3 cup sugar, baking powder, baking soda and salt in a large bowl.
Add butter.
Combine dry ingredients and butter using a pastry blender (or two forks) until the butter is reduced to the size of grains of rice.
Add white chocolate chips and berries to flour mixture, tossing gently.
Whisk buttermilk, egg yolk and vanilla in a 2-cup liquid measuring cup or small bowl.
Add liquids to dry ingredients, stirring until the dough forms a ball.
Place dough on a lightly floured surface and press into an 8-inch round, using well-floured hands.
Cut into 8 wedges. Sprinkle with 2 tablespoons sugar.
Transfer wedges to a rimmed baking sheet, preferably lined with parchment paper.
Bake for 15 to 20 minutes or until the scones are crusty on top and a tester inserted into the center comes out clean.
Serve warm.

*In lieu of buttermilk, you can combine 1 tablespoon lemon juice and enough milk (I’ve used both cow and almond milks with success) to equal 3/4 cup. Allow to sit for 5 minutes before using in the recipe.

Featured Photo: Blueberry and white chocolate scones. Photo by Michele Pesula Kuegler.

Sweet strawberry biscotti

It’s the third and final week in my biscotti series. This week’s recipe is meant to remind you of summer. By March we are all hoping winter is nearing its end but know that summer is far away. These strawberry-filled biscotti are the perfect escape from the cold, at least for a few bites.

Like all biscotti recipes, these sweet treats require two rounds of baking: first as loaves, then as individual slices. This does mean that the recipe takes over an hour from beginning to end, but the majority of that time is spent waiting for the biscotti to bake. It really is a simple-to-make dessert.

As for ingredients, the freeze-dried strawberries are key. Just like with last week’s recipe, you don’t want to use fresh, as they have too much moisture. Another important reason to use freeze-dried is the strong pop of flavor they have. For the white chocolate, chips are what I use, but you also could buy a bar of white chocolate and chop it into little pieces. Either will work just fine.

As we muddle through March with its possibly snowy, rainy, chilly weather, why not make some biscotti to make everything season so much more pleasant?

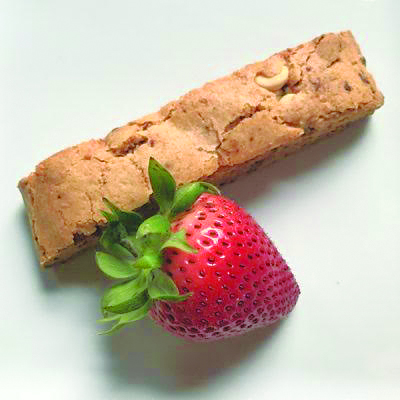
Sweet strawberry biscotti
Makes 28

1/3 cup butter softened
1 1/4 cups granulated sugar
2 eggs
1 teaspoon vanilla extract
1 teaspoon baking powder
1/4 teaspoon salt
2 cups all-purpose flour
2 cups freeze-dried strawberries
1/2 cup white chocolate chips

Preheat oven to 350 degrees.
Combine butter and sugar in the bowl of a stand mixer; mix on speed 2 for 2 minutes.
Add eggs, one at a time, beating until combined.
Add vanilla extract, mixing until blended.
Add baking powder, salt, and flour, mixing until combined.
Chop strawberries into a medium dice.
Add strawberries (and any dust that accumulates on the cutting board) and white chocolate chips, stirring until evenly distributed.
Divide the dough in half.
Shape each half into a 10″ x 3″ rectangle, using floured hands.
Set each loaf 4″ apart on a parchment paper-lined baking sheet.
Bake for 30 minutes or until the dough is set.
Leaving the oven on, remove the biscotti loaves and cool for 15 minutes on the baking sheet.
Using a butcher knife, cut the loaves into slices, 3/4″ thick.
Place slices on the prepared baking sheet with the cut sides down; bake for 8 to 9 minutes.
Turn slices over, and bake for 8 to 9 minutes more.
Remove biscotti from the oven, and allow to cool completely on a cooling rack.
Can be stored in a sealed container for several weeks.

Featured Photo: Sweet strawberry biscotti. Photo by Michele Pesula Kuegler.

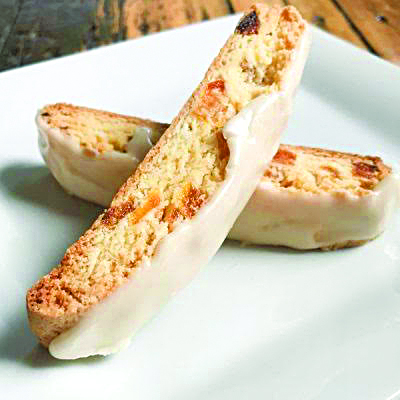
Frosted apricot biscotti

This week is Recipe No. 2 in my three-week biscotti series. Last week was all about maple syrup season; this week is an any-time-of-year recipe. The focal flavor in the biscotti is apricot. What makes it a year-round recipe is that it uses dried fruit.

You may think to yourself, “Let’s be creative and use fresh apricots!”

That is the one caveat to this recipe. You must use dried apricots. Biscotti are meant to be fairly dry cookies. If you use fresh fruit, it imparts too much moisture, which negatively affects the structure of the dough.

Speaking of the dryness of biscotti, I have met a person or two who prefers a slightly softer cookie. There is a simple way to remedy that. In the second phase of baking, when the biscotti are cut into slices, you can reduce the time by a minute or two per side. The only tricky part is to make sure the slices are fully baked. You want some softness, not raw treats.

Whether you like your biscotti traditionally dry or slightly softer, this recipe produces a nice apricot-centric snack.

Frosted apricot biscotti
Makes 28

1/3 cup unsalted butter, softened
1 1/4 cups sugar
2 eggs
1 teaspoon vanilla extract
2 cups flour
1 teaspoon baking powder
1/4 teaspoon salt
1 cup diced dried apricot
1 1/2 cups powdered sugar
1 Tablespoon milk

Preheat oven to 350 degrees.
Beat butter and sugar in the bowl of a stand mixer on speed 2 for 2 minutes.
Add eggs, one at a time, beating until smooth.
Stir in vanilla extract.
In a separate bowl, combine flour, baking powder and salt.
Add flour mixture to wet ingredients and blend until fully combined.
Stir diced apricots into dough.
Divide dough in half.
Shape each half into a 10″ x 3″ rectangle, using floured hands.
Set loaves 4 inches apart on a parchment paper-lined baking sheet.
Bake for 30 minutes or until the dough is set.
Leaving the oven on, remove the biscotti loaves and cool for 15 minutes on the baking sheet.
Using a butcher knife, cut the loaves into diagonal slices, 1/2″ thick.
Place the slices on the baking sheet with the cut sides down.
Bake for 9 minutes.
Turn over slices, and bake for 8 to 9 minutes more.
Remove biscotti from the oven, and allow to cool completely on a baking rack.
Place powdered sugar in a small bowl, and add milk, 1 teaspoon at a time, until a thick glaze is formed.
Coat each biscotti slice with glaze.
Allow glaze to set, placing in the refrigerator to speed the set, if desired.
Store in a sealed container.

Featured Photo: Frosted apricot biscotti. Photo by Michele Pesula Kuegler.

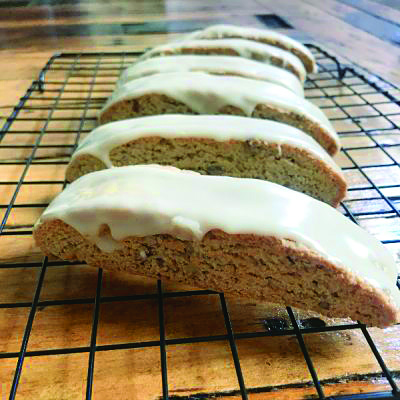
Maple walnut biscotti

It is almost maple syrup season. Why not celebrate that with a batch of biscotti infused and coated in maple syrup?

This recipe is about as straightforward as can be for a baked good. There are no hard-to-find ingredients or caveats for the directions. Simply gather all the needed items and let the baking begin.

From the time you start mixing until the glaze sets is about an hour and a half. Plan accordingly when making these treats. Keep in mind the bulk of that time is spent waiting for baking to finish or biscotti to cool. At the end you will have a batch of treats that can be eaten right away or can be stored for weeks.

Maple walnut biscotti
Makes 28

5 Tablespoons unsalted butter, softened
1/2 cup granulated sugar
2 large eggs
1/2 teaspoon maple extract
1/3 cup maple syrup
2¼ cups all-purpose flour
1 teaspoon baking powder
1/4 teaspoon salt
3/4 cup chopped walnuts
1½ cups powdered sugar
1/4 cup maple syrup
1½ Tablespoons skim milk

Preheat oven to 350 degrees.
Beat butter and sugar in the bowl of a stand mixer for 2 minutes.
Add eggs, one at a time, beating until incorporated.
Add maple extract and 1/3 cup maple syrup, beating until smooth.
In a separate bowl, mix flour, baking powder, and salt.
Add dry ingredients to wet ingredients, and blend.
Stir walnuts into dough.
Divide dough in half.
Shape each half into a 10″ x 3″ rectangle, using floured hands.
Set loaves 2 inches apart on a parchment paper-lined baking sheet.
Bake for 28 minutes or until the dough is set.
Leaving the oven on, remove the biscotti loaves and cool for 15 minutes on the baking sheet.
Using a butcher knife, cut the loaves into diagonal slices, 1/2 inch thick.
Place slices on cookie sheet with the cut sides down. Bake for 8 to 9 minutes.
Turn over slices, and bake for 8 to 9 minutes more.
Remove the biscotti from the oven, and allow to cool completely on a cooling rack. (Save parchment-lined baking sheet.)
In a small bowl, combine powdered sugar, 1/4 cup maple syrup, and milk; stir well to combine.
Using a spoon, coat one side of each biscotti with the glaze. Place on parchment-lined baking sheet.
Repeat with remaining biscotti.
To quicken the setting of the glaze, place the tray of glazed biscotti in the refrigerator for a few minutes.

Featured Photo: Maple walnut biscotti. Photo by Michele Pesula Kuegler.

Stay in the loop!

Get FREE weekly briefs on local food, music,

arts, and more across southern New Hampshire!