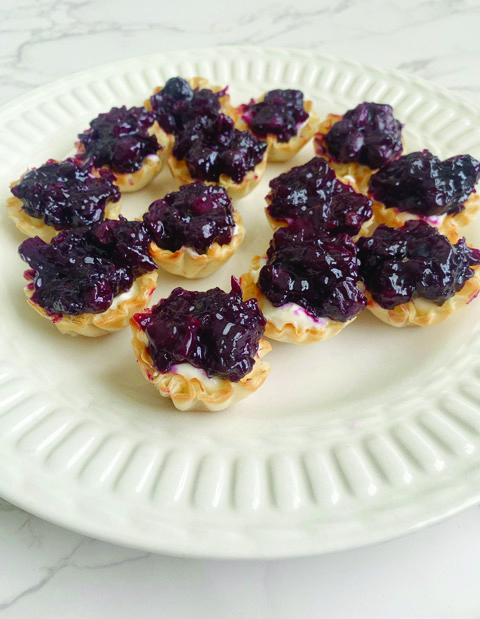
Handheld tarts bursting with blueberries

It isn’t quite blueberry season in New Hampshire, but there’s no reason to delay planning. Never mind that you probably can find some decent berries that were grown elsewhere available in the produce department of your grocery store.

These tarts are easy to make; the cooking portion is done in under 20 minutes. The longest part of the recipe is chilling the finished product. You could eat them right away, but the chilling time allows both fillings to set up a bit more firmly. No judgment if you want to eat them as soon as they are done!

For the ingredients, there are three notes. First, you want phyllo tart shells, which I did have to search for. My local grocery store didn’t carry them, but my Walmart superstore did. Fresh blueberries are the ideal ingredient for this recipe. You can use frozen, but I would start with just one tablespoon of water when making the sauce. Finally, for cream cheese, be sure to use full fat. Do not buy Neufchâtel; it has a slightly grainy texture, which you’ll notice. You want these tarts to be ultra creamy.

Feel free to make these now, but keep the recipe handy for blueberry season. They make a perfect dessert to bring to a cookout this summer.

Handheld tarts bursting with blueberries
Makes 15 tarts

15 phyllo tart shells
⅓ cup granulated sugar
2 Tablespoons cornstarch
3 Tablespoons water
½ Tablespoon lemon juice
1½ cups blueberries
4 ounces cream cheese
⅓ cup powdered sugar
2 Tablespoons whole milk

Preheat the oven to 350 degrees.
Place tart shells in the cups of a mini muffin pan or on a rimmed baking sheet.
Bake for 4 minutes.
While shells bake, combine granulated sugar, cornstarch, water and lemon juice in a small saucepan, whisking until smooth.
Stir in the blueberries, and bring to a boil over high heat.
Reduce heat to low, and cook for 2 to 3 minutes, until the blueberries release some of their juices and the sauce thickens.
Remove the sauce from the heat, and allow to cool to room temperature.
Remove tart shells from the oven.
Combine cream cheese, powdered sugar and 1 tablespoon of milk in a small bowl.
Stir until smooth, adding the additional tablespoon of milk if needed.
Divide cream cheese mixture evenly among the cups.
Top with a layer of blueberry sauce.
Store tarts in a sealed container for at least 4 hours before serving.

Featured photo: Handheld tarts bursting with blueberries. Photo by Michele Pesula Kuegler.

Cornmeal cookies

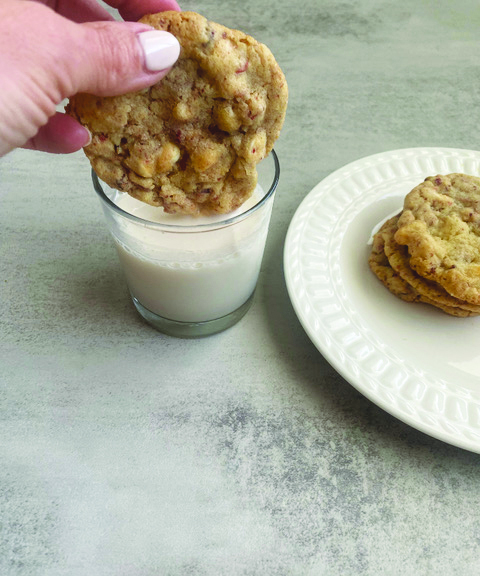
Cornmeal may not be an ingredient you consider when making cookies. However, after trying a cornmeal cookie on a trip to Kentucky, I was hooked and knew I needed to create my own version. Think of these cookies as short, sweet corn muffins that have a nicely crisp edge. Enjoyed with a cup of coffee or glass of milk, they are a delicious treat.

The majority of the ingredients in this recipe are straightforward with only two notes. If you are a regular reader, you will notice that I specified the type of salt. Although it’s a small amount, the taste of the cookie can be altered by the salt. If you use kosher salt, you will need a pinch more. However, kosher salt is a bigger crystal, which may mean that there will be tiny pockets of saltiness in the cookies. That isn’t necessarily a bad thing, but it is worth nothing. With smaller crystals, table salt guarantees even distribution of salt.

The other ingredient of note is the cornmeal. I recommend using medium grind, as I think it adds a nice amount of crunch to the cookie. You can use coarse grind, but that may make the texture almost pebble-like. Fine grind is an acceptable substitute, but that does mean you will lose some of the crunchiness.

Make a batch for your next gathering. I am pretty sure you will be the only person who brings cornmeal cookies. You may even get requests for the recipe!

Cornmeal cookies
Makes 4 dozen

1 cup unsalted butter softened
1 cup granulated sugar
1/2 cup light brown sugar
1 teaspoon vanilla extract
2 large eggs
2 cups all-purpose flour
1½ cups medium-grind cornmeal
1 teaspoon baking soda
½ teaspoon table salt

Preheat the oven to 350 degrees.
Combine butter and both sugars in a bowl.
Beat on a medium-low speed, using either the paddle on a stand mixer or a hand mixer, for 4 minutes.
Add eggs one at a time, beat after each addition, scraping sides to combine.
Add vanilla to dough, and mix until combined.
Add flour, cornmeal, baking soda and salt, stirring until combined.
Line a baking sheet with a piece of parchment paper, then scoop heaping tablespoons of dough onto the prepared tray.
Bake for 10 to 12 minutes or until the edges are golden brown.
Allow to cool for 4 minutes, then transfer to a baking rack to cool completely.

Featured photo: Cornmeal cookies. Photo by Michele Pesula Kuegler.
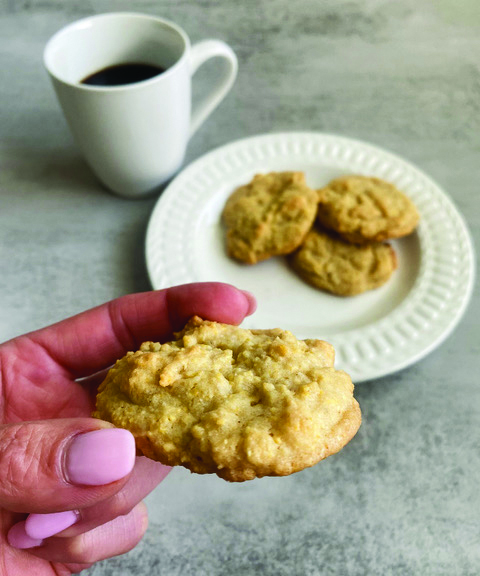
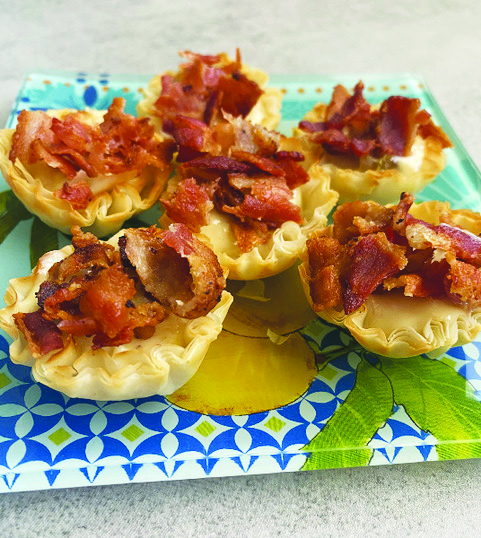
Fig and cheese tarts smothered with bacon

Since this recipe starts with figs, I know some people may look away. However, I am hoping the phrase “smothered with bacon” keeps most of you reading. Figs may not always sound appealing, but in this recipe I am pretty sure they are going to be a hit.

Although I am a fan of all figs, dried or fresh, I think what makes this recipe such a success is that the fig used in this recipe is actually fig preserves. You may wonder what you will do with the remainder of the jar after making this recipe, but the answers are many. First, you could make multiple batches of this recipe. Second, you could serve it as a condiment with a charcuterie tray. Third, it makes a great topping for toast, biscuits and more.

Now that I have you assured on your purchase of fig preserves, the other ingredients are pretty straightforward. I do have to let you know that it did take some searching to find the phyllo cups. My regular grocery store doesn’t seem to carry them anymore, but another one did. For those of you new to phyllo cups, you will find them in the dessert portion of the freezer area.

For the bacon in this recipe, I used regular sliced, as I wanted it to be extra crispy. However, if you prefer your bacon to be heartier, a thick-sliced version will work as well.

These tarts can be served straight from the oven. (Just don’t burn the roof of your mouth!) They also work well either at room temperature or cold. If you won’t be serving them immediately, be sure to store them in your refrigerator in a covered container.

Fig and cheese tarts smothered with bacon
Makes 15

5 strips bacon
15 phyllo cups
4 ounces goat cheese
4 1/2 Tablespoons fig preserves

An hour before cooking, place goat cheese on the counter to soften.
Preheat the oven to 350 degrees.
Heat a large frying pan over medium heat.
Add bacon, cooking until crispy (about 5 minutes).
Transfer bacon to a paper-towel lined plate.
Place unfilled phyllo cups in a mini muffin pan or on a baking sheet, and bake for 2 minutes.
While they bake, combine goat cheese and fig preserves in a small bowl, stirring until well distributed.
Remove cups from the oven.
Divide cheese mixture evenly among the cups.
Return the cups to the oven, and bake for 5 minutes.
While cups bake, dice bacon.
Remove tarts from the oven, and top with bacon.

Featured photo: Fig and cheese tarts smothered with bacon. Photo by Michele Pesula Kuegler.

The berry best cookies

Winter should be winding down at this point, but fresh local produce is still months away in New Hampshire. However, with a little creativity, you can enjoy treats that are full of summer flavors.

These cookies are reminiscent of summer, thanks to the addition of freeze-dried strawberries. This ingredient is the most important to consider when shopping for this recipe. You cannot use fresh or dried strawberries. Fresh strawberries have too much moisture, and dried strawberries would be chewy. However, freeze-dried strawberries are perfect, as the flavor is intense, and their crispness allows them to be diced easily.

The other ingredient of note is the white chocolate chips. They add a nice contrast of sweetness to the strawberries. Together they mimic a strawberry shortcake topped with whipped cream.

The cookies puff up when baking but flatten out while cooling. Don’t be alarmed when you return to check on them. They still are perfect. The cookies should have a moist and tender interior with a slightly crispy edge.

Now you can enjoy the flavors of summer even on a chilly day!

The berry best cookies
Makes 20

½ cup unsalted butter softened
½ cup granulated sugar
½ cup light brown sugar
1 large egg
½ teaspoon vanilla extract
1⅓ cup all-purpose flour
½ teaspoon baking powder
½ teaspoon baking soda
¼ teaspoon salt
1 cup freeze-dried strawberries diced
½ cup white chocolate chips

Preheat the oven to 350 degrees.
In the bowl of a stand mixer or in a large bowl with a hand mixer, cream butter and both sugars on speed 2 for 4 minutes.
Add egg, beating to incorporate.
Add vanilla, and mix.
Add flour, baking powder, baking soda and salt, and mix until incorporated.
Add diced, freeze-dried strawberries and white chocolate chips, stirring until combined.
Line a baking sheet with parchment paper.
Place heaping teaspoonfuls of batter on the baking sheet about 2 inches apart.
Bake for 10 to 12 minutes or until bottoms are golden.
Transfer to a baking rack to cool completely.

Featured photo: The berry best cookies. Photo by Michele Pesula Kuegler.
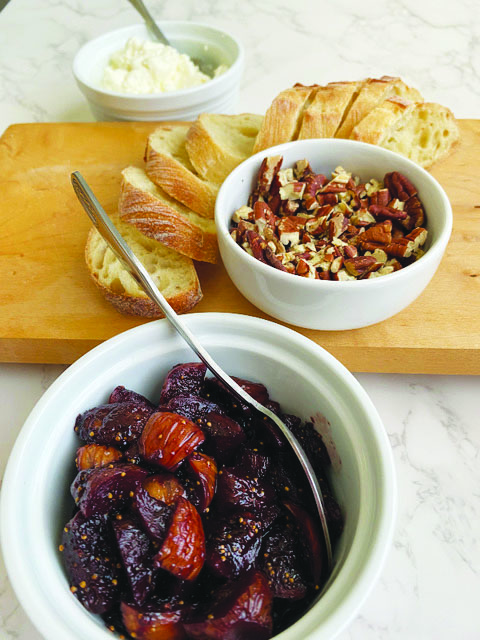
bruschetta with drunken figs and ricotta

Bruschetta is a wonderful appetizer for a gathering. You assemble all of the toppings but leave your guests to build their own snacks. This means less work for you, as well as letting your guests choose which toppings and how much of each they want.

For this bruschetta recipe, there are a few ingredient notes. For the dried figs, you can use whatever variety you prefer. Both mission and calimyrna work well. Next, the wine needs to be on the dry side so that you don’t have an appetizer that tastes more like a dessert. Finally, store-bought ricotta is 100 percent fine, but if you’re seeking total indulgence, try homemade. (I have a recipe on the Think Tasty website.)

The most important part of this recipe is the figs. Everything else can be tweaked slightly. Have walnuts on hand? Go ahead and replace the pecans. Craving sourdough? Cut it into smaller slices and forget the baguette! Need to make the figs in advance? That’s totally fine. Add a little extra liquid to the storage container, and they’ll be delightfully moist when it’s time to serve them.

Now, give this recipe a try and see how well dried figs work in an appetizer!

Bruschetta with drunken figs and ricotta
Makes 20

1/2 cup dried figs
1 cup dry red wine
2 Tablespoons granulated sugar
1 sprig rosemary
1/3 cup pecans
1 cup ricotta
20 baguette slices

Remove stems from figs, and cut into quarters.
Combine wine, sugar and rosemary in a small saucepan over high heat.
Once boiling, reduce heat to low, and add quartered figs.
Simmer, uncovered, for 30 minutes, stirring occasionally.
While figs simmer, preheat the oven to 375 degrees.
Chop pecans roughly, and place on a baking sheet.
Bake for 6 to 10 minutes, giving the pan a shake after 4 minutes.
Transfer pecans to a small serving bowl.
Place baguette slices in the oven, and toast for 5 minutes or until golden brown.
When figs are done simmering, remove rosemary.
Transfer all of the figs and some of the liquid to a serving bowl.
To assemble: top 1 baguette slice with a spoonful of ricotta, a few figs and a sprinkle of pecans.

Featured photo: Bruschetta with drunken figs and ricotta. Photo by Michele Pesula Kuegler.

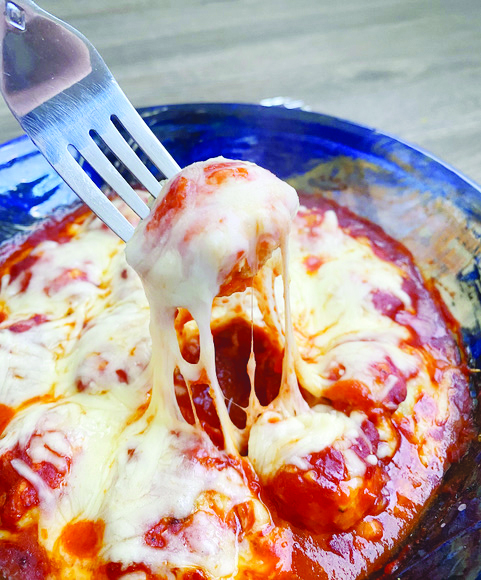
Chicken Parm meatballs

Sometimes you want chicken Parmesan — a hearty, filling meal that makes you think a nap is a good idea. Other times you want all the flavors of that meal but want to feel a little less weighted. This recipe is here to do just that.

These chicken parm meatballs deliver all of the cheesy, herby flavors of their namesake but are baked, not fried. Even better, as they are meatballs, they could be served on their own as an appetizer, or they could be made into an entrée, either atop a bowl of pasta or nestled in a sub roll.

This recipe is pretty straightforward in its ingredients and directions. For the ground chicken I used a blend of dark and white meat. If you want to make it even healthier, ground chicken breast would work well. For the bread crumbs, panko is essential. It provides more texture than a typical bread crumb would. For the mixing, I highly recommend using your hands. That will allow better distribution of herbs and cheese throughout the mix. Using a spoon most likely won’t provide the same effect.

Say goodbye (or see you later, anyway) to fried chicken parm, and hello to chicken parm meatballs.

Chicken Parm meatballs
Makes 20

1 pound ground chicken
1/2 cup panko
1/2 cup grated Parmesan
1 large egg
3 cloves garlic, minced
1/2 teaspoon kosher salt
1 teaspoon dried oregano
1 teaspoon dried basil
1/2 teaspoon freshly ground black pepper
1 to 2 cups marinara
3/4 cup shredded mozzarella

Preheat oven to 350 degrees.
Coat a baking sheet with nonstick cooking spray or a thin layer of olive oil.
In a large mixing bowl, combine ground chicken, panko, Parmesan, egg, garlic, salt, oregano, basil, and black pepper.
Mix well. (I prefer to use my hands to make sure it is thoroughly combined.)
Form mixture into balls the size of walnuts.
Place on the prepared baking sheet, an inch or two apart.
Bake for 12 minutes.
Cover the bottom of a medium-sized casserole dish with marinara.
Add meatballs and top with additional marinara.
Bake for 15 minutes.
Remove from oven, and sprinkle with mozzarella.
Bake for 15 additional minutes or until the mozzarella is fully melted.

Featured Photo: Chicken Parm meatballs. Photo by Michele Pesula Kuegler.
Stay in the loop!

Get FREE weekly briefs on local food, music,

arts, and more across southern New Hampshire!