With frost warnings in our forecasts, it is the time of year for slow-cooked meals. Simmering on the stove or in a slow cooker or instant pot, this meal shows that comfort foods can be vegetarian.
This chili is 100 percent vegetarian, which is why I included butternut in the name. This is not a recipe where you might be able to hide that it is vegetarian. However, it also is a terrific recipe to show how hearty and delicious a vegetable-based dish can be.
There are many options for accoutrements and side dishes to make this chili even more appealing. You can top it with shredded cheddar cheese, sour cream, scallions, chives, diced onions or jalapeno rings. If you’re looking for something carby to pair with it, you can’t go wrong with a fresh batch of cornbread or biscuits. Of course, a loaf of store-bought Italian bread would work well also.
As for the ingredients in this recipe, they are all pretty straightforward. All of the vegetables in the recipe are fresh. Don’t try substituting with frozen butternut squash; it will be much too soft for this dish. The spice level on this chili is pretty tame. If you prefer a spicier chili, you can add some diced jalapeno or hot sauce.
Put that cold weather at bay with a bowl of this chili.
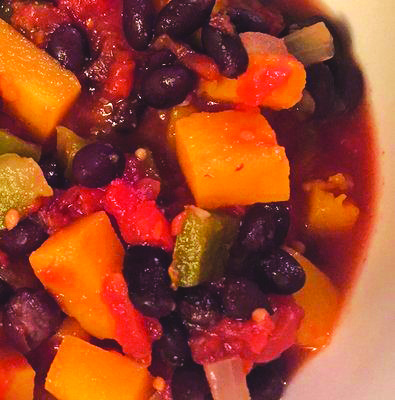
Butternut squash chili
Serves 4
Olive oil
1 large green pepper, seeded and diced
1/2 cup diced sweet onion
4 cups cubed butternut squash
1 28-ounce can diced tomatoes
3 cloves garlic, minced
1½ Tablespoons chili powder
1 26.5-ounce can black beans, rinsed and drained
Salt and pepper
Preheat a large nonstick skillet over medium heat with a small amount of olive oil.
Add pepper and onion, and sauté until tender, about 5 minutes.
Transfer pepper and onion to a crockpot or stockpot.
Add squash, tomatoes, garlic and chili powder.
If using a slow cooker or instant pot, cook on low for 4 to 5 hours or until squash is tender.
If using a stockpot, cover and cook over low heat for 2 hours, stirring every 30 minutes.
Add beans to chili, and cook for 30 minutes or until heated through.
Season with salt and pepper, if desired.
Featured Photo: Butternut squash chili. Photo by Michele Pesula Kuegler.