Cut them fresh in the morning if you can
I’ve been keeping track this year of what blooms for me, and when. So far I’ve recorded over 100 species of flowers (plus many more named varieties of the same genus) and 40 species of flowering trees and shrubs. Blooming starts with snowdrops in March and will continue on until well after frost in November with witch hazel trees blooming even after leaf drop.
I grow so many flowers because they give me pleasure to look at them. And even though I spend a lot of time in the garden, I spend more time indoors than out, so I cut stems of annuals, perennials and flowering woodies and arrange them in vases. I want flowers on the kitchen counter, the dining room table, the desk I write at, in the bedroom, in the bathroom — in fact, on every flat surface in the house.
Let’s look at some basics of preparing and arranging flowers. When is the best time to pick flowers? Pick in the cool of the morning, especially if the day will be hot. The stems are full of water and carbohydrates and should feel full, not limp. Bring along a clean container so that as you wander around picking flowers their stems are well-submerged. Instead of picking flowers just before dinner with company, try to pick them before going to work in the morning.
Flowers with multiple blossoms on a stem (delphinium, foxglove, for example) should have some blossoms in full bloom, others showing color and some in tight bud. This will prolong the show. Flowers that grow on individual stems should be in full bloom, or just starting to open. Peonies, for example, will often have tight buds on the same stem as an open blossom, but it is rare for them to bloom in the vase. Daylilies only bloom for a day, but a single scape can have up to 10 buds that will bloom in sequence for a week or more.
It’s best to let your freshly cut flowers stay in the bucket of water for an hour before you arrange them. Cut the stems on a 45-degree angle using floral shears, or your bypass pruners if they are sharp. Scissors made for cutting paper are not good for flowers, so you may want to buy a dedicated pair of floral shears.
Because of capillary action, water in hollow stems will be sucked up the stem a little as soon as you cut them. So you need to recut about ¾ of an inch of each stem and place it in a vase right away. Otherwise an air bubble may inhibit water take-up.
Be sure to remove all leaves or flowers that would be submersed in the vase you are using. Why? The leaves will rot and ferment; the bacteria will inhibit water uptake.
Florists selling fancy roses or other expensive flowers generally provide a packet of “flower preservative.” But you can buy that stuff or make your own for your homegrown flowers. In a quart of water add a teaspoon of sugar, a teaspoon of household bleach and 2 teaspoons of lemon or lime juice. I learned long ago to drop a couple of copper pennies in a vase with a bunch of tulips to help keep the buds closed longer and have seen it work. Failing that, just change the water every two or three days, and trim off a little of each stem.
The height of the vase is important. I’ve read “expert” advice recommending different ratios for the height of the vase to the length of the flowers ranging from flowers being 1.5 times the vase height, up to three times the vase height.
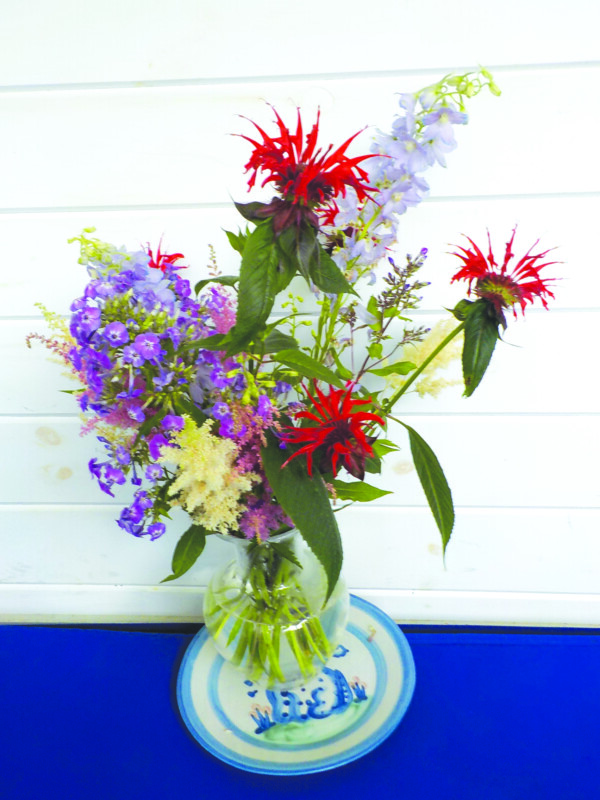
To my eye, a 6-inch vase will look good with 9-to-12-inch flowers in it, but even 18-inch stems may look fine, especially if you place shorter flowers around the outside perimeter of the arrangement. I made an arrangement recently with six stems of beebalm in an 8-inch vase. I angled the stems to create support for a 24-inch stem of delphinium in the middle, standing straight up. That looked great to me.
There are devices called frogs that can be placed in a bowl or big vase to hold flowers in place. They consist of a piece of heavy metal with sharp, upward-pointing pins that allow you to stab the flower stems and hold them in place. Glass frogs also exist that have divots in a chunk of glass where a stem can be lodged.
What is blooming now that will look good in a vase? I love delphinium, astilbe, daylilies, roses, bee balm, phlox and Shasta daisies. All will last well in a vase, and provide plenty of height for a tall vase.
We just finished the peony season with the Itoh peonies lasting well past normal herbaceous peonies. They are the result of crossing tree peonies with regular peonies. Mine, called Garden Treasure, produced 30 or more 5-inch-diameter blossoms that last very well in a vase.
Arranging flowers is an art form we can all enjoy. You don’t need training or expertise. Just pick what you like, and arrange them in a vase, or even in a tall water glass. Give flowers to an aging uncle or a friend with a sprained knee. Everyone loves the gift of flowers. And be sure to put some on your dinner table tonight.
Henry is the author of four gardening books and is a gardening consultant. Reach him at henry.homeyer@comcast.net.
Featured photo: Flower arrangements are easy to make and pleasing to the eye. Photo by Henry Homeyer.