We are at the midpoint of a biscotti binge. Last week’s recipe for strawberry biscotti got me thinking about other flavor combinations that could work. This week I am focusing on a sweeter biscotti, and next week I will round out the series with a spicier biscotti.
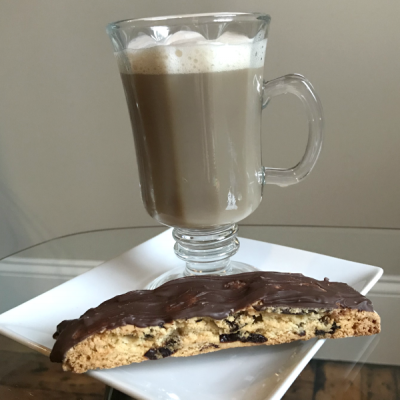
Caramel apple biscotti are the perfect treat for when you are craving a candy-like dessert. The coating of caramel gives a nice boost of sweetness. Even better, these are a neater way to eat than a regular caramel apple. All of the flavor, a lot less mess!
Just like last week’s recipe, you need to use dried fruit when making these. I have made these with regular apples, and the results are mediocre. With fresh apples, you need to bake the biscotti for almost 8 minutes longer, which results in a cookie that is on the verge of being burnt.
Make a batch as a belated Mother’s Day gift, or keep them for yourself. They’ll be enjoyed either way!
Caramel apple biscotti
Makes 30
1/3 cup unsalted butter, softened
1 1/4 cups granulated sugar
2 eggs
1 teaspoon vanilla extract
2 cups all-purpose flour
1 teaspoon baking powder
1/4 teaspoon salt
1 teaspoon cinnamon
1 1/2 cups diced dried apples
1 cup caramel baking chips
1 teaspoon shortening
Preheat oven to 350 degrees.
Beat butter and sugar in the bowl of a stand mixer on speed 2 for 3 minutes.
Add eggs one at a time, beating until smooth.
Stir in vanilla extract.
Slowly add flour, baking powder, salt and cinnamon, mixing until combined.
Stir diced apples into dough.
Divide dough in half.
Shape each half into a 10″ x 4″ rectangle, using floured hands.
Set each loaf 3″ apart on a parchment paper-lined baking sheet.
Bake for 30 minutes or until the dough is set.
Leaving the oven on, remove the baking sheet from the oven, and cool biscotti loaves for 15 minutes on the baking sheet.
Using a chef’s knife, cut the loaves into diagonal slices, 3/4″ thick.
Return the slices to the baking sheet with the cut sides down; bake for 9 minutes.
Turn slices over, and bake for 9 minutes more.
Remove biscotti from oven, and allow them to cool completely on a baking rack. (Do not discard the parchment paper.)
Combine caramel chips and shortening in a small bowl.
Microwave on high in 15-second increments, stirring after each, until fully melted.
Using a spoon, coat one side of biscotti with caramel.
Return biscotti to parchment paper to allow coating to harden.
To quicken the hardening of the coating, place the biscotti in the refrigerator.
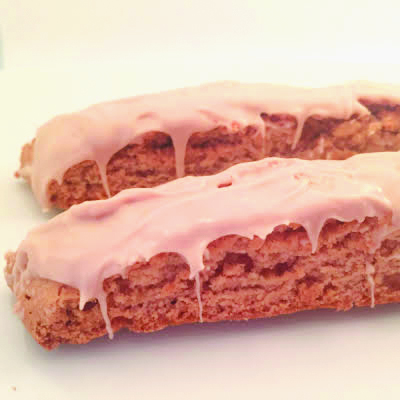
Featured Photo: Caramel apple biscotti. Photo by Michele Pesula Kuegler.