Gather ideas from great green spaces
One of the best ways to learn how to create a lovely garden is to see others. Visit good gardens of neighbors, great gardens near and far. I recently visited three great gardens and, as always when viewing other gardens, they gave me much to consider. The gardens I visited were Bedrock Gardens in Lee, N.H., Chanticleer Gardens in Wayne, Pennsylvania, and Longwood Gardens in Kennett Square, Pennsylvania.
All these gardens had significant areas of lawn or meadow. I realize that lawns are not in favor, generally, among the pro-pollinator and bird crowd. But if you provide plenty of plants that support pollinators, I do not see lawns as bad. Each of these gardens has plenty of flowering trees, shrubs, perennials and annuals. Something is always in bloom, including both native plants and exotic ones.
So what does lawn accomplish? It provides contrast — a simple green palette — to show off the plants. Expanses of green are soothing to the eye. I can only focus on so many amazing plants before I get visually fatigued, much as I do when I visit an art museum.
Lawn also allows you to stand back to see the landscape from a distance. For trees, that is important. In a forested area, and all three of these gardens have them, individual trees are sometimes hard to see. They blend in with the others. But I need to stand back to look at a majestic beech or oak that towers 100 feet above me.
Bedrock Gardens only recently was deeded over from the original owners, Jill Nooney and Bob Munger, to the nonprofit that manages the property. Jill is an amazing sculptor who for over 30 years has created art to surprise and delight visitors to this 20-acre garden. Much of her art is painted welded steel that will delight visitors for the century ahead. She is the modern Alexander Calder of gardens.
Although I am not an artist, I do purchase and create art and whimsy for my own gardens, and you can, too. Look around at what you can use: a brass headboard from an abandoned bed; the rim of an old wagon wheel, a collection of stacked stones or a single tall standing stone buried in the ground. Stone always enhances a garden. Walls are expensive but almost worth their weight in gold.
Pathways are important to a great garden, too. They lead the visitor from one area to another. Placing art or even a bench at a distance pulls viewers forward, luring them to see what is ahead. Chanticleer has wonderful pathways through the woods that appear to be wood chips embedded in rubber. Very soothing to knees and feet.
My late sister, Ruth Anne Mitchell, taught me long ago when viewing art or gardens, “If you see a place to sit down, sit down.” So I do, and I find it enhances the experience of the garden. Not only am I less tired; often gardens surprise us with something special near a resting point. Perhaps you can design a special feature near a bench: rare and dainty plants or a small water feature.
All three of the gardens I visited made much use of water in the landscape. I am lucky enough to have a small stream that runs by my gardens. I built a bench near it, so I can listen to the burble of the water. And you can tune your brook: Place stones that hold back water, allowing it to cascade over them. Different drops create different sounds.
Years ago, for a New York Times article, I interviewed by phone the designer of the gardens at the Getty Museum in Los Angeles, Robert Irwin. He created a recirculating stream that crossed a path through a woodland area seven times. He told me he tuned it so that at each little bridge visitors would hear a different aquatic tune. Think of that if you have a stream on your property.
Color is very important in designing good or great gardens. I only got the eight-color box of crayons as a boy; my sister Ruth Anne got the 64-crayon box. But I have learned to appreciate all the nuances of color and how they go together. The best explanation of how colors go together — or don’t — is a book by garden writer Sydney Eddison: The Gardener’s Palette: Creating Color in the Garden (Contemporary Books, 2003, $30 in hardback). Get it if you can find a copy.
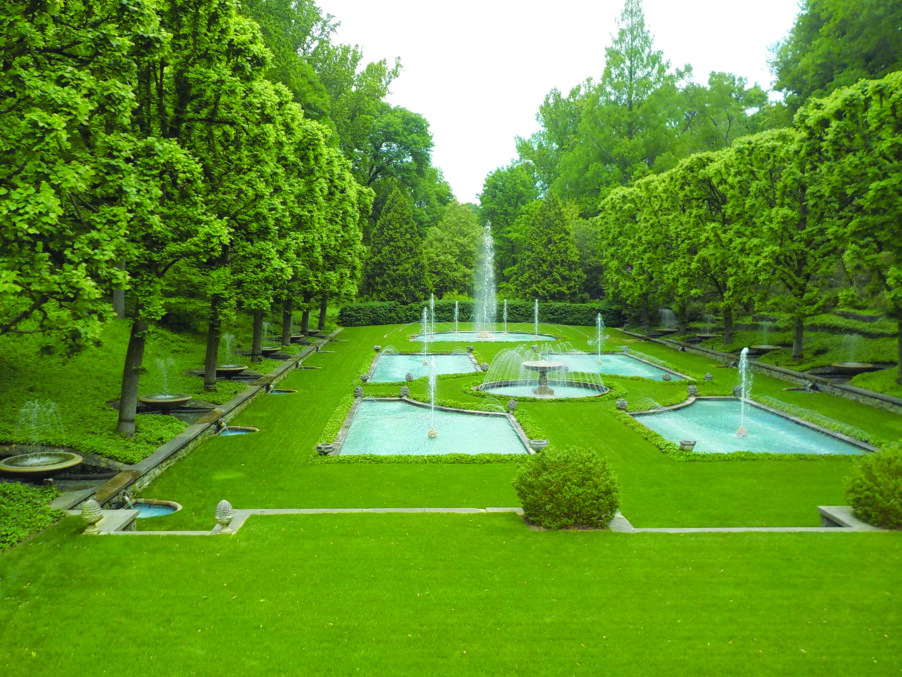
Great gardens like those at Longwood, an old DuPont family residence originally, recognize that color is important all year. But most shrubs and perennials only bloom for a few weeks. So they choose trees and shrubs that are not only sculptural in form but also have nuanced colors in their leaves. Green is not one color but many. Choose wisely.
Lastly, another way to present color all spring, summer and fall is to use annual flowers liberally. Many of these will keep on blooming in an effort to create seeds. Pots of annual flowers are used frequently in these great gardens. Pots place flowers closer to the viewer’s eye and can also be replaced with other pots if the flowers finish their displays or look a bit bedraggled.
So do visit other gardens this summer, whether at a local garden club tour or one of the fine gardens I mentioned here today.
Henry is a garden consultant and the author of four gardening books. He speaks often to garden clubs and library groups. Reach him at henry.homeyer@comcast.net or PO Box 364, Cornish Flat, NH 03746.
Featured photo: Formal use of lawns and water at Longwood. Photo by Henry Homeyer.