Raspberry jalapeño spread

Another weekend, another social gathering, right? If it is an at-home occasion, you may need to bring an appetizer to share. Since we are all busy hustling and bustling, why not bring a homemade snack that is simple yet addictively delicious?

This recipe is a play on the ’80s classic of cream cheese topped with jam. However, it is a recipe with much more depth but not much more effort. First, we are starting with goat cheese. While cream cheese is nice and creamy, its flavor is one note. Goat cheese offers a nice bit of tanginess for the base. Then we get to control the flavor of the spread topping the goat cheese. Raspberries are the star, but there are other elements. Sugar is added to brighten the fruit. Feel free to add half the amount and check for sweetness levels. Finally, there is minced jalapeño. Nothing like a little heat to make a snack more memorable. Of course, you also can adjust the amount of heat. Like minimal heat? Use only half the jalapeño. Like a lot of heat? Include the ribs and seeds.

Now, the only decision you have to make is the type of crackers to serve with this spread. I personally like a whole-wheat cracker for the crunch and flavor, but the options are limitless.

Make the raspberry jalapeño spread early in the day and let it chill all day long. When it’s party time, simply pour it over your goat cheese, grab your crackers, and you’re ready to go!

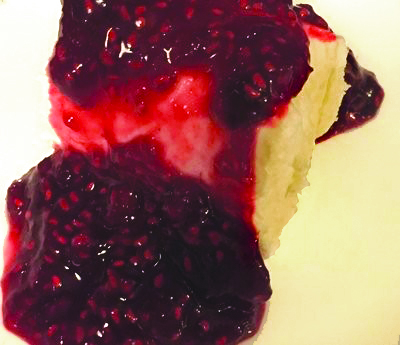
Raspberry jalapeño spread
Serves 4-6

2 cups fresh or frozen raspberries
1/3 cup granulated sugar
1 jalapeño, seeds and ribs removed
8 ounces goat cheese
Crackers

Combine raspberries and sugar in a small saucepan over medium heat.
Stir occasionally, using some force to smash the raspberries.
Dice jalapeño finely.
When sugar is dissolved, add jalapeno.
After spread begins to boil, reduce heat to low and simmer for 5 minutes, stirring frequently, until the spread thickens.
Remove from heat; refrigerate until chilled, about 2 hours.
Place goat cheese on a small serving plate; top with raspberry spread.
Serve with crackers.

Featured Photo: Raspberry jalapeño spread. Photo by Michele Pesula Kuegler.

Rosemary Mixed Nuts

Over the next month, odds are likely that you will be hosting or attending a gathering where you are requested to bring an appetizer to share. There are bound to be an assortment of dips and charcuterie trays. Why not make something simple, different and utterly memorable? Let me introduce you to this mixed nut recipe.

You may be wondering why you can’t just buy a container of mixed nuts at the grocery store and bring that to the party. The answer is simple: The flavors in these mixed nuts are not going to be found on a grocery store shelf. The combination of sweet, salty and herbaceous delivers a snack that is truly unique. It will work as a part of an appetizer menu, as well as a dessert menu.

Let’s talk about the ingredients. The ratio of walnuts to pecans is up to you. In fact, if you want to use only one type of nut, that is fine. The butter should be unsalted. If you only have salted butter, you should use only 1/4 teaspoon of salt. Fresh rosemary is preferred, as dried rosemary has a pine needle sort of texture.

I have made this recipe for many a gathering, and it is always popular. Thankfully, you can easily double or triple the recipe to feed a big, hungry crowd. Let the season of eating continue!

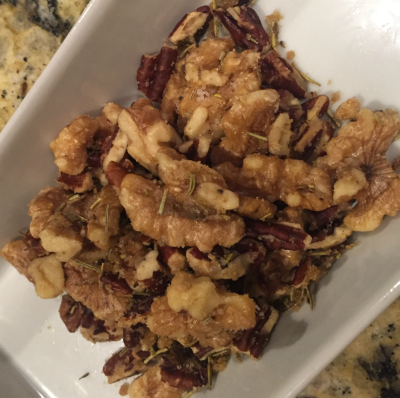
Rosemary Mixed Nuts
Serves 4-6

2¼ cups walnuts and pecans
1 Tablespoon unsalted butter
2½ Tablespoons brown sugar, divided
¾ teaspoon kosher salt
2 Tablespoons fresh rosemary, minced
1 Tablespoon water

Preheat the oven to 350 degrees.
Spread walnuts and pecans on a rimmed baking sheet; bake for 10 minutes.
Right before the nuts are done, melt the butter in a small bowl (15 to 30 seconds in a microwave).
Add 1 tablespoon brown sugar to melted butter, and stir well.
Remove nuts from the oven, and push into a pile using a spatula.
Pour melted butter mixture over nuts, and toss to combine.
Spread nuts into a single layer; sprinkle with salt and rosemary.
Bake for 10 minutes.
Combine water and remaining brown sugar.
Remove nuts from the oven, and drizzle with sugar syrup.
Bake for 5 more minutes.
Serve warm, or cool and transfer to a storage container.

Featured Photo: Rosemary Mixed Nuts. Photo by Michele Pesula Kuegler.
Soft sugar cookies

Welcome to eating season! I’m embracing it wholeheartedly with this cookie recipe. Who doesn’t want to bake cookies with cold weather and dark afternoons? There’s nothing like some freshly baked cookies to make the evening brighter.

Although I am a fan of traditional sugar cookies, where you roll out the dough and cut out shapes, I also have a fondness for this version. These cookies are incredibly tender and are best topped with a buttercream frosting. Consider them really short cupcakes.

Not only do these provide a moist and delicious cookie, but they also require less time and effort. There is no floured counter to prepare (or clean afterward), and you don’t have to worry about how thick or thin each cookie is. Just grab a small scoopful of dough, roll for a moment, and the cookie is formed.
Of course, you still can decorate these cookies to your heart’s content. Get the eating season going with a batch of freshly baked cookies!

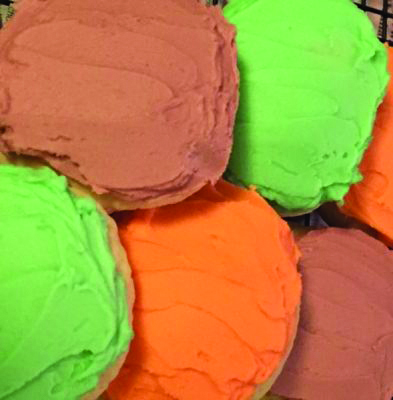
Soft sugar cookies
Makes 36

Cookie dough
½ cup unsalted butter, softened
1 cup granulated sugar
2 eggs
½ cup plain Greek yogurt
2 teaspoons vanilla
1½ teaspoons baking powder
½ teaspoon baking soda
¼ teaspoon salt
3 cups all-purpose flour
Frosting
½ cup unsalted butter, softened
2 to 3 cups powdered sugar
½ teaspoon vanilla
1 to 2 Tablespoons milk
food coloring, if desired

Make the cookies
Preheat the oven to 350 degrees.
Combine butter and sugar in the bowl of a stand mixer or a large mixing bowl.
Beat for 2 minutes on low speed using paddle attachment or hand mixer.
Add eggs, one at a time, and mix until combined.
Add yogurt and vanilla, mixing until incorporated.
Add baking powder, soda, salt and flour. Mix on low.
Form dough into a ball the size of a walnut.
Place on a baking sheet, leaving 2 inches between cookies.
Flatten balls of dough slightly.
Bake for 12 minutes. (They will not be golden.)
Cool completely.

Make the frosting
Combine butter, 2 cups powdered sugar, and vanilla; mix well.
Add milk, as needed, 1 teaspoon at a time.
More sugar can be added if you prefer a sweeter frosting.
Frost cookies, as desired.

Featured Photo: Soft sugar cookies. Photo courtesy of Michele Pesula Kuegler.

Homemade applesauce

Applesauce is one of my favorite easily made dishes. On a weekend afternoon, the smell of simmering apples adds warmth to a chilly day.

This is a simple recipe, which gives you the ability to adjust it to your palate. The most important decision is the type of apple you will use. You can lean into a tarter version with Granny Smiths or you can go with a sweeter flavor by using Honeycrisps. Almost anything in between can work as well. The second most important decision is the amount of sugar. I prefer just a hint of sweetness, which is why I tend to use a slightly tart apple such as a McIntosh and add only two tablespoons of sugar. You definitely can change the amount of sugar. However, do it in small increments! Finally, the amount of cinnamon is personal. A great option is to serve the applesauce plain with a shaker of cinnamon nearby. Individually seasoned applesauce for all!

With Thanksgiving only a week away, this is a great recipe to keep handy. When you’re eating all the heavier leftovers (stuffing, veggie casseroles, and mashed potatoes — I see you) a side of applesauce could be the perfect choice.

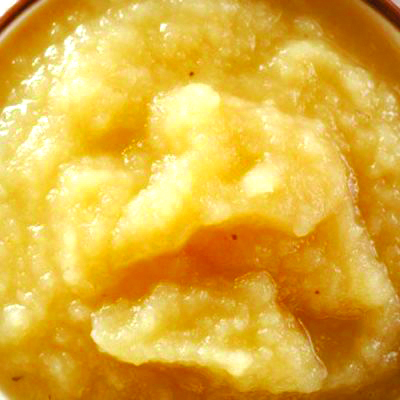
Homemade applesauce
Makes 4

2 pounds apples (approximately 4 large)
1 Tablespoon lemon juice
1/2 cup water
2 Tablespoons granulated sugar
Cinnamon

Peel and core apples.
Cut apples into small cubes.
Combine apples, lemon juice, and water in a medium pot, and bring to a boil over high heat.
Reduce heat to low, and simmer for 25 minutes stirring occasionally.
Remove from heat, and mash apples with a potato masher.
(If you prefer smoother applesauce, you can use an immersion blender.)
Add sugar, stirring to combine.
Season with cinnamon as desired.
Serve warm, or allow to cool before storing in a covered container.

Featured Photo: Homemade applesauce. Photo by Michele Pesula Kuegler.
Apple parfait

It is almost “eating season”, which is what I call the time between Thanksgiving and New Year’s. It seems that every weekend, as well as a good number of weekdays, is filled with food-centric events. While it’s fun to indulge, I also try to keep things healthy. All that being said, I still crave a sweet treat. That’s where these parfaits become the answer.

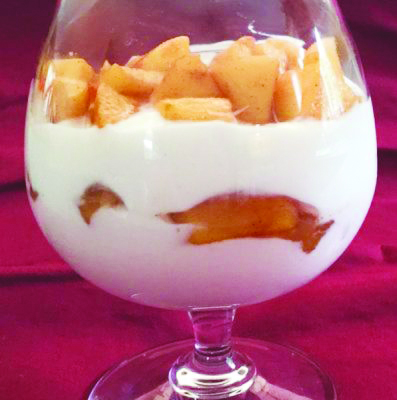
These apple parfaits are really healthy and incredibly easy to make. Even better, they can help use all the apples you have left from your orchard trip earlier this fall. Any apple will work; base your recipe on the variety you prefer or whatever you have on hand. I used brown sugar in this recipe to add a caramel note, but if you’re in a pinch, granulated sugar will work. Vanilla yogurt is key to this recipe, as it adds sweetness without overpowering the apples. Greek vanilla yogurt is my preferred option, as it makes for a richer parfait. You can substitute regular vanilla yogurt, if needed.

The most difficult decision for this recipe is what container you use. I served mine in brandy snifters, but there are so many options. Half-pint canning jars, martini glasses or wine glasses could be used. If at all possible, use a clear dish so you can see the layers.

Now you have a beautiful, healthy way to quench those dessert cravings!

Apple parfait
Makes 4

3 medium-sized apples peeled, cored and diced
1½ tablespoons brown sugar
1 teaspoon cinnamon
2⅔ cups vanilla Greek yogurt

Heat a nonstick skillet over medium heat.
Add apples, and sauté for 1 minute.
Add sugar and cinnamon, and sauté for an additional minute.
Transfer apples to a plate to cool, about 10 minutes.
Place ⅓ cup yogurt in the bottom of each individual serving container.
Place ⅛ of cooked apples in each glass.
Add ⅓ cup yogurt to each glass.
Top with remaining apples.

Featured Photo: Apple parfait. Photo by Michele Pesula Kuegler.

Caramel-stuffed chocolate chip cookies

It’s the week after Halloween, and you may be wondering why you would need a dessert recipe. Think of it as a way of reducing the amount of candy floating around your home. Alternatively, this recipe could go into your holiday planning file.

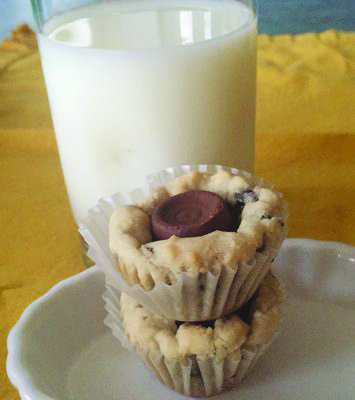
This recipe was created with caramel-filled chocolate candies, but you definitely could make a substitution. Peanut butter-filled candies, Hershey’s kisses, or other small chocolate candies could be used as the filling for this recipe. Take a peek in your candy stash, and see what you could use.

These cookies store well. I have made batches that were shipped cross country and weren’t eaten until a week after baking and were still as delicious as the day they were made. So, as you start to think about your holiday baking, these could be a perfect choice. Make them in advance of gatherings or cookie exchanges, and know that you will have cookies ready when you need them!

Note: I have always used muffin tin liners when making these. Greasing the pan will work, but it is definitely a distant second choice for me.

Caramel stuffed chocolate chip cookies
Makes 48

1 cup unsalted butter, softened
¾ cup light brown sugar
¾ cup granulated sugar
2 eggs
1 teaspoon vanilla
1 teaspoon salt
1 teaspoon baking powder
2¾ cups all-purpose flour
1 cup mini chocolate chips
48 chocolate-covered caramels, unwrapped

In the bowl of a stand mixer or in a large mixing bowl, combine butter and sugars.
Beat on medium speed for 3 minutes.
Add eggs, one at a time, beating until incorporated.
Stir in vanilla.
Add salt, baking powder and flour, mixing until blended.
Add chocolate chips, stirring until combined.
Cover dough with plastic wrap and refrigerate for 2 hours.
After 2 hours, preheat oven to 350 degrees.
Line a mini muffin pan with liners, or grease each cup.
Place a heaping teaspoon of dough into each cup.
Bake for 10 minutes or until golden.
Place tray on wire rack and push one caramel candy into each cookie.
Cool for 5 minutes, then transfer cookies from muffin pan to cooling rack.
Store in a resealable container once fully cooled.

Featured Photo: Caramel-stuffed chocolate chip cookies. Photo by Michele Pesula Kuegler.

Stay in the loop!

Get FREE weekly briefs on local food, music,

arts, and more across southern New Hampshire!