Look at all the pretty flowers!
I like to have blossoms in the garden and in vases everywhere. I try to have something blooming all the time, or as often as possible. Right now, in mid-April, I count more than 10 species of plants in bloom, along with seven species of bulb plants that are blooming by the hundred for me.
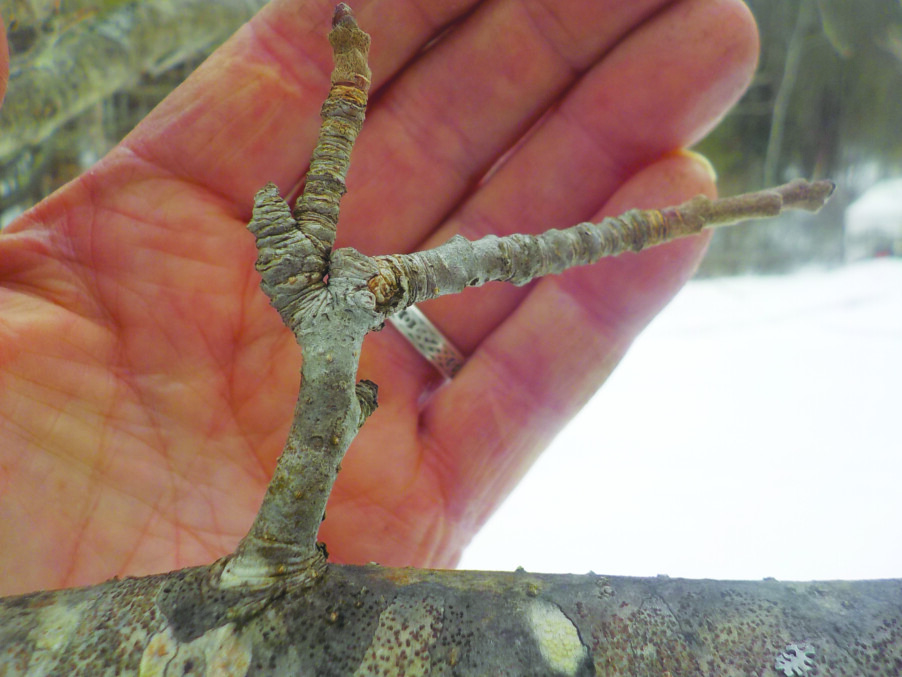
Let’s start with trees and shrubs — what I call woodies. The most unusual woody is leatherwood (Dirca palustris). This is a native woodland plant that does well in part shade. Although the literature says it prefers moist, rich soil, I have it in dry soil and it does well there.
Leatherwood has small greenish-yellow flowers that appear about the same time as forsythia — mid-April for me. Mine is slow-growing with lovely gray bark that reminds me of beeches. This is a well-mannered plant that stays 3 to 6 feet tall and wide.
February Daphne (Daphne mezereum) is in bloom now with highly fragrant pinky-purple flowers. It is originally from Europe, Turkey and Iran. I love it so much I named a corgi after it (she is now gone, alas). It stays 3 to 5 feet tall and wide. In the fall it produces small red berries.
Magnolias are in bloom now, too. My favorite is the Merrill magnolia, a hybrid that produces double white lightly fragrant flowers. I planted mine as a small tree in 2004, and now, 19 years later, it is about 40 feet tall with a spread of 25 feet. It blooms reliably (nine years out of 10) on my birthday, April 23. It is a good specimen tree to put in a lawn and will do well even if the soil is consistently moist to soggy.
Forsythias are in bloom everywhere with bright yellow flowers. If yours only blooms down low, in the area covered by snow, the buds that were formed last summer were killed by the winter cold. So get rid of it and buy a new variety such as New Hampshire Gold, Vermont Gold or Meadowlark. All are hardy throughout New England.
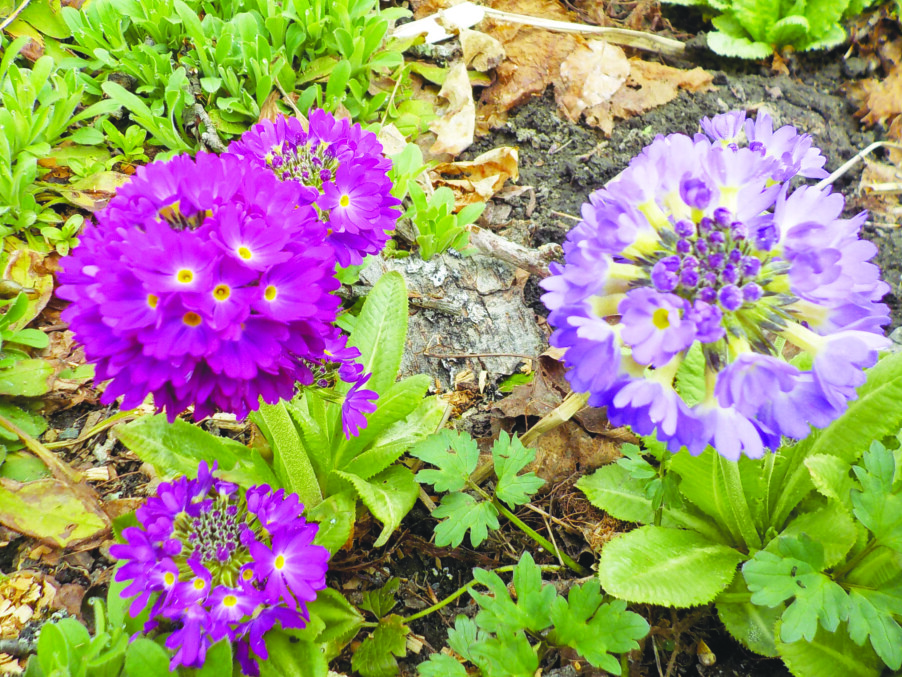
My favorite early spring perennial is called the drumstick primrose (Primula denticulata). It comes with flowers in purple, blue, pink, magenta and white. The florets are small and arranged in 2- to 3-inch globes on 6-inch stems. They do best in moist to wet soil in sun or partial shade.
Hellebores or Lenten Roses (Helleborus orientalis) are also wonderful spring flowers. Mine have been blooming for a couple of weeks already and will continue on for another month or so. The blossoms are five-petaled and 2 to 3 inches wide with yellow stamens in the center. Colors range from white and cream to pink, purple and nearly black. They are evergreen, but last year’s leaves should be cut off now as they are all bedraggled.
A dainty flower with beautiful finely cut foliage is a spring ephemeral called corydalis or fumewort (Corydalis solida). It pops up in my garden where it wishes, and I am always glad to welcome it. It seems to do best in moist, part shade with rich soil. The flowers on mine are small, long-spurred light blue, but other colors are also possible. There is a yellow variety of a related species (C. lutea).
Lungwort or pulmonaria (Pulmonaria spp.) is a good ground cover that is blooming for me now, too. It is interesting that a single stem might support blue, pink or apricot flowers all at once. All do well in shade or partial shade and better in moist soils than dry soils. It spreads by root.
There are at least a dozen different species of pulmonaria including P. longifolia with spotted leaves and multicolored blossoms. The one I like best is P. angustifolia, which has very intense blue flowers and solid green leaves. I’ve read that varieties or species with more white spots grow better in full sun than those with fewer or no spots.
Wildflowers are starting to bloom, including one of my favorites, bloodroot (Sanguinaria canadensis). These white multi-petaled flowers come up from the soil wrapped in the leaves that look like a green cigar. On cold days, or at night, the blossoms close up, but they open on sunny days when the bumblebees are working.
The bloom season of bloodroot is short, but there is double bloodroot which is sterile and blooms for a longer time. Like all bloodroots, the clumps get bigger every year, so you can dig them up and divide them to start doubles in new places. The sap from the roots is poisonous, so wear gloves when dividing any bloodroots. Do that now or in the fall.
We certainly deserve spring blossoms for having survived winter and mud season. But you do have to plan and plant for those early bloomers.
Henry is the author of four gardening books and is a 25-year veteran of the Master Gardener program. Reach him by email at henry.homeyer@comcast.net.
Featured photo: Drumstick primroses. Photo by Henry Homeyer.