Every gardener has an opinion about when to start planting the vegetable garden. Frost-hardy plants like spinach, onions and peas should already be in the ground for most everyone, but tomatoes and peppers? I believe that waiting until June is right for my garden, even if we get no more frost.
Why do I plant later than many others? Tomatoes and peppers like warm soil. In fact, they’d rather be growing in Mexico than Cornish Flat. Yes, you can plant them early, but they won’t grow much. They’ll sit there and sulk. If you can get your hands on a little soil thermometer, check your soil down 3 or 4 inches. If it is 60 degrees or more, fine. Have at it.
Another way to decide when to plant is to ask an “old timer.” Ask someone in your neighborhood when it is safe to plant various crops. If she has been gardening in your neighborhood for the last 25 years or more, her advice is probably excellent.
If you started seeds indoors, your tomatoes or broccoli may be tall and lanky. So tall that they will fall over when planted. The solution? Plant much of the stem in the ground, either in a deep hole for the root ball, or sideways in a shallow trench. Remove any low leaves to make it look like a little palm tree. Then make a hole for the root ball with a 6-inch trench next to it. Lay the tomato seedling in the ground, and gently turn up the top while covering the stem with soil. All the buried stem will produce roots. Broccoli or other brassicas I just plant deep if they are too tall.
Potatoes can go in the ground now unless your garden is still soggy. In fact, don’t plant anything in soggy soil. I have a somewhat soggy place for my garden, but I make raised beds, which helps with drainage. I have made two kinds of raised beds: raised mounds (30 to 36 inches wide) or wood-sided raised beds. I use rough-sawn hemlock planks that are a full inch thick and 8 inches wide. Pressure-treated wood is now said to be safe to use in the vegetable garden, but I prefer untreated hemlock, which I find lasts about 10 years.
Potatoes are started from chunks of sprouted potatoes, or from whole, small potatoes. Buy “seed potatoes” at your local feed-n-grain store, hardware store or garden center. Grocery store potatoes are likely treated to avoid sprouting, although organic potatoes are probably fine. Seed potatoes are sold as disease-free, which is important. If you cut large potatoes into chunks, make sure each has a couple of “eyes,” where they will sprout stems. Leave them in a shady, breezy place for a day or two to heal the cuts.
Loosen the soil well and dig a hole with a hand tool. You want the spud to be at least 3 inches deep when planted as the new potatoes need space to grow above the seed potato. Cover with just an inch of soil at first, but then fill the hole with more soil after the leaves and stems are up above the soil level.
Peppers and eggplants I plant as small plants in mid-June. To give them even more warmth at night I sometimes cover them with row cover (a thin agricultural fabric sold at garden centers). And I’ve been known to place dark-colored rocks near some special French hot peppers I grow to store heat during the day and kick it back at night. Peppers and eggplants can be wind-pollinated, but bees help too, so don’t leave row covers on once they start blooming.
Parsnips I plant by seed in mid-June, and they generally take two weeks or more to germinate. Most seeds are good for three years, but you must buy parsnip seeds every year. Like all root crops, parsnips benefit from having loose soil with few rocks (oh, sorry, Vermonters).
Be sure to thin all root crops in early July once they are big enough to grab onto. Give the carrots an inch to start, then a month later thin to 2 inches. You can eat the thinnings. Beets, same thing. And beet greens are delicious.
What about unusual veggies? I like to buy an artichoke plant at my local greenhouse. I have started them from seed, but it is a long process starting in February. Give your artichoke a 2-foot square of space, add lots of compost and a little organic fertilizer, and place it in full sun. Make sure it does not dry out. It will produce one good-sized artichoke at the top of the plant, and smaller ones as side shoots. The foliage is lovely, so you can plant one in your flower garden!
Swiss chard is pretty enough to sneak into your flower beds. Get Bright Lights chard, which has red, yellow and green stems.
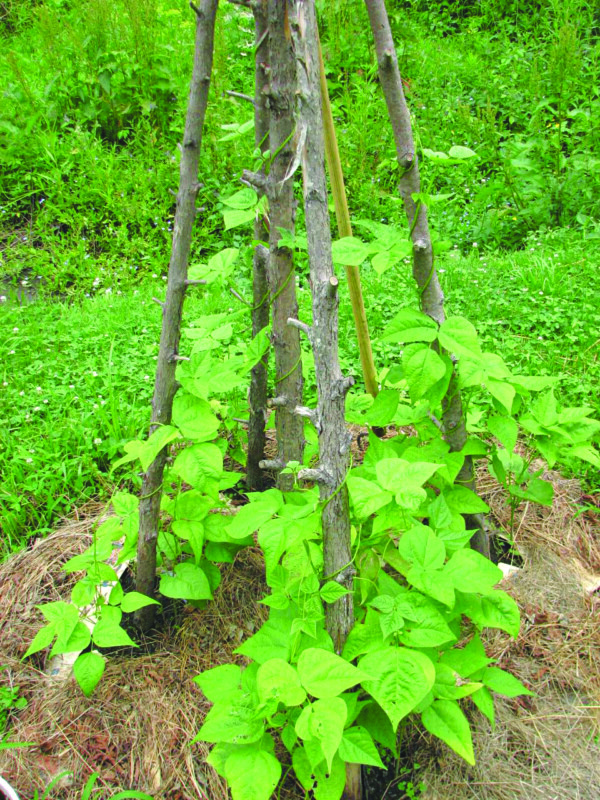
Beans come as bush beans or pole beans. Bush beans all ripen over a three-week period and are then done. Pole beans, if you keep on picking them, will keep producing until frost. Kentucky Wonder is the classic pole bean, though Kwintus is my favorite. It’s good eating, even when large.
A word of caution about fertilizers: More is not better. Chemical fertilizers can burn fine roots. And too much organic fertilizer can push growth too fast. Compost is always a good addition to your planting hole.
I never use insecticides in the garden. Their side effects can be awful for you, your kids or pets. Just hand-pick bugs, or spray off little things like aphids with a stream of water.
Featured photo: Beans. Photo by Henry Homeyer.