Choose the variety that works best for your garden
Unlike the games of chance at our local fair, you always win when you buy a hydrangea. They generally bloom their fool heads off every year, even if you have poor soil and a poor track record in the garden. When I was a boy I noticed that every cemetery had hydrangeas, so I called them cemetery bushes (my parents knew few names of plants). Now is the time they are blooming, so it is time to go to your local, family-owned garden center and buy one — or more than one.
If you want a tall plant with instant curb appeal, buy what is called a hydrangea “standard.” A standard is a shrub that has been grafted onto a tall stem, usually about 5 feet tall. Hydrangeas start out low and often wide, but if you get a standard, you get something that looks a bit like a lollipop — or an instant small tree.
I have six different hydrangeas, each differing in bloom time, color, size of blossom and shape of blossom. Two of mine are standards and are about 25 years old. Each is 15 to 20 feet tall and wide.
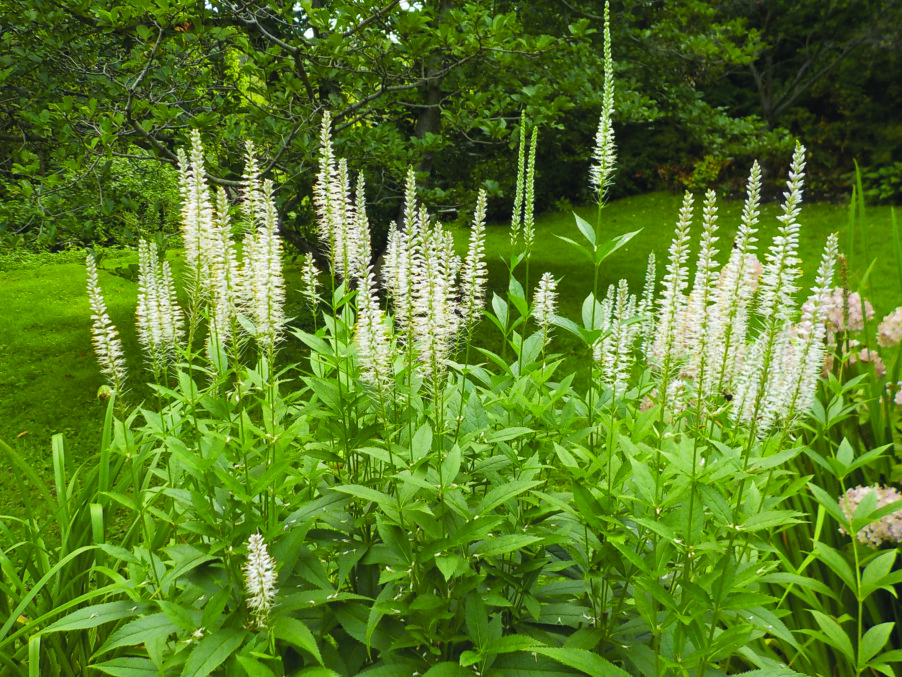
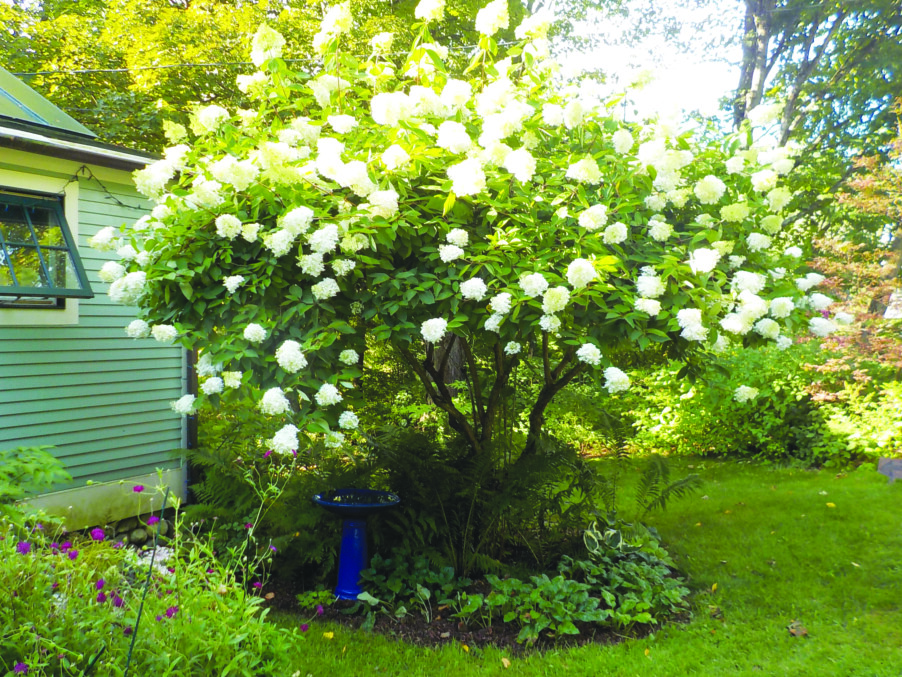
The first standard I planted is what’s called a “PeeGee” hydrangea. PeeGee is shortened from the Latin name, Hydrangea paniculata grandiflora (which means large flower head). This is the classic cemetery plant, one that has been around since it was imported from Japan in 1862.
My PeeGee hydrangea has blossoms of various sizes, from 5 inches across to 8 inches or more across. Most blossoms are roughly globular, but some are a bit elongated, especially toward the top of the plant. The panicles are a mixture of fertile and showy infertile florets. The blossoms start out a green-tinged white, transforming to white, then pinkish and finally brown after frost. If you pick the blossoms before frost and put them in a dry vase, they will stay looking pinkish all winter and beyond.
I love my “Pink Diamond” hydrangea; it is also a H. paniculata grandiflora, and lives up to its name even better than a PeeGee. Its uppermost flower panicles can reach 12 inches long and 8 inches wide. The woody stems are thicker and stronger than on most hydrangeas, so they do not flop the way some others do when wet from rain. The pink panicles are a delight to behold.
There is one native hydrangea, called smooth hydrangea (Hydrangea arborescens). It stays small, only 3 to 6 feet tall and wide. It does well in partial shade but is intolerant of dry soils. It will tolerate full sun only if the soil stays moist. ‘Annabelle’ is commonly sold in the nursery trade but I can’t imagine why. Yes, it does have huge panicles, but it has flimsy stems so the panicles droop or flop onto the ground.
According to the Mt. Cuba research station, the best hydrangea for pollinators is the smooth hydrangea called ‘Haas Halo,’ a native one. I planted several for a client one fall and they were immediately consumed by deer. But they came back the following spring and I surrounded them with wire fencing to keep the deer away. In Year 3 they are blooming nicely. The center of each flat flower head is full of small, fertile flowers surrounded by larger white flat, infertile florets.
Another favorite of mine is called ‘Quick Fire.’ Now in Year 5 for me, it is a shrub about 4 feet tall and wide; it is loaded with 4- to 5-inch flower heads. It opens greenish white, then turns white, then pink. The pink color comes on earlier than most others, hence the name. What I like about it is that it keeps a nice mix of white and pink panicles. I am now pruning it yearly to keep it at its current size. It blooms on new wood, so I won’t lose any blossoms if I prune it now or even in the early spring.
Many New England gardeners would like to be able to grow blue hydrangeas, so they buy them and find they really only perform well for one year. A variety called ‘Endless Summer’ came out in the ’90s with much fanfare, claiming it would do as well here as it does in the mid-Atlantic region. But it didn’t do well. Most buds are set the year before, and winter tends to kill them.
Readers often write me asking how to get the numerous blue panicles in years 2, 3 and beyond. I tell them to treat them as expensive annuals. Dig them up and throw them on the compost if they don’t succeed. Instead of Endless Summer, I call them Endless Disappointment. There are now other blue hydrangeas sold, and some may be OK for our climate.
My favorite hydrangea is the climbing hydrangea, H. anomola subspecies petiolaris. Climbing hydrangea is usually sold as a small vine in a one-gallon pot. It takes a long time to get to blooming size — often five or six years. Then it takes off and grows rapidly. The great thing about this vine is that it will bloom in full shade — I have it on the north side of my barn. It will attach to stone or brick surfaces but not wood, though it can climb trees. As it started growing it up my barn I attached it to the barn with a special plastic chain designed for staking young trees. Then later it grew through cracks in the boards and now needs no support — and usually blooms inside my barn! Like all hydrangeas, its flowers stay on and look interesting most of the winter.
So if you like the look of hydrangeas, go get one. I think most are wonderful.
You may email Henry at henry.homeyer@comcast.net. He is a garden consultant and the author of four gardening books. He lives in Cornish, N.H.
Featured photo: My PeeGee Hydrangea always puts on a good show. Photo by Henry Homeyer.