Another weekend, another social gathering, right? If it is an at-home occasion, you may need to bring an appetizer to share. Since we are all busy hustling and bustling, why not bring a homemade snack that is simple yet addictively delicious?
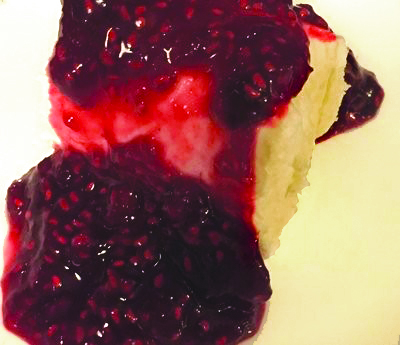
This recipe is a play on the ’80s classic of cream cheese topped with jam. However, it is a recipe with much more depth but not much more effort. First, we are starting with goat cheese. While cream cheese is nice and creamy, its flavor is one note. Goat cheese offers a nice bit of tanginess for the base. Then we get to control the flavor of the spread topping the goat cheese. Raspberries are the star, but there are other elements. Sugar is added to brighten the fruit. Feel free to add half the amount and check for sweetness levels. Finally, there is minced jalapeño. Nothing like a little heat to make a snack more memorable. Of course, you also can adjust the amount of heat. Like minimal heat? Use only half the jalapeño. Like a lot of heat? Include the ribs and seeds.
Now, the only decision you have to make is the type of crackers to serve with this spread. I personally like a whole-wheat cracker for the crunch and flavor, but the options are limitless.
Make the raspberry jalapeño spread early in the day and let it chill all day long. When it’s party time, simply pour it over your goat cheese, grab your crackers, and you’re ready to go!
Raspberry jalapeño spread
Serves 4-6
2 cups fresh or frozen raspberries
1/3 cup granulated sugar
1 jalapeño, seeds and ribs removed
8 ounces goat cheese
Crackers
Combine raspberries and sugar in a small saucepan over medium heat.
Stir occasionally, using some force to smash the raspberries.
Dice jalapeño finely.
When sugar is dissolved, add jalapeno.
After spread begins to boil, reduce heat to low and simmer for 5 minutes, stirring frequently, until the spread thickens.
Remove from heat; refrigerate until chilled, about 2 hours.
Place goat cheese on a small serving plate; top with raspberry spread.
Serve with crackers.
Featured Photo: Raspberry jalapeño spread. Photo by Michele Pesula Kuegler.