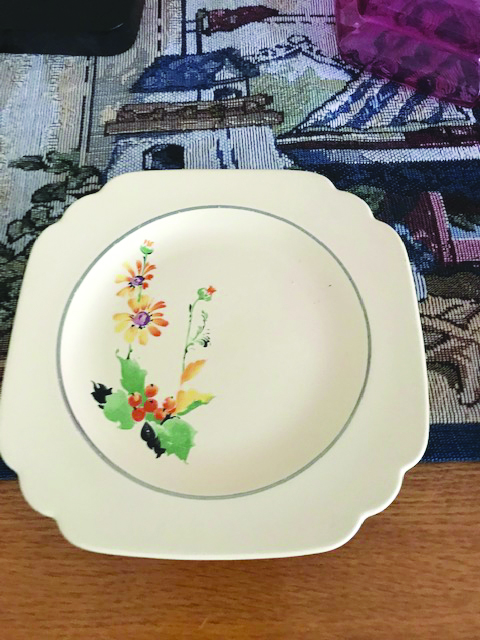
I have service for six of dinner, soup, bread/butter, salad bowl, dessert, cup/saucer and rectangular 11-inch platter that are looking for a new home. Can you provide a value of these dishes?
Marget
Dear Marget,
The Homer Laughlin Co. has quite the history. Since the late 1800s it’s been one of the most common names for china. There are many many styles and patterns. Diner china to fiesta ware, they have it!
I did find some pricing and it seems that the common dinnerware runs in the range of $5 to $10 or more per piece. The serving pieces and hard-to-find patterns and styles can be much higher. As always, all pieces have to be in great condition with no damage or scratches. Marget, the prices I found were all over the place and I think would vary a lot locally, depending on finding a buyer who will then also re-sell. My suggestion would be a local antique shop. But be aware, as I said, they have to then sell them. I hope this was helpful and your dishes find a new home.
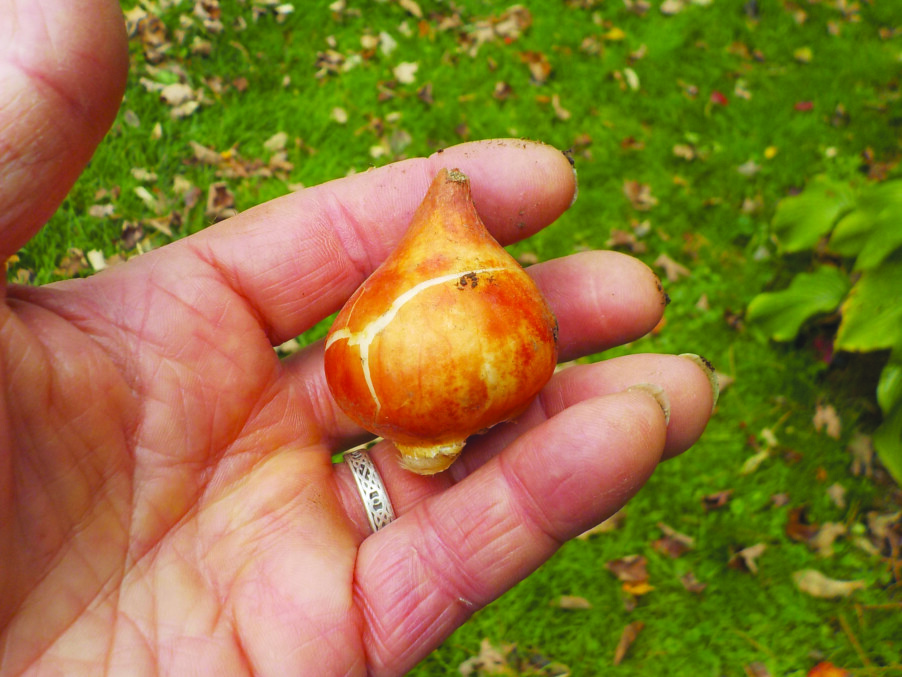
Try tulips, snowdrops and somewhat squirrel-proof daffodils
I’ve been planting bulbs around my property for at least 40 years, and some of them are still flowering each spring. I even have daffodils I brought up from my childhood home in Connecticut that might be 70 years old or more. Others run out of energy and disappear with time. If you haven’t done so yet, now is the time to get some and plant them.
First, let’s look at the basics: What makes a bulb plant survive and flourish? Decent soil. It must be well-drained. Soggy soil rots bulbs. If you have a heavy clay soil, it will stay wet and is not a good place for bulbs unless you add plenty of compost to the planting hole to help it drain better. Planting on a hillside helps, too, as water will drain off a hillside.
That said, there are a few bulbs that do fine in moist soil. Camassia is a lesser-known bulb plant that blooms in late spring with blue, purple or white star-shaped blossoms arranged on a central stem. Some are 2 to 3 feet tall or more. In the Northwest some grow in moist meadows or along the edges of woodlands. I’ve grown them and found a planting lasts about five years. There is one daffodil that does well in moist soil: thalia. It is very late, white and a bit frilly.
Bulb flowers take shade better than sun-loving perennials. Growing up we had hundreds of daffodils that bloomed along a woodland path behind the house. The leaves got sunshine and re-charged the bulbs before the trees were fully leafed out. Of course if you have plenty of sunshine, all the better.
Some people have had great luck planting daffodils in a grassy field or lawn. I’ve done that, but find that the bulb foliage is still green and producing food for the bulb when the lawn needs to be cut. If you cut the foliage too early, your bulbs won’t perform as well. I like to plant daffodils in flower beds between big clumps of hostas. They can bloom early, and then their dying foliage is hidden by the hosta leaves.
Some gardeners dig a little hole for each bulb, but that seems like too much work for me, even if you have one of those tools that are made for digging small round holes. I’d rather use my shovel to dig one oversized hole big enough for the 25 bulbs or more. For large bulbs like daffodils or tulips a hole 24 to 36 inches long and 18 to 24 inches wide is fine for 25 bulbs.
For the big bulbs I dig a hole 6 to 8 inches deep. Then I add compost and some organic fertilizer or “bulb booster” fertilizer and stir it into the bottom of the hole. I place the bulbs on the improved soil, pointy end up, and cover with more improved soil.
What about those hungry, bulb-stealing squirrels? They don’t eat daffodils as they are vaguely poisonous. They may dig a few up to see what you planted, but they won’t eat them. “Yech,” they say, if they inadvertently take a bite.
When I interviewed the White House gardener in 1999 he said they planted thousands of tulips each year, despite the rampant gray squirrels. He said they planted the tulips and covered them with soil, then put down a layer of chicken wire, then more soil. Oh, and he said they fed the squirrels all winter with cracked corn. Squirrels that are not hungry are less likely to try to steal your bulbs.
Some people have great luck with tulips coming back, but I consider them annuals. In general I find that the second year only half the tulips come back to bloom, the third year only half of those come back and so on. But I often plant 100 tulips, all one color for a blast of color in spring. I particularly like the tall ones that bloom a bit later.
‘Maureen’ is one of my favorite tulips. She is a 28-inch-tall tulip, a creamy white that blooms in May. ‘Menton’ blooms at the same time and is rose-pink with apricot-pink petal edges and is 26 inches tall. Wow. They make a nice mix.
If you consider your tulips annuals, you can plant them in your vegetable garden and pull them after blooming. Then you can plant tomatoes or something else there. I plant them close together, and they do fine. And if you have a deer problem, you can easily fence a small plot for 100 tulips with four poles and some bird netting.
The little bulbs are great early harbingers of spring, particularly snowdrops. Snowdrops are small white globes on 4-inch stems. Mine fight through frozen soil in early March. Some years (when we have deep snow) I shovel snow off the hillside where they appear so they can bloom on schedule. Each year I have more, so now, after decades, I have many hundreds.
Other early bloomers include winter aconite (Eranthis hyemalis), a small upward-looking six-petaled brilliant yellow flower. Another favorite of mine is glory-of-the-snow (Chionodoxa luciliae). This is a nice blue with a yellow eye. It blooms shortly after the snowdrops in April.
Henry lives in Cornish Flat, NH. He is the author of four gardening books and is a UNH Master Gardener. His email is henry.homeyer@comcast.net.
Featured photo: Plant all bulbs pointy end up. Photo by Henry Homeyer.
Nonprofit group holds celebration with Jodi Picoult
For the past 50 years, New Hampshire Humanities has worked to keep the humanities alive in the Granite State. The Annual Celebration of the Humanities, which this year also serves as a way to kick off the nonprofit’s 50th year, will be held on Wednesday, Nov. 8, at The Palace Theatre in Manchester with bestselling author Jodi Picoult as the keynote speaker.
“The annual celebration is our chance once a year to really bring people together from all around the state to celebrate the work that we do as a humanities council [and] to celebrate the fact that there’s wonderful things happening in the humanities all over New Hampshire,” said Michael Goldman, the executive director of the organization. “We have a tradition of bringing really interesting speakers to New Hampshire, or often when we can, we try to celebrate people who are connected to New Hampshire.”
The New Hampshire Humanities is an independent nonprofit that has worked to keep beneficial cultural work and programs happening throughout the state. Through its affiliation with the National Endowment for the Humanities and funding from public partners, it can help fund organizations such as libraries, museums, historical societies and other cultural centers.
“We really try to bring in someone who’s a really inspiring person connected to the larger field of humanities work, whether it’s an author … or somebody who’s really helping bring out the story of New Hampshire, the United States or the world in general,” Goldman said. “Jodi Picoult is a great example. … She’s really unflinching at taking things that are big topics for the world around us [and] really digging into what those issues are and bringing those stories to life.”
Such topics include ethics surrounding medical work and LGBTQ rights; her most recent novel, Mad Honey, addresses issues surrounding people who are transgender in the United States. Several of her books have been banned, which Goldman says she has responded to from the perspective of both a parent and an author. More recently, she has come together with other authors to sign a suit against artificial intelligence using the copyrighted works of writers.
During the event she will talk about writing and the research process, her collaboration with other writers and what brings her joy. The program will be preceded by a reception with appetizers and refreshments.
“This is an event that is really about bringing in a broad audience, both of people who know New Hampshire Humanities and care about the humanities [while] at the same time [hoping] to introduce the work that we do to a broader audience, so it’s a combination of things,” Goldman said. “It’s a celebration of all the wonderful ideas and discussion and dialogue that the humanities includes, and we’re celebrating that for the evening with some amazing authors and hoping to help people think about big ideas.”
2023 Annual Celebration of the Humanities When: Wednesday, Nov. 8, at 5 p.m. Where: The Palace Theatre, 80 Hanover St., Manchester Cost: Tickets range from $35 to $50; visit palacetheatre.org to purchase.
Featured image: Jodi Picoult. Photo by Rainer Hosch.
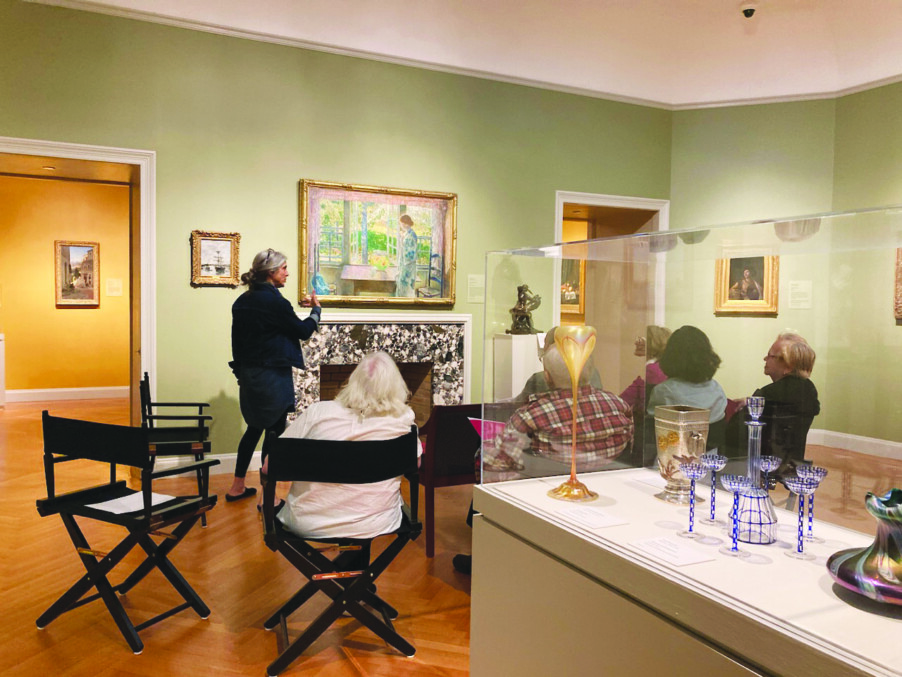
Currier program helps those experiencing memory loss and their care partners
On the first Wednesday of every month, Currier Museum of Art in Manchester holds Memory Café, a program for individuals experiencing memory loss along with their care partners.
“The Memory Café is something that the Currier has done for quite some time, but we stopped doing it during the pandemic,” said Corey Lyford, who administers and designs the program. “We were only able to relaunch the program this past June. It’s designed to be a really joyful art looking experience for people in early stages of memory loss along with their care partners. A care partner could be a spouse, an adult child [or] a friend. … Any and all are welcome.”
Each session starts in one of the studio spaces at the museum, where attendees gather for light refreshments and socialization to get to know each other before heading to the gallery.
Before Covid, the entirety of the session would take place in the studio, where the art would be presented on slides. While this approach made it possible to look at multiple pieces, including ones that were not in the Currier collection, the team felt it was important to offer the true gallery experience.
While looking at the art, program facilitator Lucie Chmura likes to encourage people to use the method of “slow looking.”
“People get to really take time and relax into looking at a piece of artwork, much longer in front of it than one normally would when moving through the gallery spaces,” Lyford said. “Folks get to think about engaging their different senses, such as looking at a painting and thinking about what [they] hear when looking at this painting. Are there any sounds that come to mind? Everything is very open-ended. There are no wrong answers. People don’t have to draw on memory. This is really about what we’re all experiencing together in the moment.”
When deciding what art to select for the program, Lyford said she and Chmura think about the conversations the pieces may inspire, going for ones that are likely common to everyone in the group, to create an enjoyable, positive experience for both those experiencing memory loss and those who are not. Prompts are used to help viewers engage with the piece and to enliven conversation.
“We’re trying to blur that line between a care partner and someone with memory loss,” Lyford said. “We’re trying to help people not feel stigmatized and not feel like they’re standing out [or] like the attention of the program is on the fact that they have memory loss.”
She says the purpose of Memory Café is to create a support system and build connections while enjoying a creative experience.
“We hope for people to find respite and to find the museum as a resource for them and to keep engaging with these creative opportunities even if they are in a place in their life where they may have felt like that wasn’t possible anymore,” Lyford said. “We want people to feel safe and that applies to the person with memory loss and also for their care partners. They can be going through some pretty difficult times, so we’re hoping that this provides a creative space for them and one that they’ll want to come back to and see familiar faces from month to month.”
Memory Café When: The first Wednesday of every month. The next session is Wednesday, Nov. 2, from 1 to 2 p.m. Where: Currier Museum of Art, 150 Ash St., Manchester
Featured photo: Memory Cafe. Photo Courtesy of the Currier Museum of Art.
The latest from NH’s theater, arts and literary communities
Bard-adjacent: Actorsingers presents the musical farce Something Rotten at the Keefe Center for the Arts (117 Elm St. in Nashua) on Friday, Oct. 27, and Saturday, Oct. 28, at 8 p.m. and Sunday, Oct. 29, at 2 p.m. Tickets cost $20 for adults, $18 for seniors and students. The production is set in the 1590s when brothers Nick and Nigel Bottom are trying to write a hit play that will get them out from the shadow of “The Bard” and are told by a soothsayer that the future of theater is singing and dancing and acting, according to actorsingers.org.
Spooky soiree: The Windham Concert Band and the Amherst Town Band will play a Halloween-themed selection of music including Wagner’s “Ride of the Valkyries,” Edvard Grieg’s “March of the Trolls” and more on Sunday, Oct. 29, from 3 to 5 p.m. at Souhegan High School (412 Boston Post Road in Amherst), according to a press release. Costume-wearing is encouraged; the event is free.
Quoth the raven: “Nevermore,” an exhibit that “pays homage to the mesmerizing allure of the darkness,” is on display at the Mosaic Art Collective (66 Hanover St., Suite 201, in Manchester; 512-6209, mosaicartcollective.com) through Tuesday, Oct. 31, according to a press release. The gallery is open Wednesdays through Fridays from 2 to 6 p.m.; Saturdays and Sundays from 1 to 4 p.m., and by appointment.
NH Furniture Masters The New Hampshire Furniture Masters are collaborating with the League of NH Craftsmen for the exhibit “Connecting through Craft” on display through Thursday, Dec. 14, at the League of NH Craftsmen Headquarters Gallery (49 S. Main St. in Concord). The pieces in the exhibition were created during a partnership that paired New Hampshire Furniture Masters with League members, according to a press release. The gallery is open Tuesdays, Wednesdays and Thursdays from noon to 4 p.m., the release said.
On Saturday, Oct. 28, from 5 to 7:30 p.m., the Furniture Masters will hold a Signature Fundraising Gala at the gallery. Attendees can explore the exhibit, talk to the makers and bid on silent auction items as well as enjoy food, drink and live music from Hot Skillet Club (a jazz band trio), the release said. Tickets cost $50 and are available at furnituremasters.org/the-main-event.
Landscapes: The New Hampshire Antique Co-Op (323 Elm St. in Milford; 673-8499; nhantiquecoop.com) is currently featuring the exhibit “Celebrating the American Landscape” featuring pieces from the late 1800s to the present, highlighting The White Mountain School, the Dublin Art Colony and the Hudson River School, according to a press release. The exhibit is on display through Jan. 31. The Co-op is open Tuesday through Sunday, 10 a.m. to 5 p.m.
Veterans’ art: New Hampshire Veterans Home (139 Winter St. in Tilton; nh.gov/veterans, 527-4400) will host an art show in the Town Hall great room on Friday, Nov. 3, from 10 a.m. to noon and 1 to 3 p.m. featuring veterans’ art displays as well as live music, demonstrations and conversations with veteran and visiting artists (from The Galleries at 30 Main in Meredith), according to a press release.
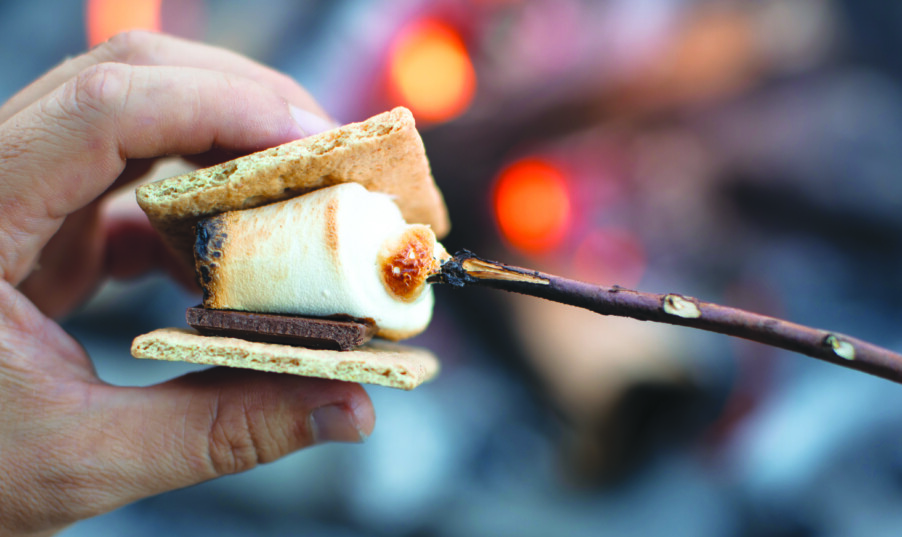
Exciting new adventures in graham cracker, marshmallow and chocolate
S’mores seem like a good bet.
They only have three ingredients. You have access to sticks. And even though the leaves have turned and the nights are cold, s’mores, with their accompanying campfire, give you a good reason to keep the deck furniture out a few more weeks. What could possibly go wrong?
Aw, jeez, I just jinxed it, didn’t I? Now even roasting marshmallows seems like too much to wrap your head around. OK, let’s break this down to its essential components: graham crackers, marshmallows, chocolate and fire. We’ll ease into it.
The Graham Crackers
Graham crackers are a good place to start. They were designed to be non-threatening. They were invented by the followers of Sylvester Graham, a 19th-century preacher and nutritionist, who was convinced that white flour, sugar and meat of any kind led to poor health and impure thoughts. If you think that you wouldn’t have been likely to get along with him, an angry mob of bakers and butchers in 1837 Boston would agree with you. They laid siege to his hotel while he was on a speaking tour, and were only dispersed when Graham and his followers dropped bags of cement on them from the hotel roof.
Commercial graham crackers, the ones we remember from kindergarten, are delicious, inexpensive and easily available, so who would make them from scratch?
You would. As long as you don’t expect perfection.
Lindsey Bangs, the baker of I Whisked It, a homestead bakery in Raymond, says that the secret is rolling the dough to a consistent thickness.
“If you don’t get the dough completely even, the edges will be a little crispy while the center isn’t done yet.”
This isn’t a huge problem for home bakers but would be a logistical headache for a commercial baker, which is why you don’t see house-baked graham crackers in bakeries very often, she says. But making them yourself also allows you to take some liberties in how you flavor them — adding cardamom, or even a little black pepper.
“Adding more cinnamon would really bump the flavor profile up,” Bangs says.
She likes her marshmallows gently toasted and golden brown.
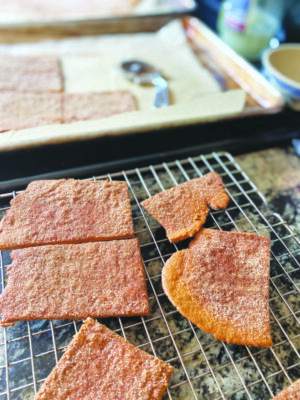
Homemade Graham Crackers
Homemade graham crackers. Photo by John Fladd.
Lindsey isn’t kidding about how fiddly graham crackers can be. They are straightforward enough to make at home, but making them professionally would be like juggling ice cubes. If you follow each step, though, you will be very pleased with the result.
A note on substitutions:
When making comfort foods, it is very tempting to jazz up a recipe. By their nature, comfort foods are basic; they are there to comfort, not to inspire or excite or intrigue the eater. This is why there are so many recipes and articles about mashed potatoes. Everyone wants to mess with them, but when someone is burned out from work or nursing a broken heart or feeling homesick, they do not want blue cheese in their mashed potatoes.
Most of the ingredients in this recipe lend themselves to intriguing substitutions. I would recommend restraint; feel free to change one ingredient. More than that will muddle the flavor of your graham crackers. Even one substitution will probably get you a pointed comment from a graham cracker purist.
1 cup (113 g) Whole wheat flour – You could use stone-ground whole wheat flour for this, but that would be your one substitution.
1 cup (120 g) all-purpose flour – Don’t experiment with this; you don’t want to toughen or soften the texture of your graham crackers by using bread or pastry flour.
¼ cup (50 g) white sugar – or brown sugar, or maple syrup, but that would be your one substitution.
½ teaspoon salt – I like kosher salt, but again, well, you know.
1 teaspoon ground cinnamon – I like smoked cinnamon.
1 teaspoon baking powder – There isn’t really a substitution here, but did you know that you should replace your baking powder every six months? Weird.
1 large egg
¼ cup (50 g) vegetable oil – or hazelnut oil
¼ cup (85 g) honey – or hot honey
2-3 Tablespoons (28-43 g) milk
more milk to make cinnamon sugar cling to the top of your crackers
cinnamon sugar for topping (optional)
In a large bowl, whisk together the dry ingredients – the flours, salt, cinnamon, and baking powder.
In a separate bowl, whisk together the wet ingredients – the sugar, egg, oil, honey, and milk. I don’t know why sugar is considered a wet ingredient, but it is, and it works better when you treat it that way. Chemistry is weird.
Add the wet ingredients to the dry ones, then stir to combine. You might have to knead the dough a little to bring it together.
Wrap the dough, and chill it for at least an hour.
Preheat your oven to 300º (150º C).
Divide the graham cracker dough in half.
Roll each batch of dough to 1/16 inch thick. It is important that the dough is consistently thick. Is there an easy way to do that? And how thick is 1/16 inch, anyway?
Here’s how you’re going to preserve your sanity. Lay down a sheet of parchment paper, and weigh it down with half your dough. Flatten it out a little with the heels of your hands. It turns out that the wire in most clothes hangers is made of 12-gauge steel, 1/16 of an inch thick. Place a clothes hanger on either side of your dough, then cover everything with another layer of parchment paper.
Using the wire as a guide, roll the dough out as thick as the hangers. As you get your dough thinner and thinner, each end of your rolling pin will rest on one of the hangers.
Peel the top layer of parchment paper from each batch, then slide the bottom layer onto a baking sheet, then repeat the whole process with the other half of the dough.
If you are going the cinnamon-sugar route, brush each sheet of dough with milk, and sprinkle it with the cinnamon-sugar.
Bake the sheets of dough for five minutes, rotate them, then bake them for another five minutes.
Remove each sheet from the oven and cut to shape with a bench scraper or a pizza cutter.
Return the dough to the oven, and bake for another 20 minutes or so.
This is the part that seems really fiddly, but it’s important if you want your graham crackers to be crisp and not bendy:
Turn off the heat, and open the oven door all the way. Let it cool for five minutes, then close the door again, and let the crackers cool in the oven for another 20 minutes.
Transfer the graham crackers to a cooling rack. At this point they are exquisitely crispy. They should stay crispy, though not crunchy, for a couple of days, depending on how humid the air is. If you have any of those “Do Not Eat” dehydration packets saved, put those with the crackers in an air-tight container, and maybe store them in your refrigerator, which is the driest place in your kitchen.
So, the natural question: Is making your own graham crackers worth the trouble?
First of all, the number of steps involved is misleading. Tying your shoes or organizing your sock drawer would probably involve 72 separate steps if you broke it down. None of these graham cracker steps is very complicated. I know that there are days when you feel like opening an oven door is at the outer limit of your ability, but you can totally do this.
Secondly, these are delicious. Most of us have never had a thoroughly crisp graham cracker, warm from the oven. It is warm, but crunchy, gently sweet, but with tiny bursts of salt, and — depending on how well you were able to restrain yourself — with a little something extra.
This recipe is based on one from King Arthur Flour, my first stop when looking for any baking recipe. Their recipes are pretty much bullet-proof, but here’s something that even they won’t tell you: Flip a warm-from-the-oven graham cracker upside-down, and smear the bottom with butter. It is the most decadent legal experience you are ever likely to have.
The Marshmallows
When it comes to marshmallows, Sherrie Paltrineri knows what she’s talking about. She runs Sweet & Sassy, a small candy company specializing in pre-made s’mores. It’s fair to say that she’s not a s’more purist.
“Right now we’re making s’mores with up to 12 flavor profiles per week,” she says. “As we get into the fall season, we have pumpkin spice, of course, but we play around with Dark Chocolate with Raspberries, Orange Cranberry, and even Mochaccino.” According to Paltrineri, the surprise sleeper hit of this past summer was made with root beer flavored marshmallows.
She likes her marshmallows completely torched. “I love them burned; I want them to go up in flames,” she says.
Cooking with Marshmallows
There are a lot of people who will assure you that making your own marshmallows from scratch is relatively easy and very rewarding. I am not saying that those people are wrong, but my most recent attempt at home marshmallowing went badly. The term “fiasco” is too kind to describe it accurately.
I am not saying not to try it. There are many very nice instructors who can walk you step-by-step through the process — Martha Stewart springs to mind — but they could speak to this much more authoritatively than I can.
But is there a marshmallow-forward recipe that we can tackle that will help guide you toward s’morehood?
As it turns out, there is:
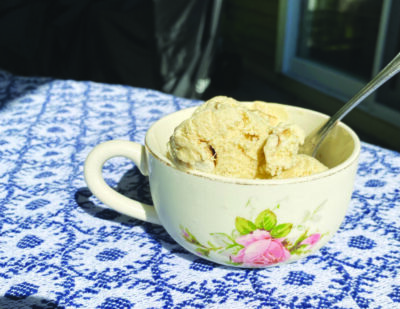
Toasted Marshmallow Ice Cream
1 10-ounce bag of mini marshmallows
4 egg yolks
pinch of kosher salt
½ cup (99 g) white sugar
3 cups (735 ml) half and half
2 teaspoons vanilla
Toast the marshmallows under the broiler in your oven, or with a blowtorch, either one of the tiny kitchen ones or a regular no-pretense plumber’s blowtorch from a home center. (I like the one with a pistol grip; it has a great sound. Hissssssss, click, WHUMP!) The torch will allow you to get a little more variety in how dark you toast the marshmallows, but in any case, if you prefer them toasted a gentle golden brown, cook them a little darker than you might otherwise do. The ice cream base will dilute the flavor slightly, and a darker marshmallow will bring more marshmallow flavor.
Toasted Marshmallow Ice Cream. Photo by John Fladd.
Combine egg yolks, salt, sugar and cream in a small saucepan.
Heat, whisking, until the mixture reaches 175ºF/80ºC.
Strain the hot mixture over 2/3 of the toasted marshmallows. Add the vanilla, and whisk the mixture until it is as smooth as it’s going to get. Do not let this step worry you; clumps of semi-melted marshmallows in this ice cream is not a bad thing.
Chill the mixture for at least three hours or overnight, then churn according to your ice cream maker’s manufacturer’s instructions.
When spooning the soft-serve-textured ice cream into containers, layer with the remaining toasted marshmallows, before hardening it off in the freezer.
Even die-hard marshmallow fans will admit that they can be a little (unrelentingly) sweet. This ice cream carries the toasted marshmallow flavor gently, in a just-sweet-enough base. The flavor is delicate enough that you will probably not want to eat this with any topping that might overpower it.
This is a definite winner.
The Chocolate
Let’s face it: It’s the chocolate that makes or breaks a s’more. The graham cracker provides texture, and the marshmallow provides sweet stickiness, but it is the chocolate that sets the tone for the whole enterprise.
Should you go with a classic milk chocolate, or something darker? Should you let it melt completely, or let your marshmallow cool a little so you still have some resistance to your teeth? Should you use a classic American candy bar or something a little shmancy?
According to Jeffrey Bart, the owner of the Granite State Candy Shoppe in Concord and Manchester, most people don’t put enough thought into this.
“Many times, someone will just break up a chocolate bar and hope for the best,” he says. His suggestion is to either use two types of chocolate or to finely chop some, but not all, of the chocolate, and use both in a s’more. The little pieces, having more surface area, will melt easily. “That hits the perfect ratio of totally melted and fused with the graham cracker,” he says, “and something to still bite into.”
He prefers his marshmallow gently toasted.
“I’m of the Low and Slow camp,” Bart says.
Rob Delaney and Maggie Pritty of Worldwide Chocolate in Brentwood agree that texture is important but stress the importance of picking the right flavor profile.
“Personally I’d go with a dark milk chocolate,” Delaney says, “which is not a thing that a lot of people are even aware exists.” He says that some dark milk chocolate can have as high a cocoa percentage as 55 to 70 percent, as opposed to the usual 35 percent or so for a typical grocery store chocolate bar. “That would have that milky, caramelly character, without being so sweet.”
Pritty stresses the importance of reading the label on a bar of chocolate. “Make sure to look at the ingredients,” she says. “You want to see that it’s made with cocoa butter and sugar, not hydrogenated palm oil or anything like that.”
She likes her marshmallows dark brown but not quite burnt.
So is there something chocolate-forward and s’moresy that will build your confidence back up?
Yes. Yes, there is.
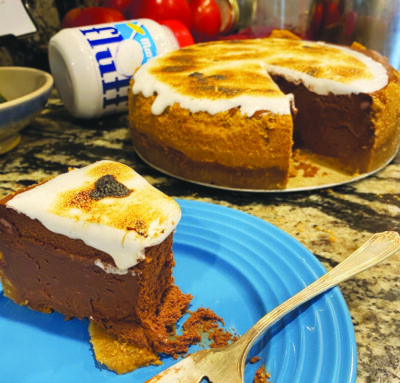
Dark Chocolate Cheesecake with Graham Cracker Crust and Toasted Marshmallow
Crust
403 g graham cracker crumbs – this is almost exactly equal to one box of graham crackers
4 Tablespoons (56 g) butter, melted – this is half a stick
Cheesecake Filling
24 ounces (678 g) cream cheese, room temperature – this is three 8-ounce packages
1 cup (207 g) sugar
6 Tablespoons (43 g) dark cocoa powder
1 cup (230 g) sour cream, room temperature
1 teaspoon vanilla extract
8 ounces (227 g) dark chocolate, melted and slightly cooled
4 eggs, room temperature
Marshmallow Topping
1 7.5-ounce jar of marshmallow cream
Preheat oven to 325°F (163°C). Line a 9-inch (23 cm) springform pan with parchment paper in the bottom and grease the sides.
Dark Chocolate Cheesecake with Graham Cracker Crust and Toasted Marshmallow. Photo by John Fladd.
Combine the graham cracker crumbs and melted butter in a small bowl. Press the mixture into the bottom and up the sides of the springform pan. It will seem like too much crust, until it doesn’t.
Bake the crust for 10 minutes, then set aside to cool
Put your chocolate in a microwave-safe bowl, and heat, 15 seconds at a time, to melt it. Stop when it still has a few lumps. If you stir it at that point, everything will melt without getting too hot.
Cover the outside of the pan with aluminum foil. This is to more-or-less waterproof it, when it goes into a water bath. (Yes, there will be a water bath. Don’t panic. As the Winter Warlock® once put it, put one foot in front of the other.)
Reduce the oven temperature to 300°F (148°C).
In a large bowl, beat the cream cheese, sugar and cocoa until completely combined. If you use an electric mixer, use your lowest speed for this. Because Reasons.
Add the sour cream and vanilla, then mix to incorporate them.
Add the melted chocolate in three parts, stirring to combine each time.
Add the eggs, one at a time, mixing after each addition.
When everything is completely combined, pour the cheesecake batter into your foiled-up springform pan.
This is where the water bath comes in. In old recipes, it will be called a bain marie. Put your foiled-up pan inside a larger pan, maybe a turkey-roasting pan. (If, like me, you don’t have a pan that big, use your largest non-melty mixing bowl.) Gently fill the larger pan or bowl with hot water that reaches about halfway up the side of your springform pan.
Bake for about 70 minutes. Don’t panic and open the door too much. The whole reason for the water bath is to provide gentle steady heat to your cheesecake. It will have your back for one or two viewings, but try to exercise some restraint. Set a timer, and go clean out your refrigerator. You will not believe what there is in there.
After your timer goes off, check on your cheesecake. It shouldn’t be ready yet, but it will have a nice skin on top of it and be a little wiggly in the middle. Turn the oven off, but leave the cheesecake inside with the door closed, to finish cooking gently. Leave it for another hour.
When the oven is much cooler and your cheesecake has an internal temperature of 150º-175º F (65º-80º C), remove it from the oven, and let it cool on your countertop, then refrigerate for three to five hours or overnight.
When your cheesecake is completely cooled and firm, take it out of the refrigerator and de-pan it. You will rightfully feel proud.
But you’re not done yet.
Coat the top of the cheesecake with marshmallow cream. Use your own judgment as to how much you want to use.
Toast the marshmallow layer. Yes, you could do this under your broiler, but I prefer to use a blowtorch, either one of the mini ones designed for kitchen use or a plumber’s torch from the hardware store.
Serve immediately. If you aren’t serving a dozen people — though if you aren’t, why aren’t you? — wait until service before topping each slice with Fluff individually, then torch it in front of your guests, which is probably more dramatic anyway.
Much like a s’more, this is a very rich, deeply chocolatey treat. Even if you are a “more is more”-type person, you might want to start with a small slice of this. Its intense chocolateness is balanced by the sour tang of the cream cheese and sour cream, but it is still very, very rich. If you wanted to freeze this (and why wouldn’t you?) small slices might be even better.
The Fire
The only element left to discuss is the fire.
Yes, you could toast your marshmallow over the last coals in a charcoal grill, or even a gas one. In an emergency, you could toast it over one of the front burners in your kitchen, especially if you have a gas stove.
But half the experience of making s’mores is navigating actual flames — flirting with disaster, if you are a gently-toasted-golden-brown person, or plunging your marshmallow into the heart of the flame if you belong to the go-for-broke, fully-torched school of marshmallow toasting.
The key to a good marshmallow fire, according to 15-year-old Eagle Scout candidate Hailey Hansen, is starting small: “When I make a fire, I like to make a log-cabin fire, with sticks stacked like walls to a house, but you have to start from the bottom first, with tinder, then kindling, and larger and larger sticks, before you get to that stage.”
She says that coals are better for any campfire cooking, as they provide a steady, dependable heat, which lets a marshmallow roaster confidently choose how done they want to roast their marshmallow, but it’s not a binary situation:
“Your fire doesn’t have to be all coals. You can have half with flames, but let the other half burn down to safer” — by this, she clearly means “old person” — “coals,” she says.
Hailey likes her marshmallows golden brown and crispy but thoroughly melted inside.
At this point you must be feeling pretty confident s’mores-wise. If you can handle that cheesecake, you can host a s’mores party with one hand tied behind your back. But maybe you would like one more easy recipe to keep you bucked up until then. Is there an easy recipe that you can make to keep everyone on a short leash until it’s actually S’mores Time?
As a matter of fact, yes, there is.
S’mores Candy
Some marshmallows — the big ones, the mini ones, whatever you have around
Some graham crackers — you know you’re going to have to buy a new box, anyway, so you might as well use up what you have handy at the moment
Some peanut butter — all natural, or the kind that children actually like, it’s up to you.
Some chocolate — any chocolate: white, milk, dark, whatever you have stashed away in that cupboard that the kids can’t reach.
Crush the graham crackers into crumbs. A food processor is good for this.
S’mores Candy. Photo by John Fladd.
Mix the crumbs with peanut butter — however much it takes to make a nice, stiff dough. You will almost certainly start doing this with a spoon, but almost as certainly end up mushing it altogether with your hands. You decide when it is the right consistency; this is one final exercise to get in touch with your s’mores instincts.
Melt the chocolate in your microwave. (See cheesecake recipe, above)
If you are using large marshmallows, cut them into quarters or eighths. If you are using mini-marshmallows, just let them be themselves.
Coat the marshmallows with the peanut butter dough you just made. You will probably need to play with it in your hands a little, before it reaches the consistency you want, and more-or-less covers the marshmallow. This doesn’t have to be perfect (because of the next step).
Drop the marshmallow/graham cracker/peanut butter ball into the melted chocolate, and then roll it around with a fork, until it is completely coated.
Remove the candy from the melted chocolate with your fork, then gently place it on a plate covered with a piece of waxed or parchment paper.
Repeat this until you run out of an ingredient. Don’t worry if you have some left over; any extra will mysteriously disappear.
Refrigerate the candies for at least 20 minutes. They are very good with tea.
Putting It All Together
At this point you might expect step-by-step instructions on how to make s’mores, but that would be silly. You have known how to make a s’more since you were 5 years old. It was probably the first food you learned to cook. It is less complicated to put together than toast.
Step 1: Toast a marshmallow
Step 2: Put a piece of chocolate on half a graham cracker, then sandwich the marshmallow between the two cracker halves.
(I do have a preference for Mexican chocolate — the gritty stone-ground kind — but when I mentioned this to our three chocolate experts, they stared at me in shock, then started to speak to me in very small words, so use whatever kind suits you personally.)
However, I do have one final recipe:
S’mores Martini
Graham Cracker Vodka
1 sleeve (135 g) graham crackers
3 cups 80-proof inexpensive vodka
S’mores Martini. Photo by John Fladd.
Combine graham crackers and vodka in a blender. Blend at whatever speed pleases you for about one minute. Feel free to chuckle evilly as the graham crackers meet their fate.
Pour into a wide-mouthed, air-tight jar.
Store in a warm, dark place for a week, shaking twice daily.
This is really important: On Day 7, DO NOT SHAKE THE JAR.
Gently pour the clear liquid through a fine-meshed strainer, let it settle, then pour it through a coffee filter, into a labeled bottle.
Chocolate Vodka
This is very similar to the previous recipe.
¼ cup/1 ounce/30 g cocoa nibs. Cocoa nibs are the raw ingredient for chocolate-making. You can find them in an upmarket grocery store or online. I like ones from Guittard. They come with this warning: “May contain shell, kernel, plant material or other material from the growing process. Inspect or re-clean before using. This is not a Ready-to-eat food.” In other words, just exactly what we’re looking for in this application.
2 cups middle-shelf vodka
Combine the cocoa nibs and vodka in a large wide-mouthed jar, seal, shake vigorously, then place in the basement or under the sink, with the graham cracker vodka.
Shake twice per day for four days.
Strain, filter, and bottle, as above.
S’mores Martini
1 ounces crème de cacao
2 ounces chocolate vodka
2 ounces graham cracker vodka
a toasted marshmallow, for garnish
In a mixing glass, rinse several ice cubes with crème de cacao, then pour it off.
Pour equal amounts of chocolate and graham cracker vodka over the liqueur-rinsed ice.
Stir gently but thoroughly.
Pour off, into a chilled martini glass.
Garnish with toasted marshmallow, much like you would a conventional martini, with an olive.
The surprising thing about this martini is how well the flavor of graham crackers comes through. Make no mistake; this is a strong, fully adult cocktail. It is not nearly as sweet as you might be tempted to think. This is a s’more to drink in small sips.